


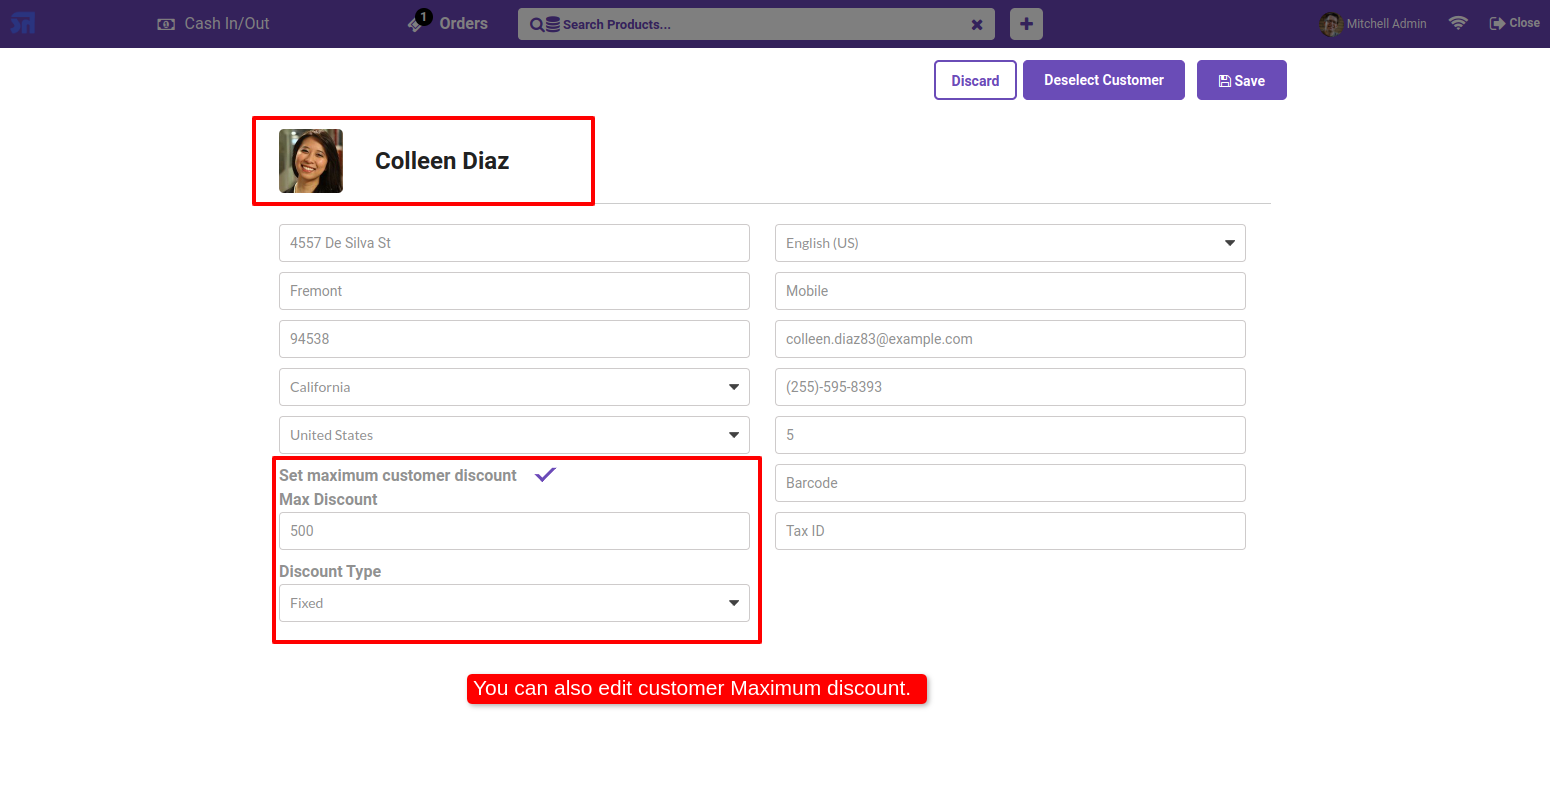
In Customer see the option set maximum Discount.
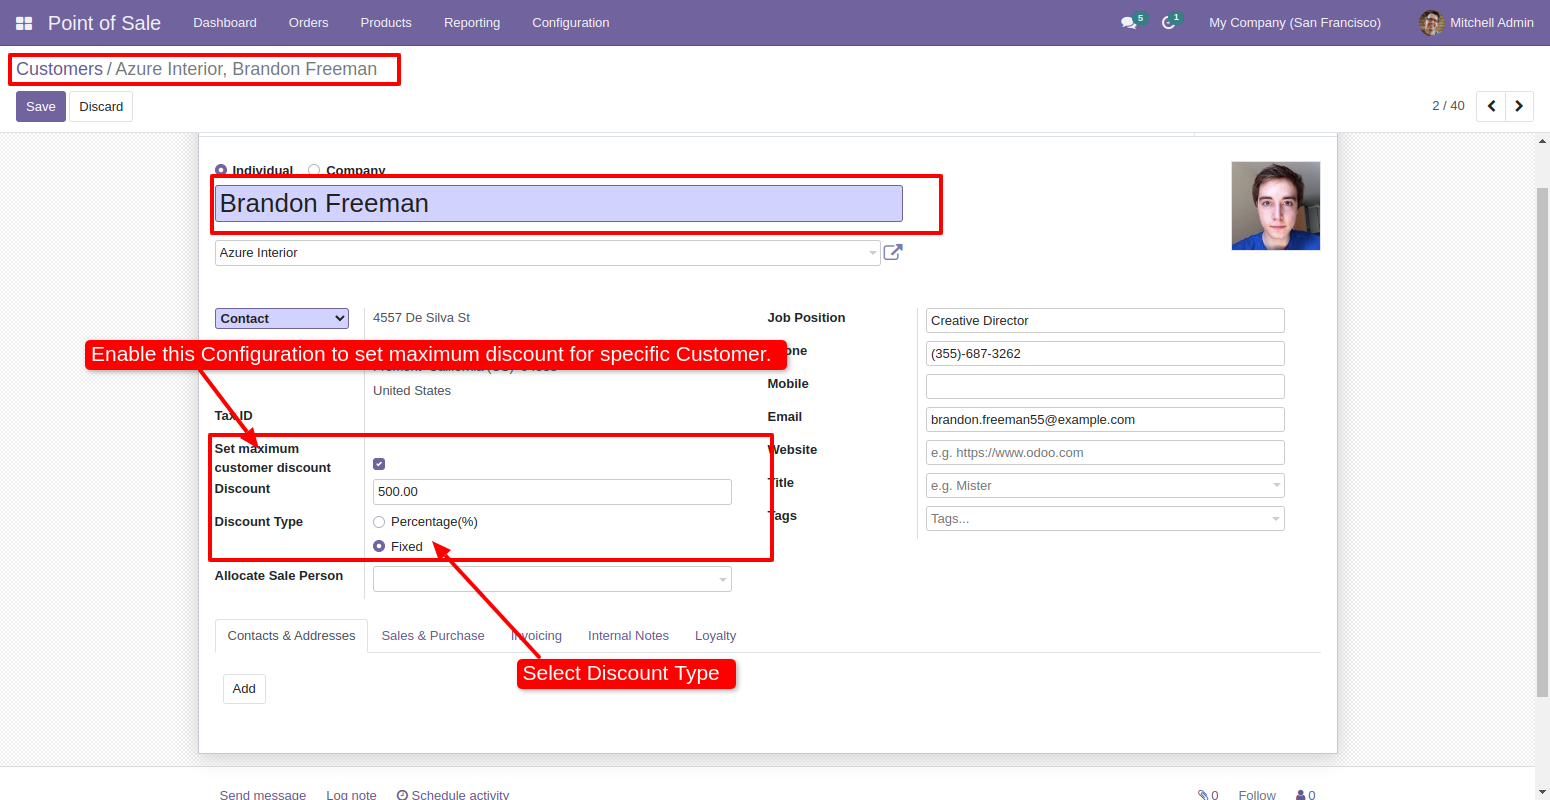
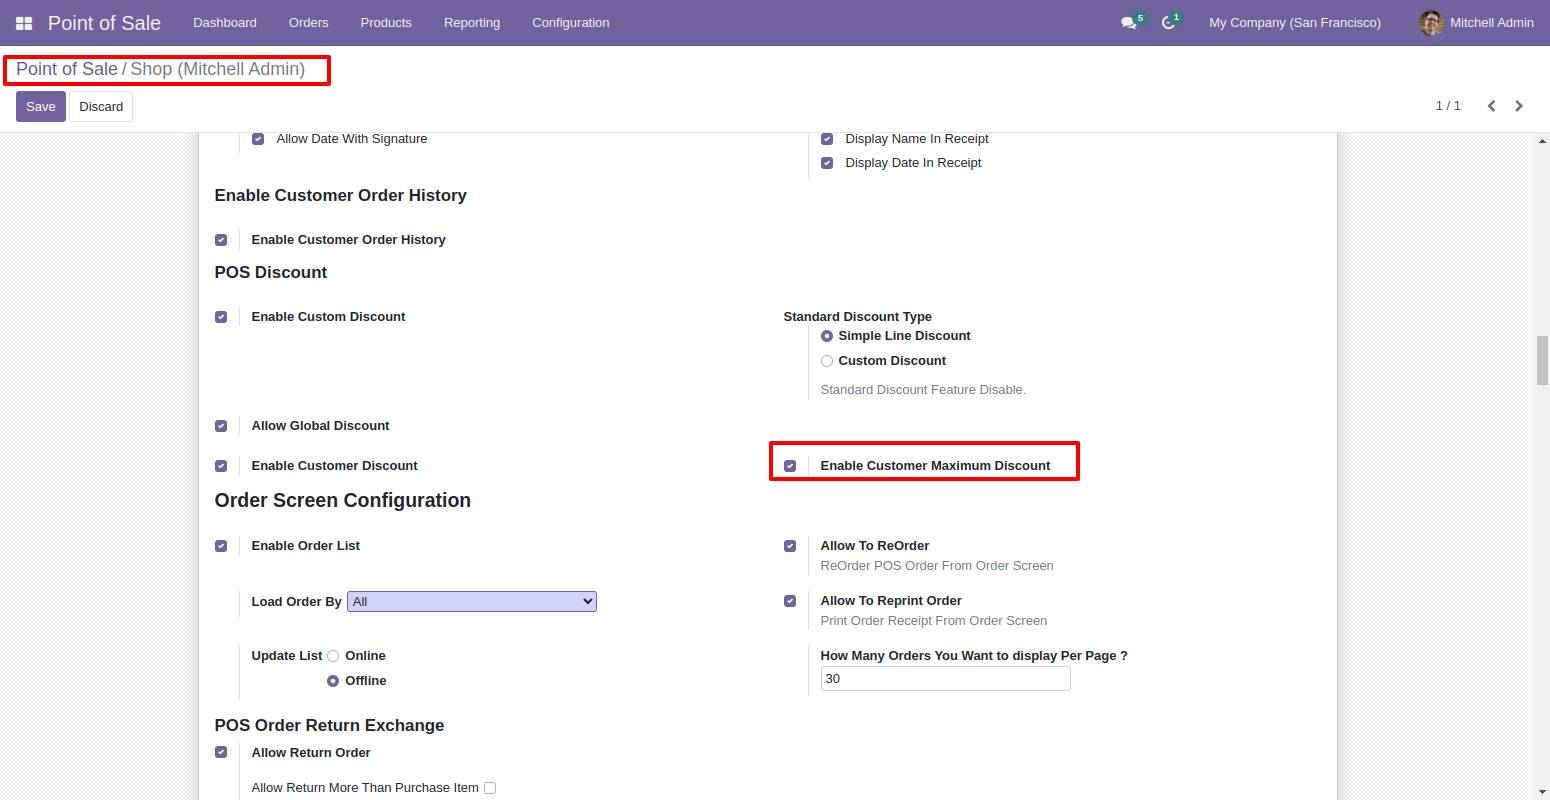
Enable Feature Customer Maximum Discount.
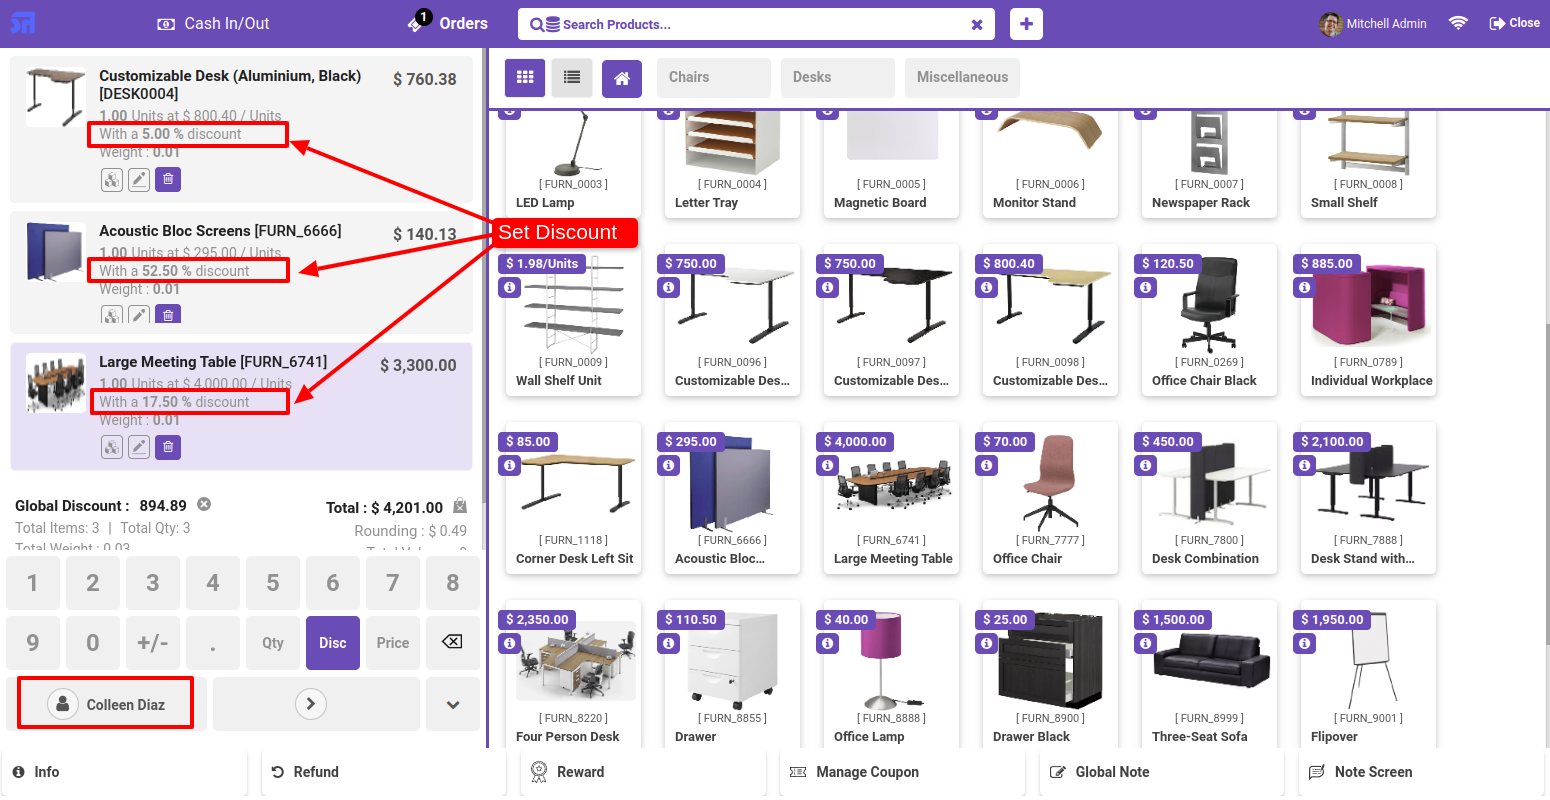
See Discount in shop.
Set Discount In order line.
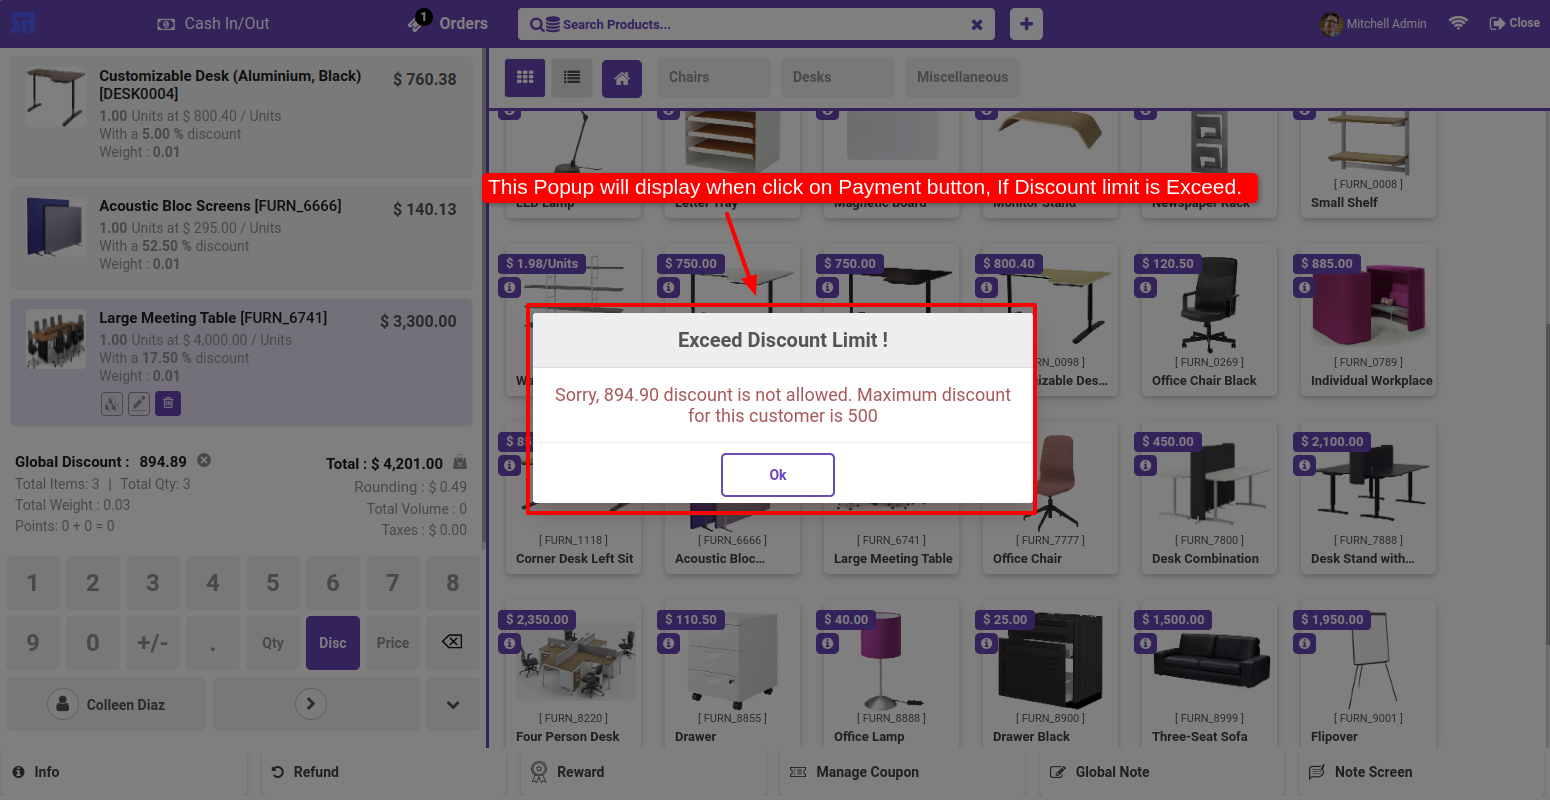
The Warring massage Pop that show max Discount of Product.
Apply Global Discount.
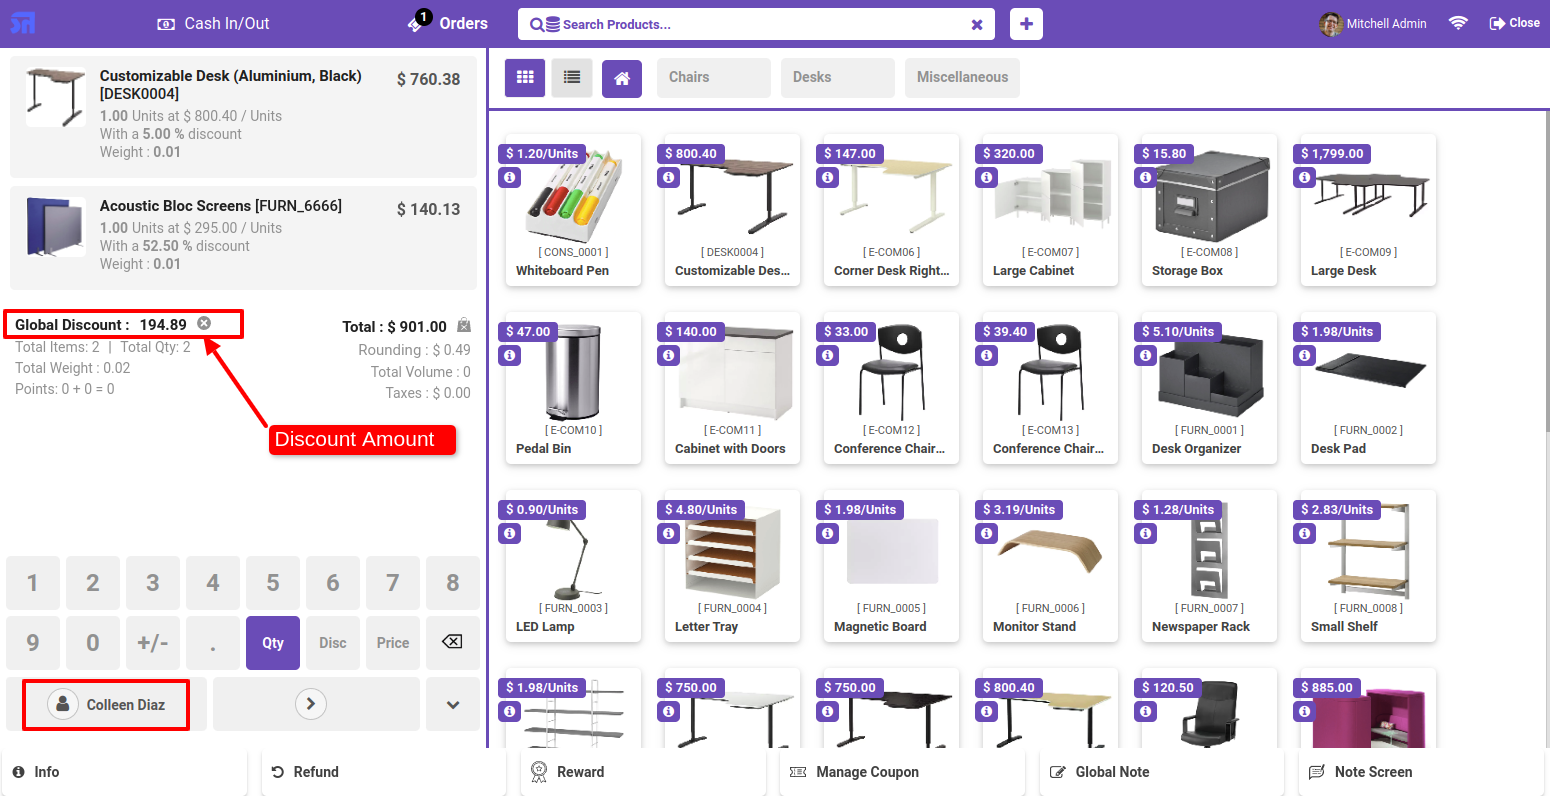
if the the amount is lower then set amount then apply discount.
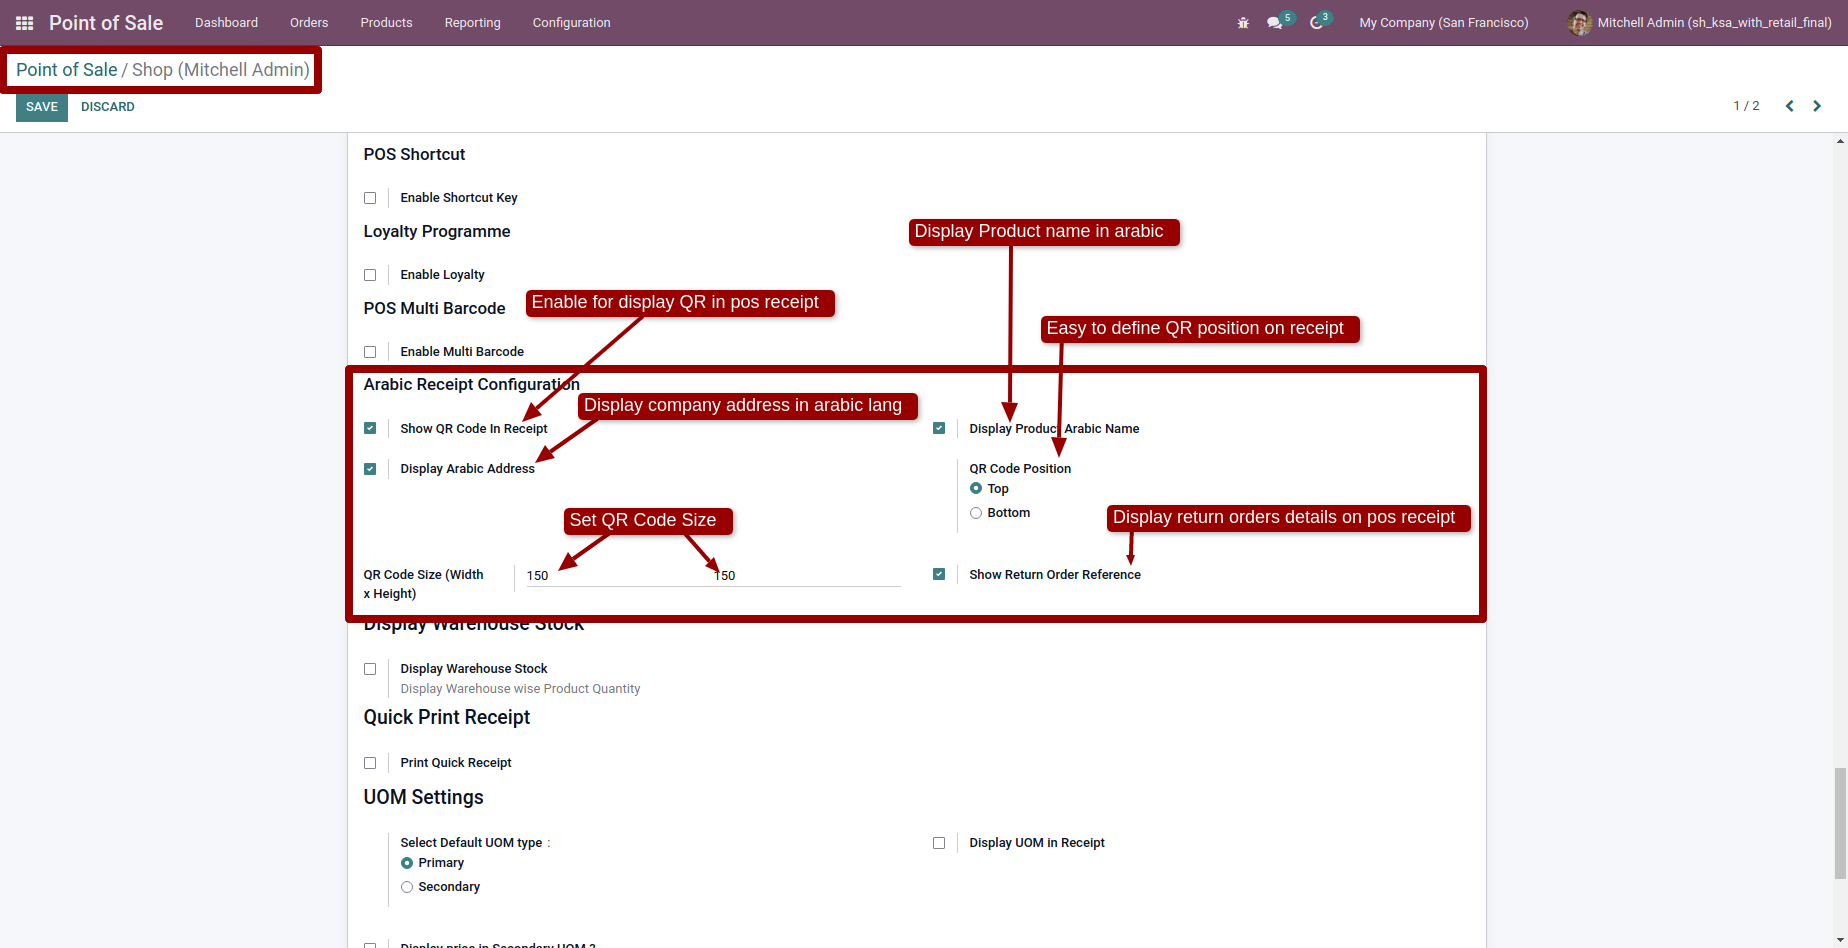
Goto pos setting and enable Arabic Receipt Configuration.
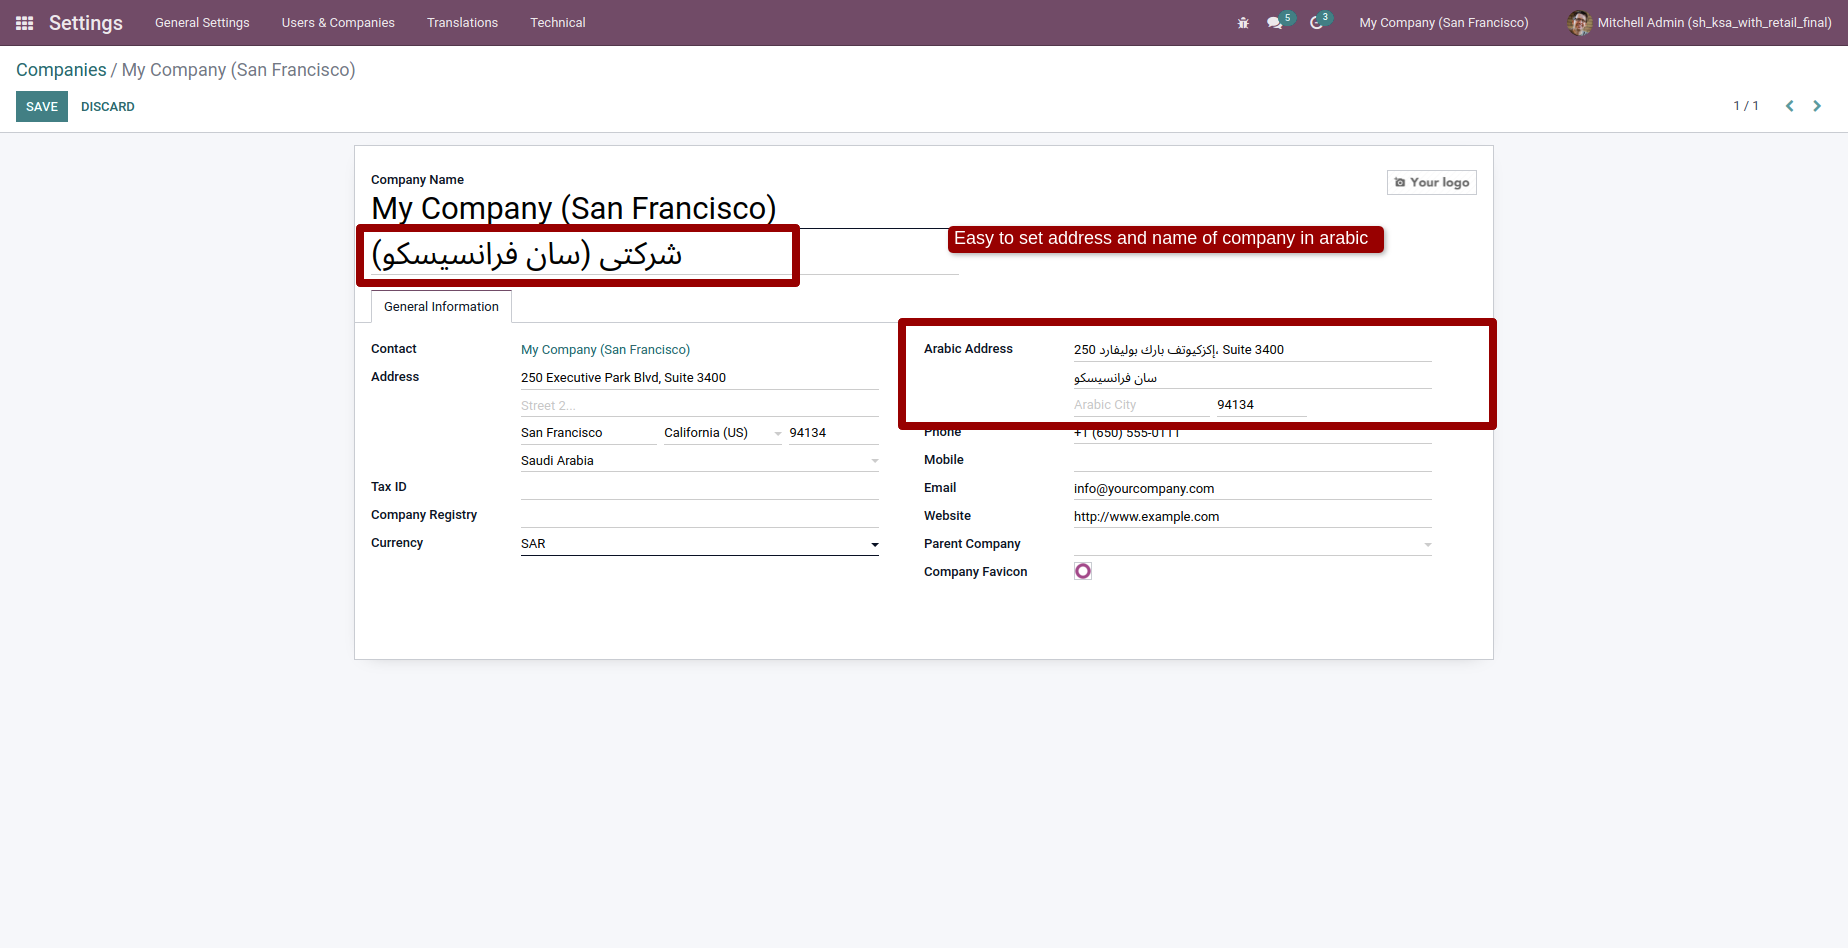
Goto company and set company name and address in arabic language.
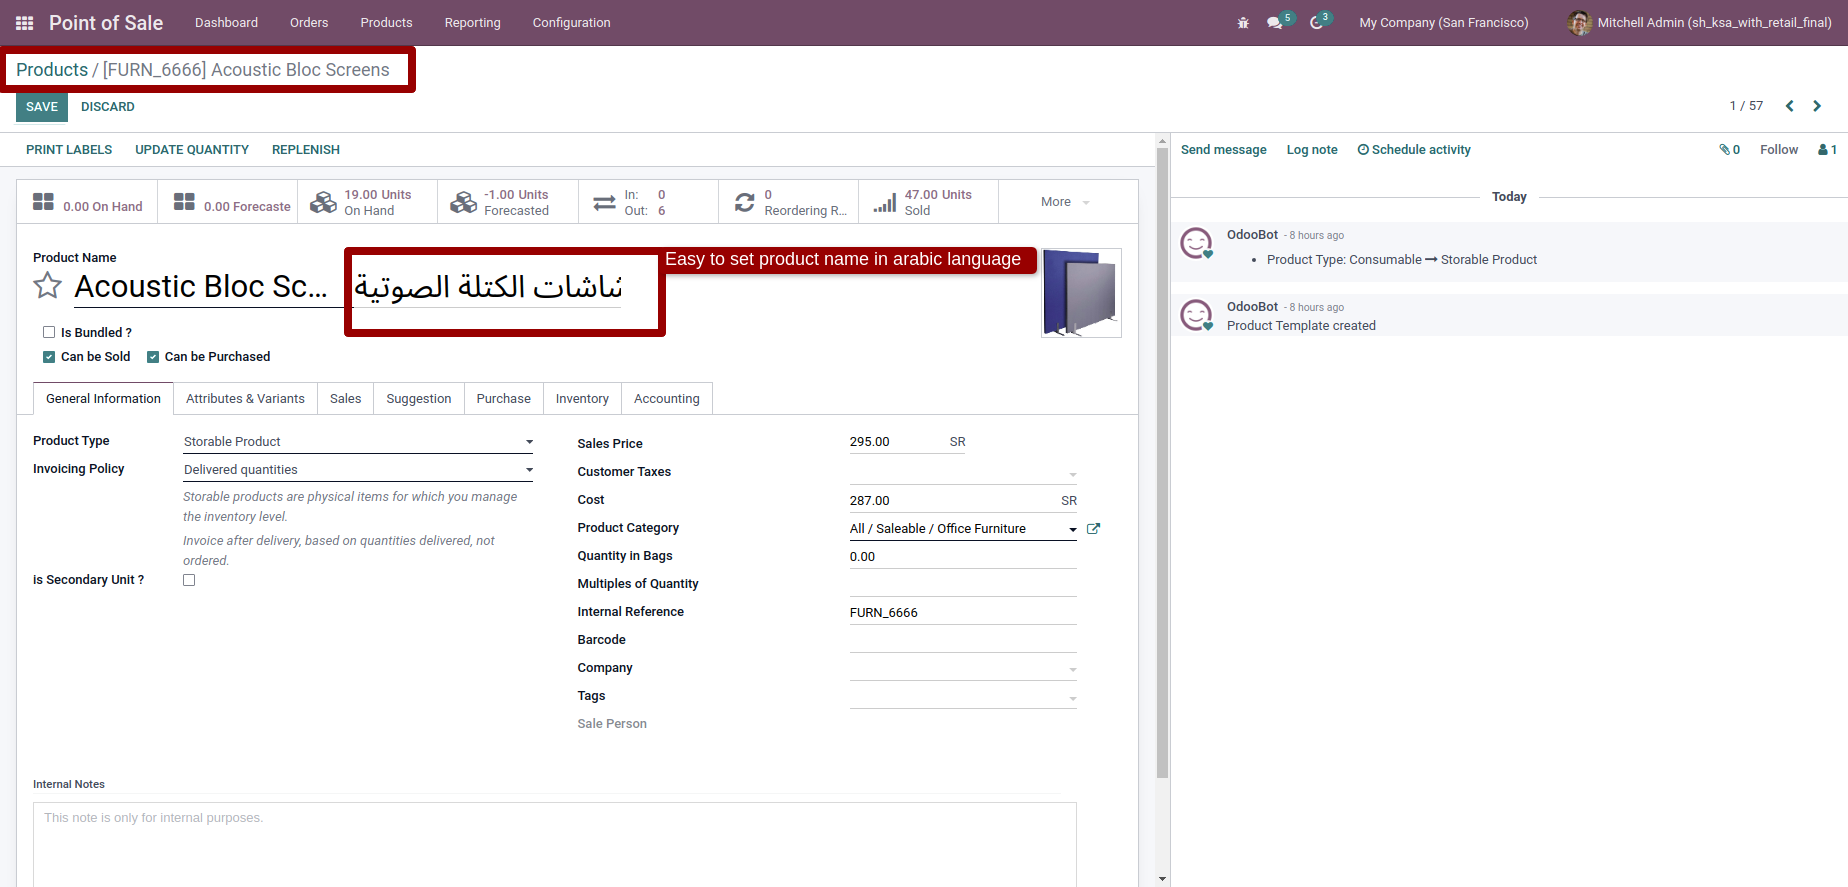
Goto product and set product name in arabic language.
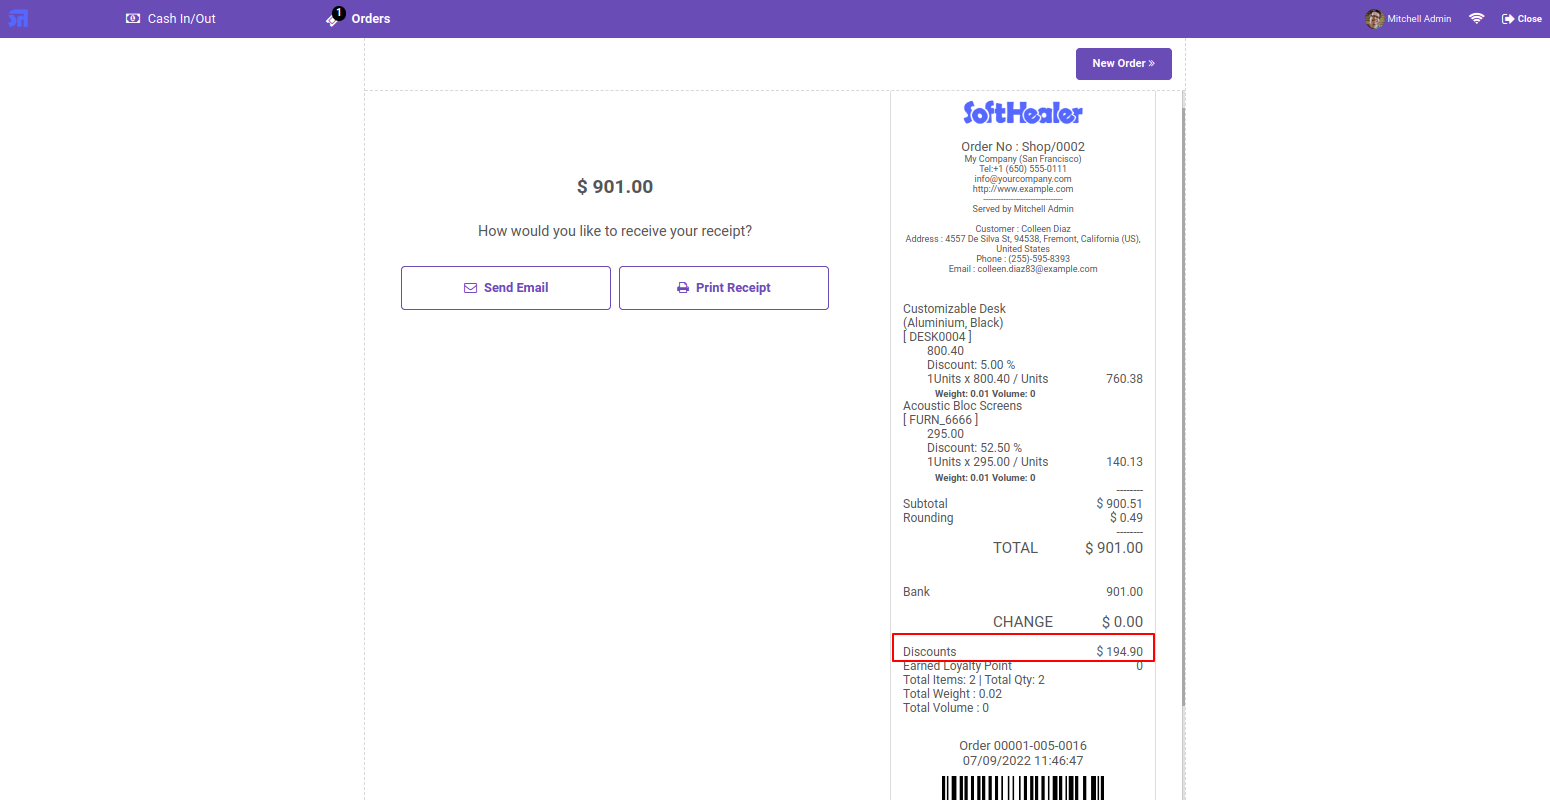
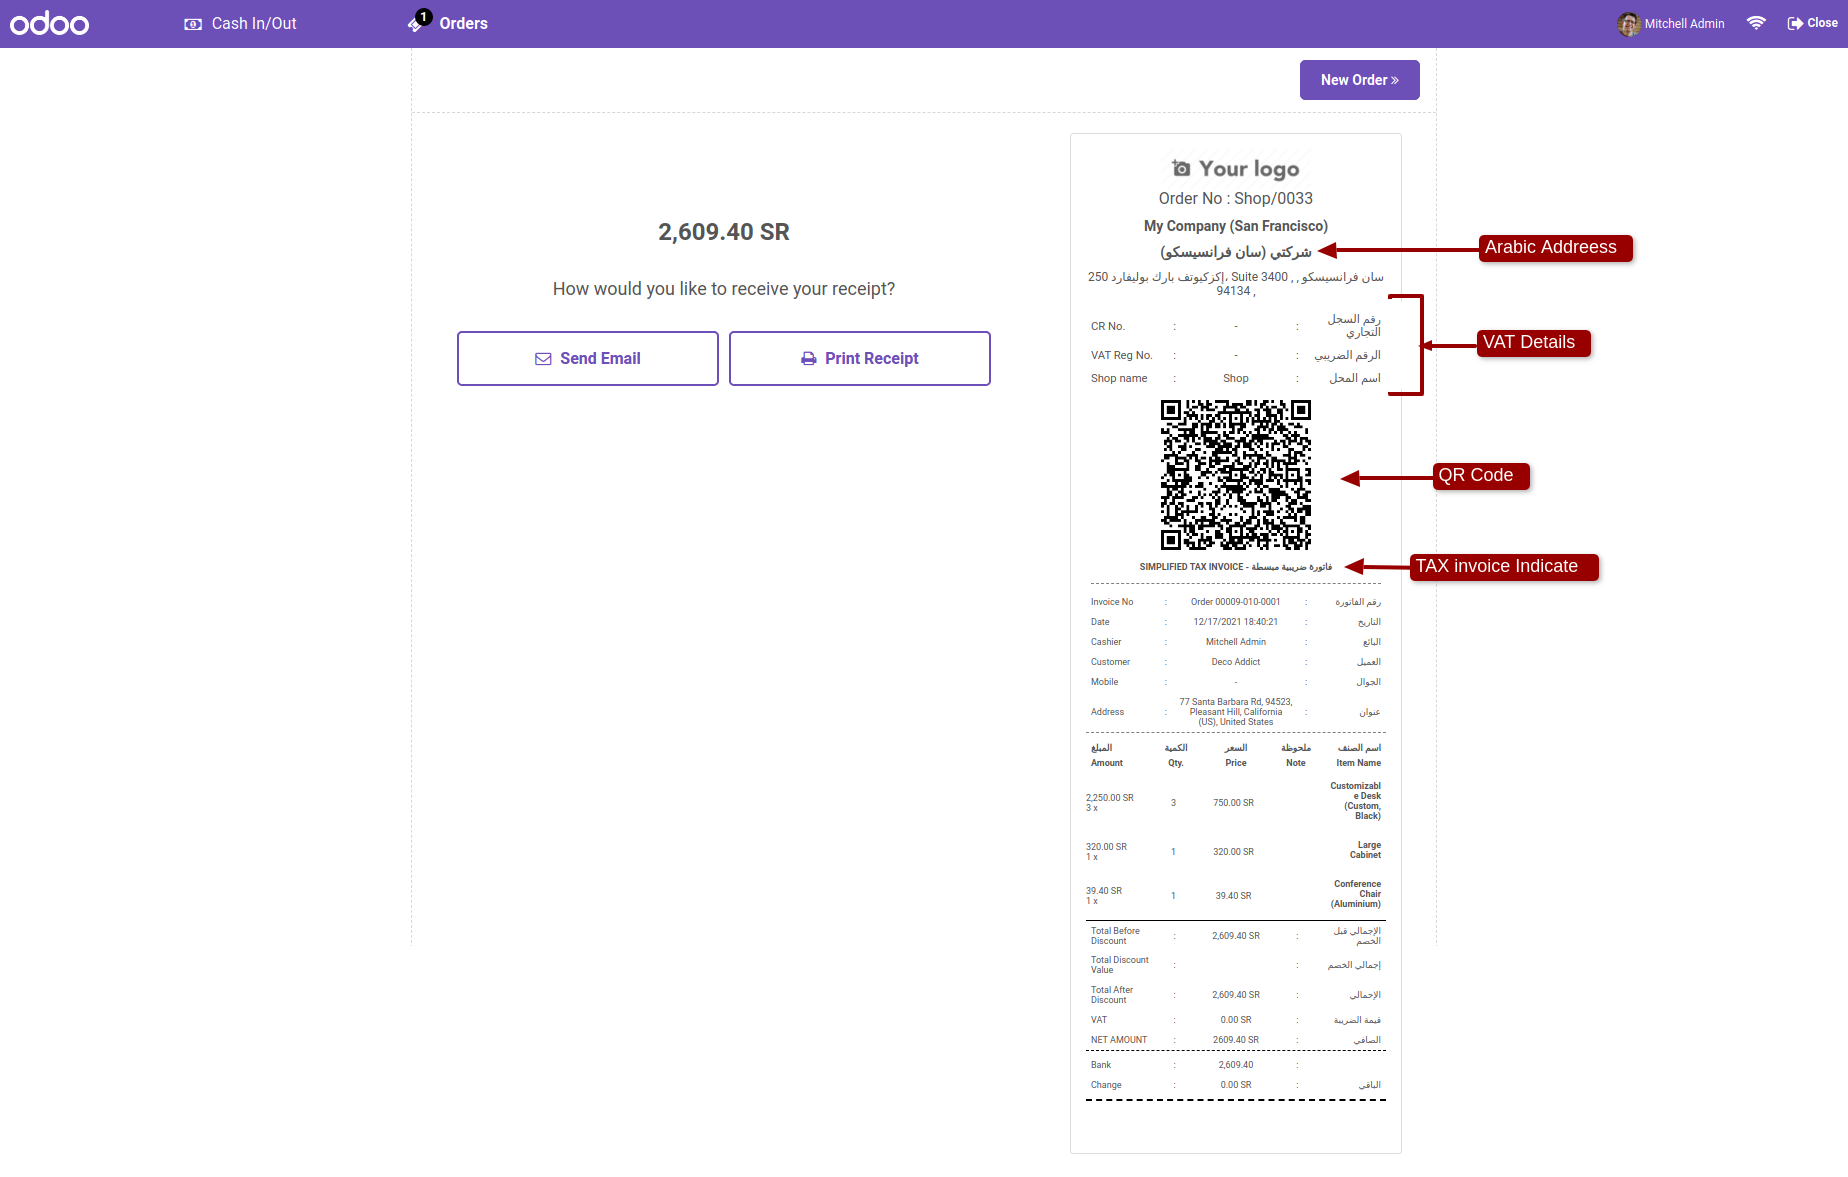
KSA E Invoice Formate Receipt with Normal Order.
KSA E Invoice Formate Receipt with Return Order.

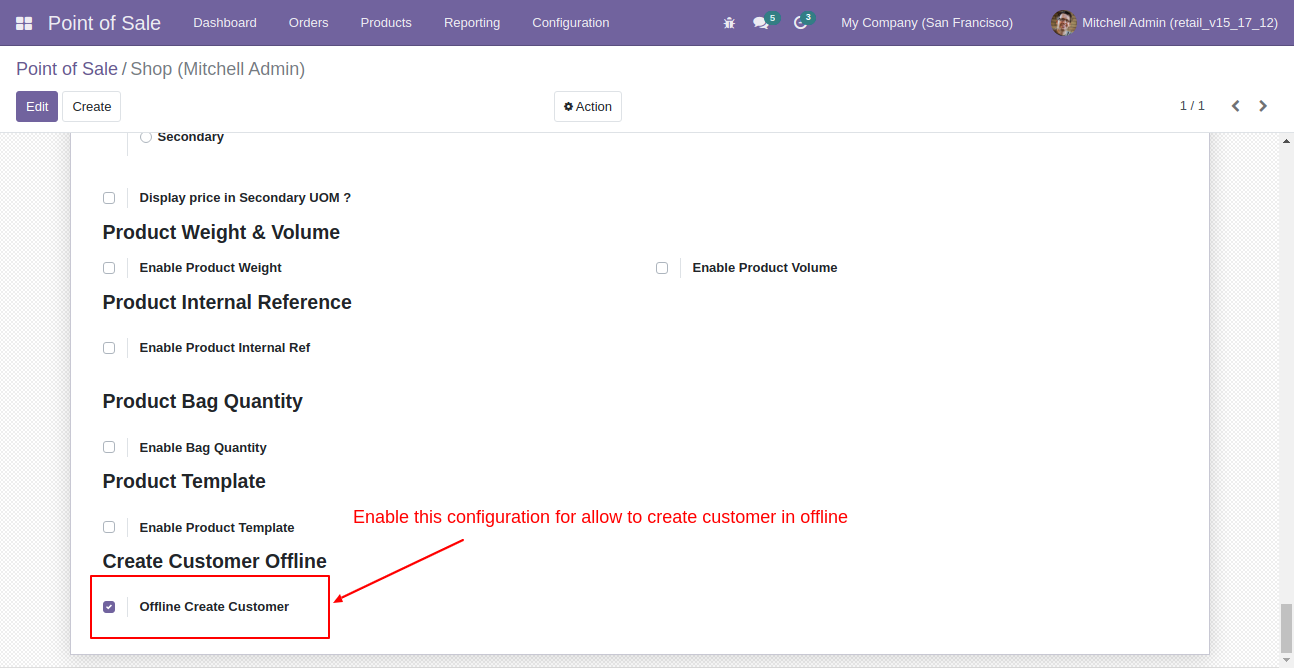
Goto pos session setting and enable the 'Offline Create Customer'.
After that you can create customer, while your pos service is stop/offline.
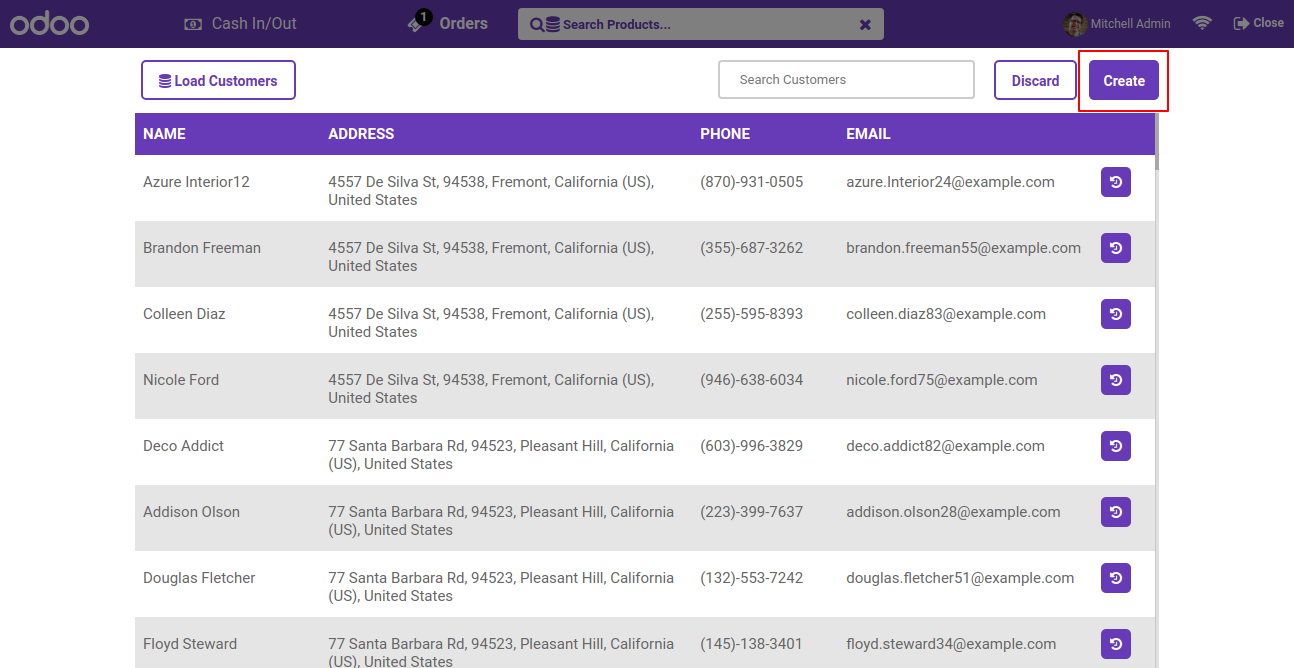
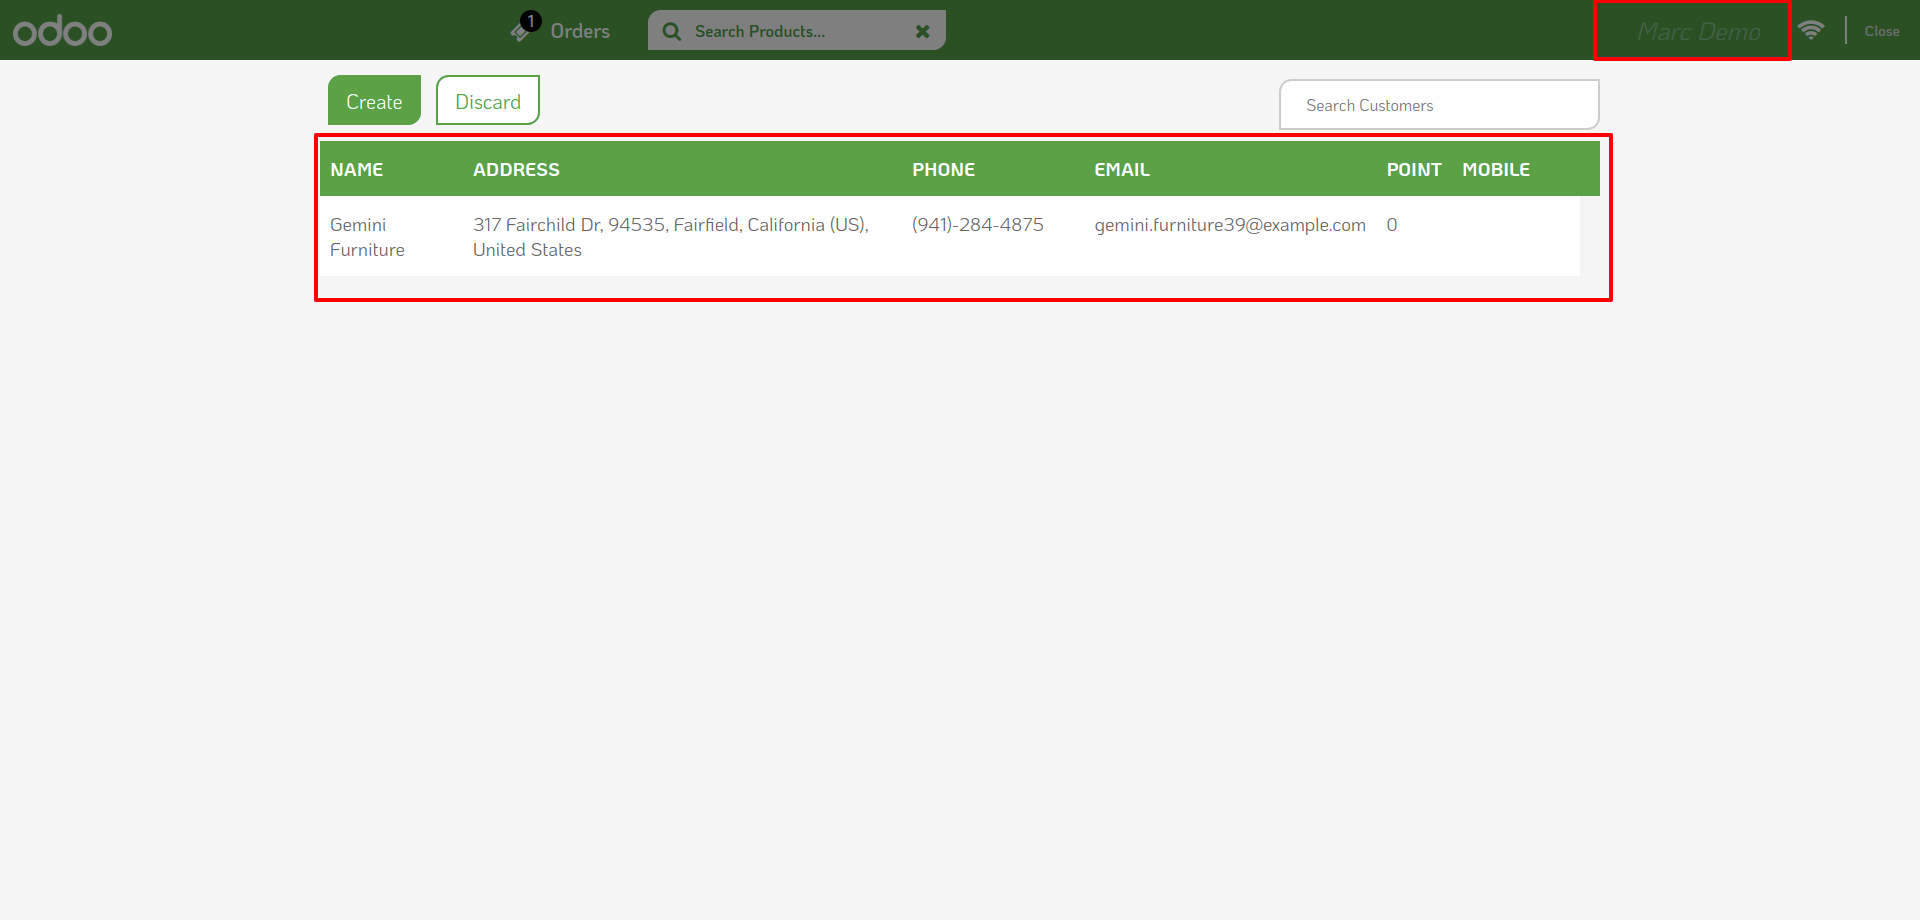
Fill the customer details and click 'Save'.
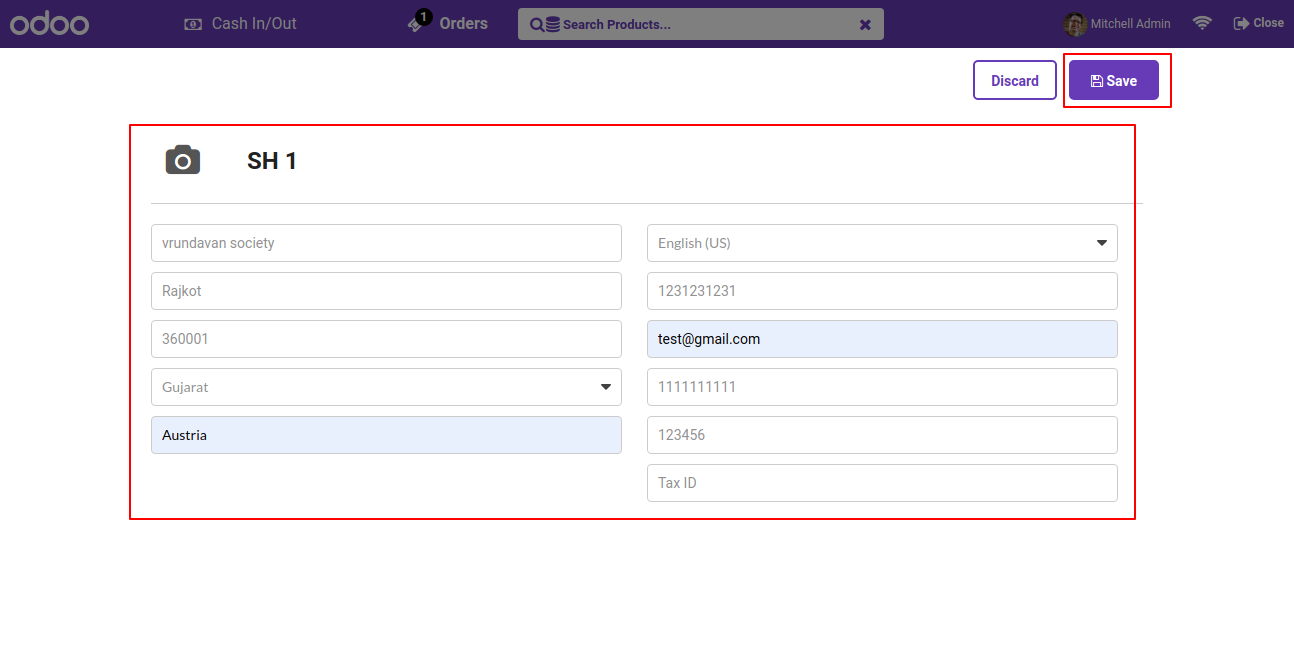
After click on save, It will display warningn.

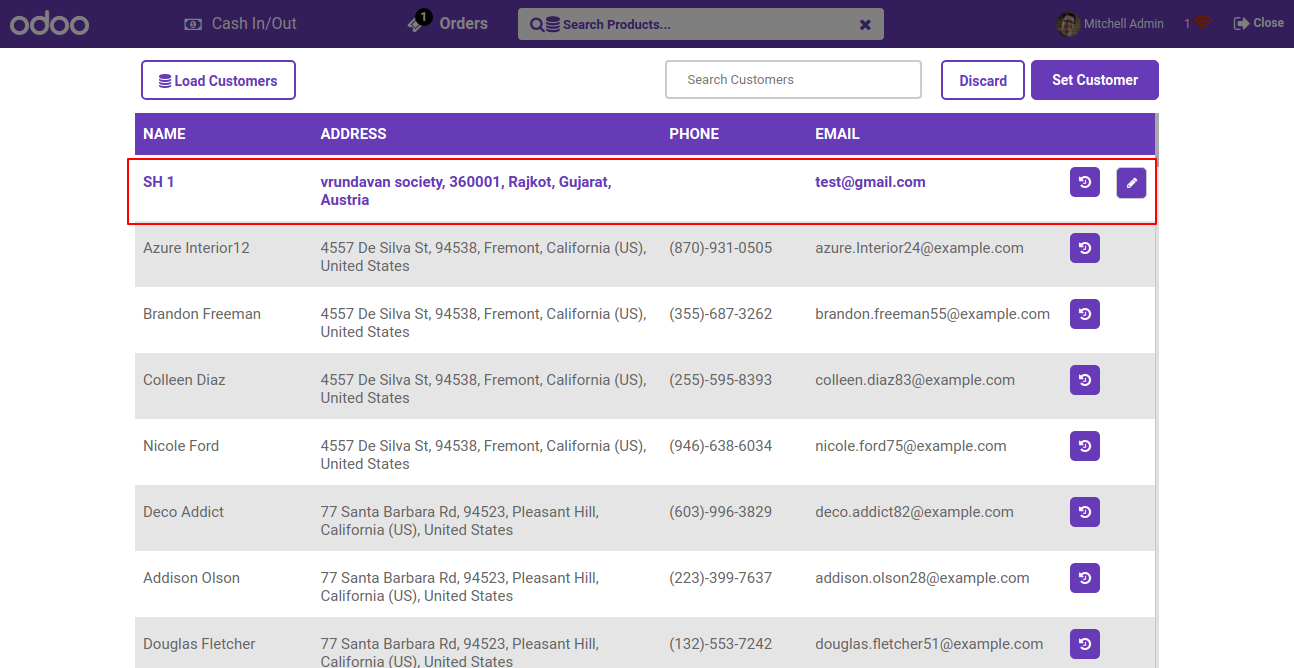
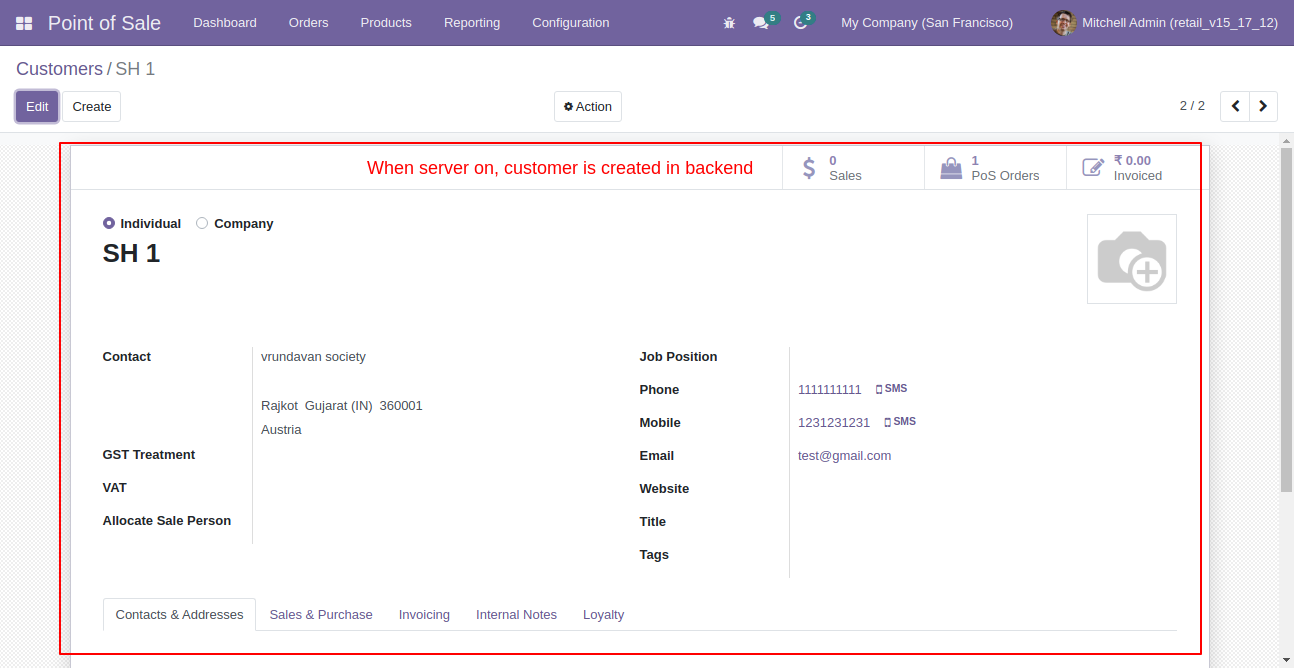
Customer created and you can use those customer into create an orders. It will sync when you online.
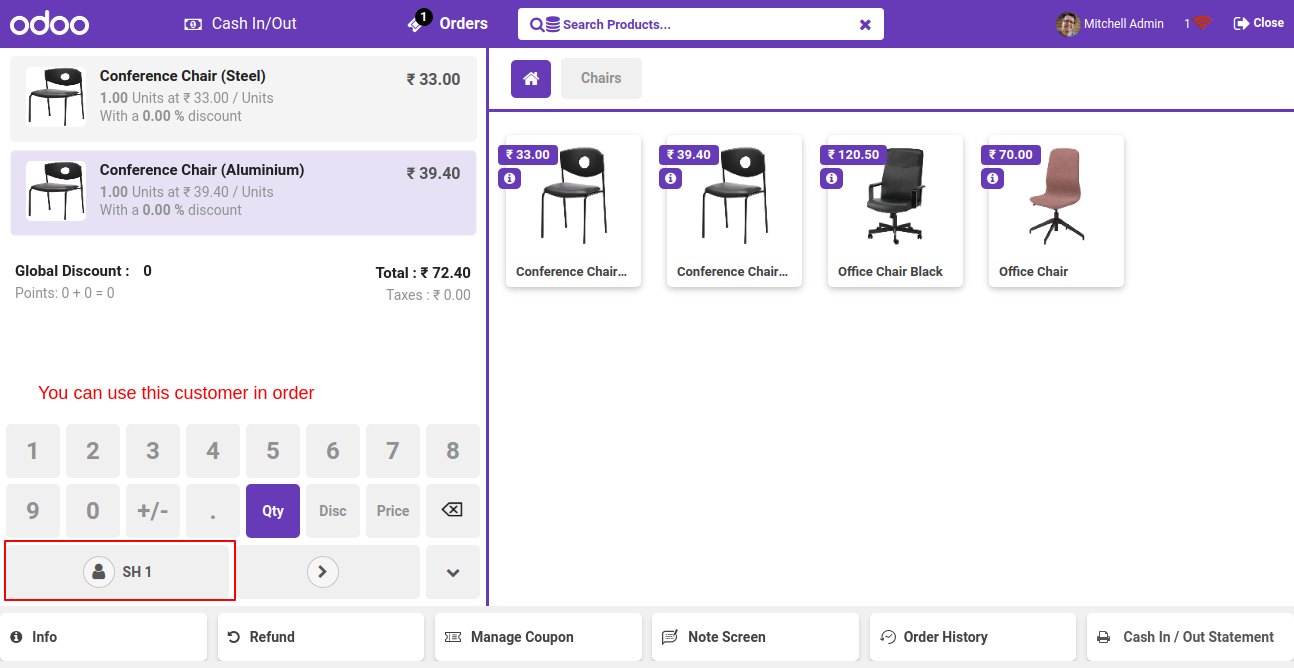
Make new order with customer, which you created in offline.(Make sure pos is still offline)
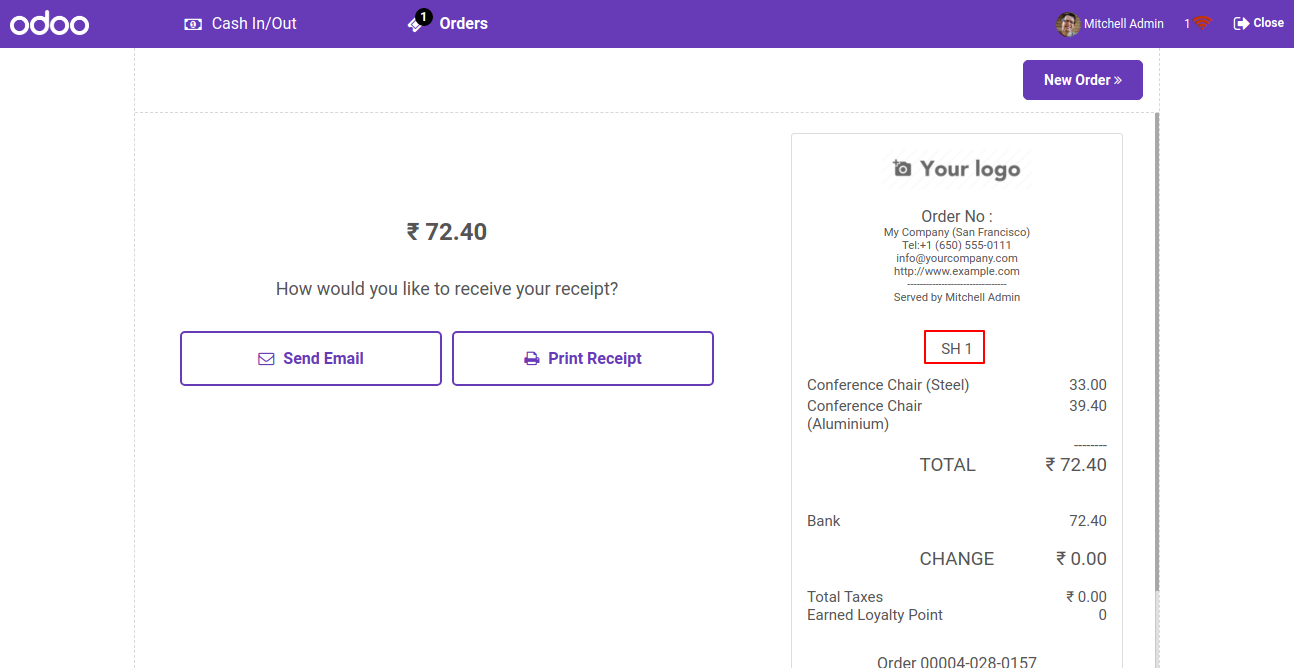
Payment screen in offline.
While your server is online it will sync customer and orders as well.
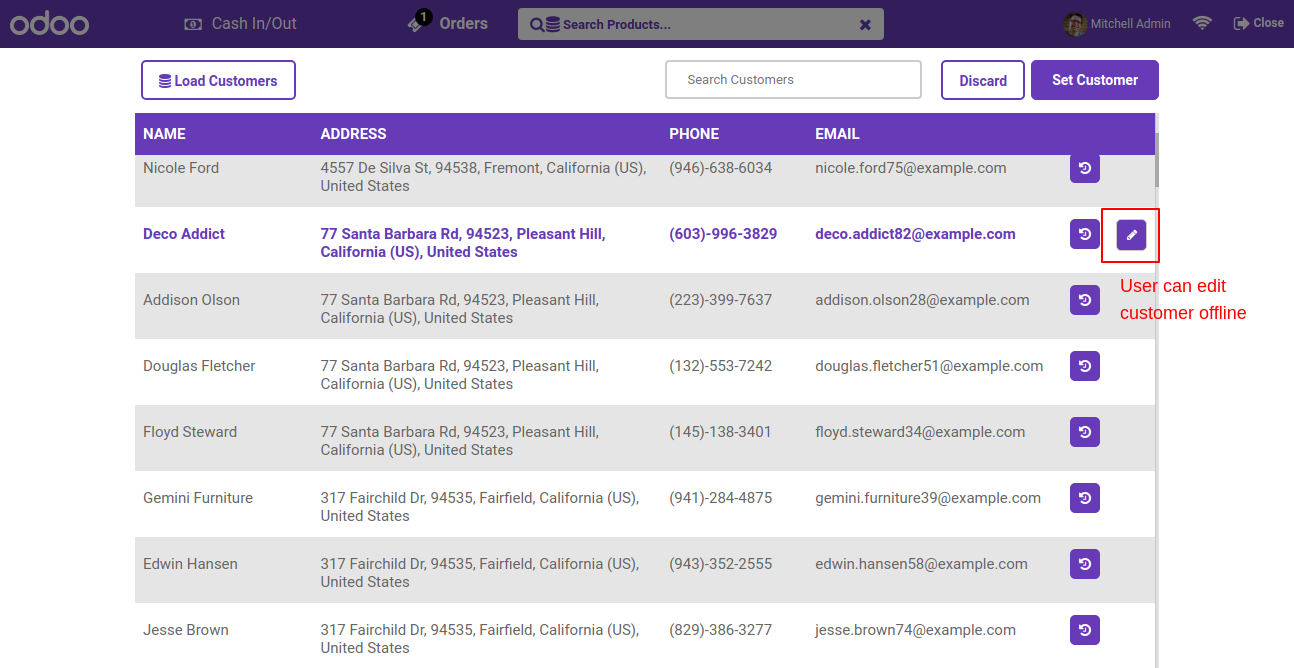
Also you can edit customer while your server is offline.
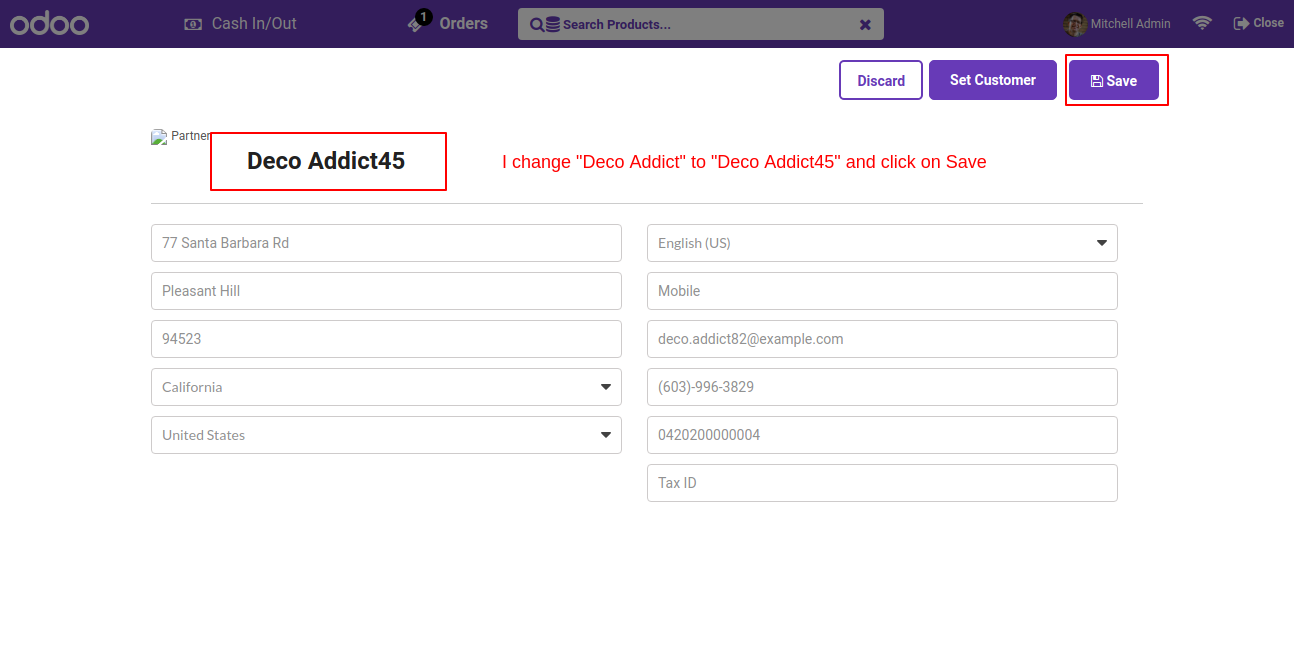
Make some changes in the customer and click to save.
After click on save it will raise a warningn. (It will sync changes while server is online)
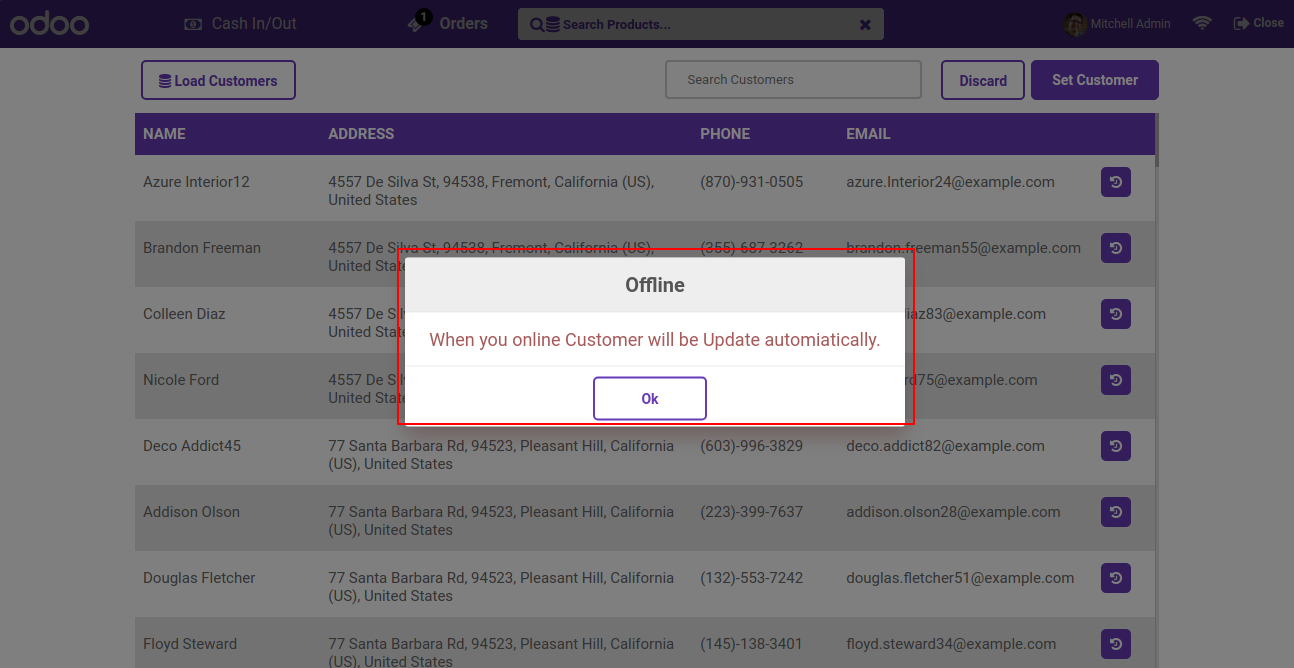
Customer changes is sync while your server on again.

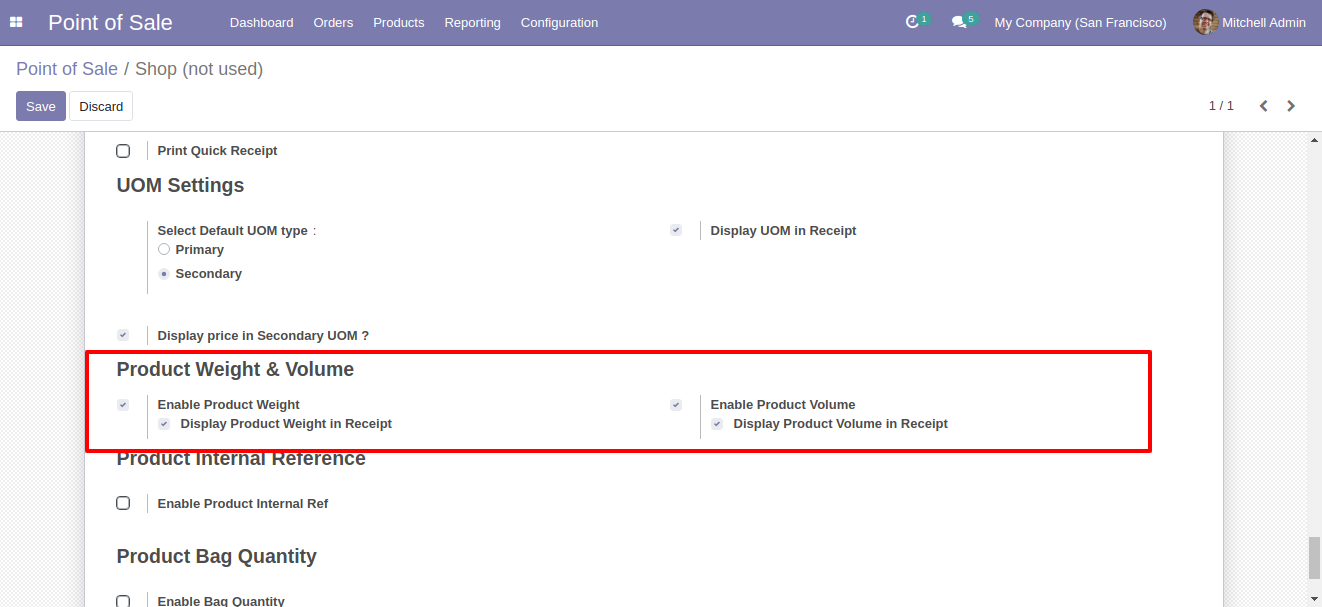
Goto pos setting and enable product weight and volume feature.
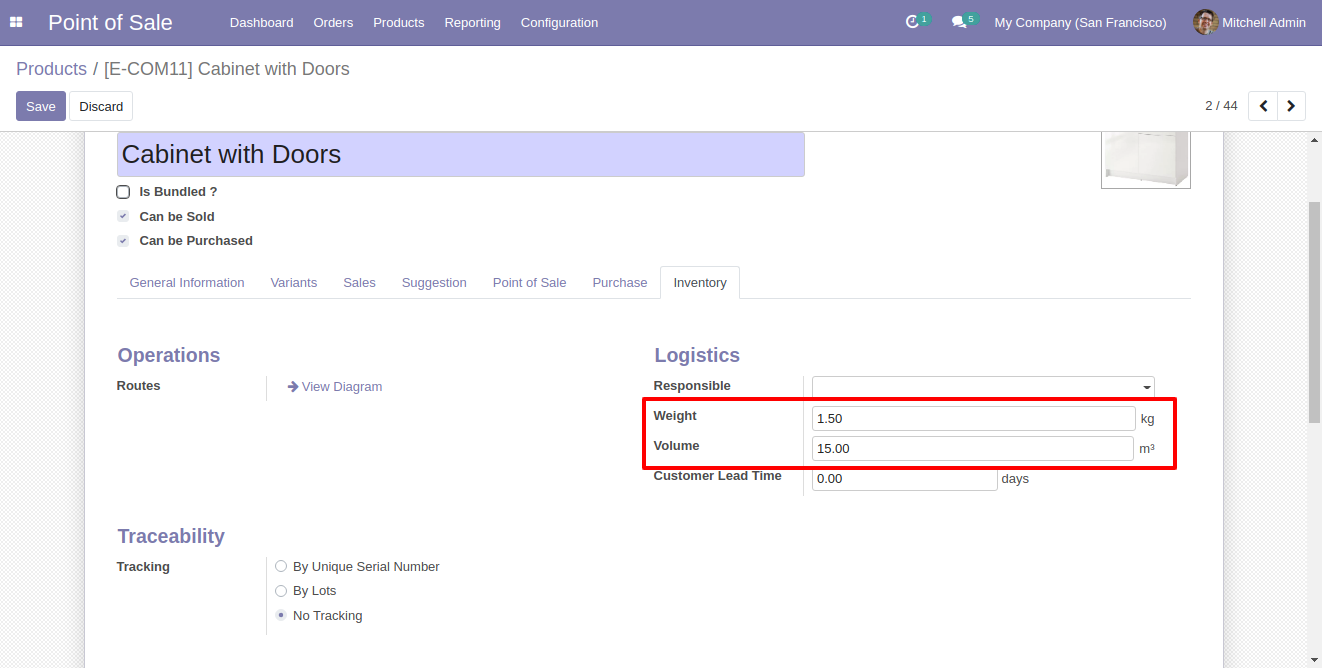
set weight and volume information in products.
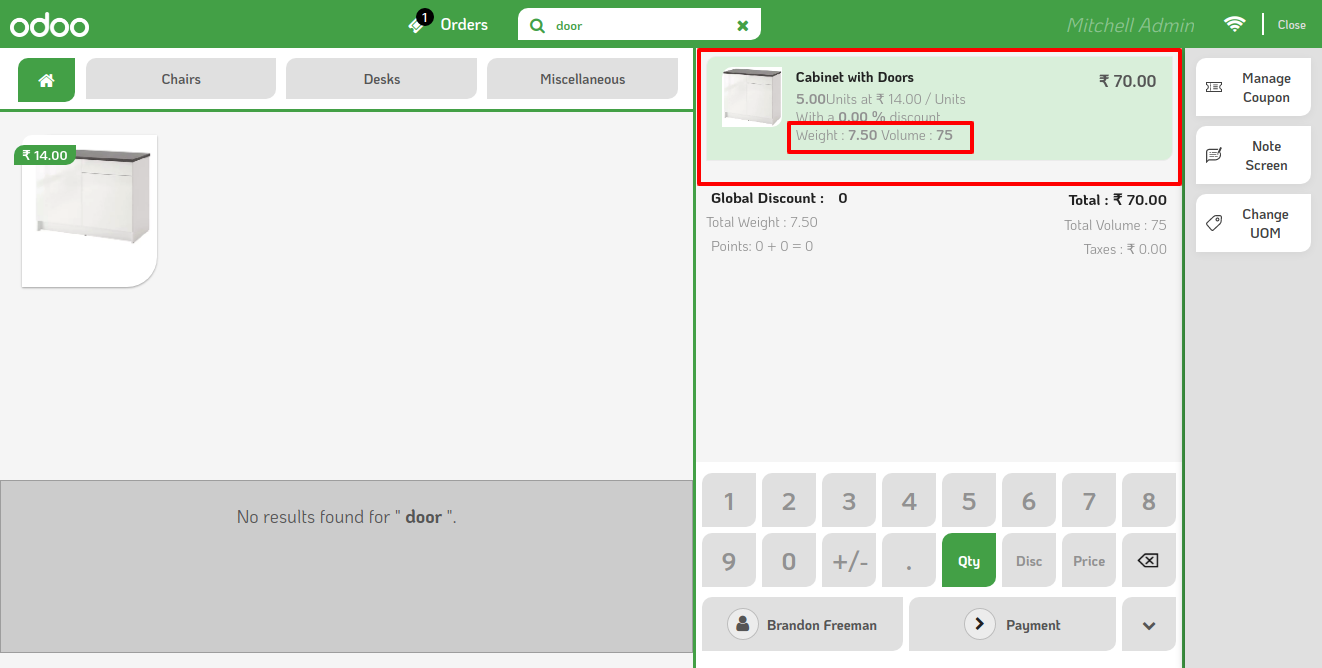
Now you can see the products weight and volume information in the pos cart.
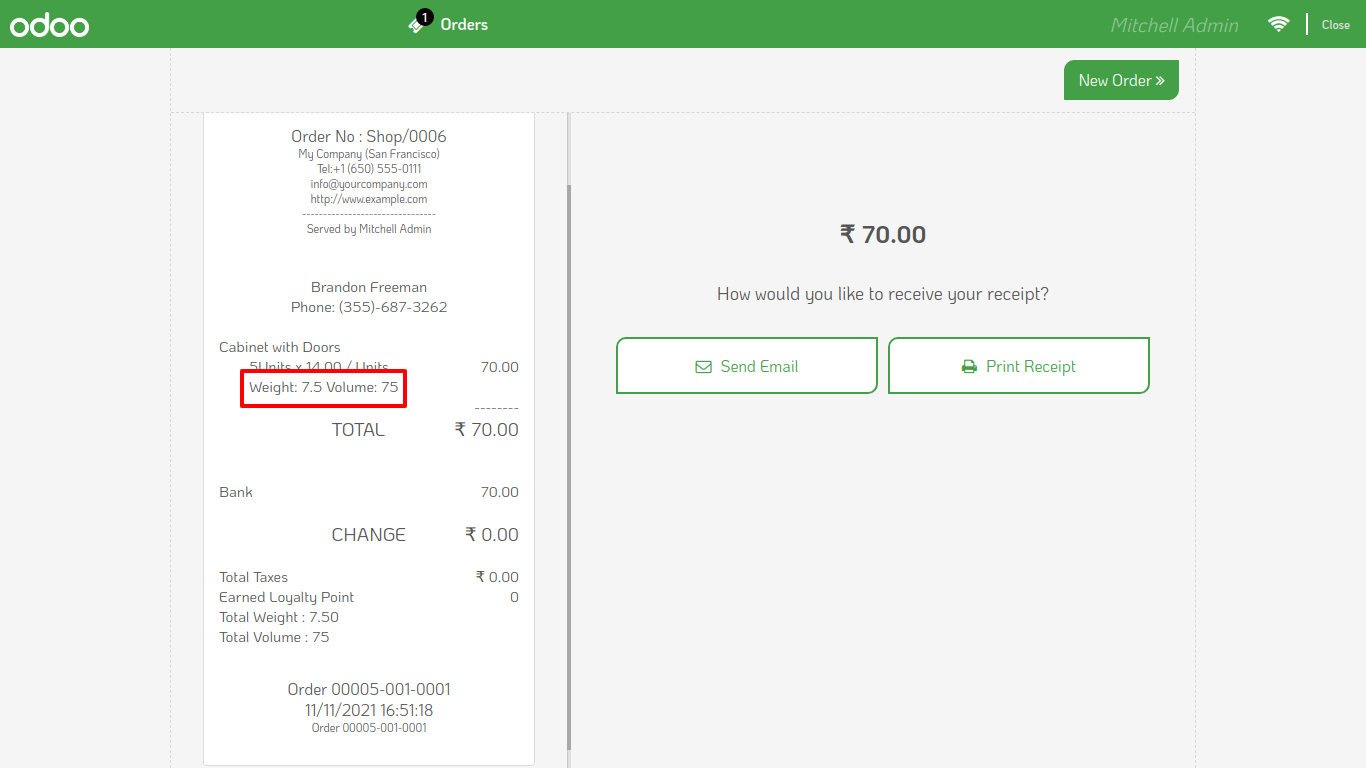
Products weight and volume information in the receipts as well.
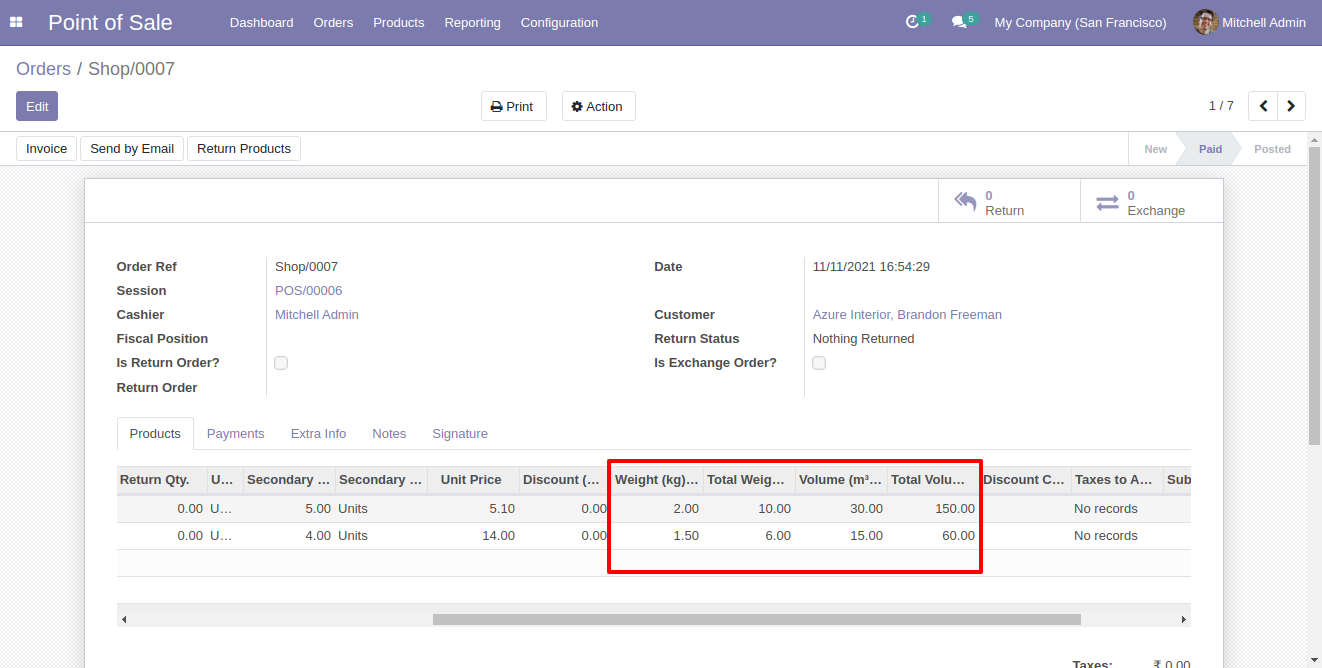
Products weight and volume information in backend orderline.
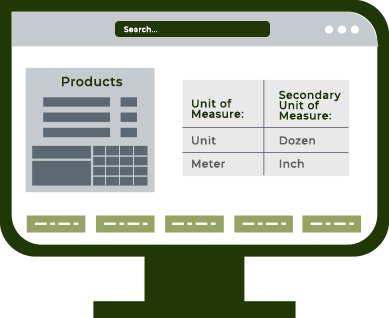
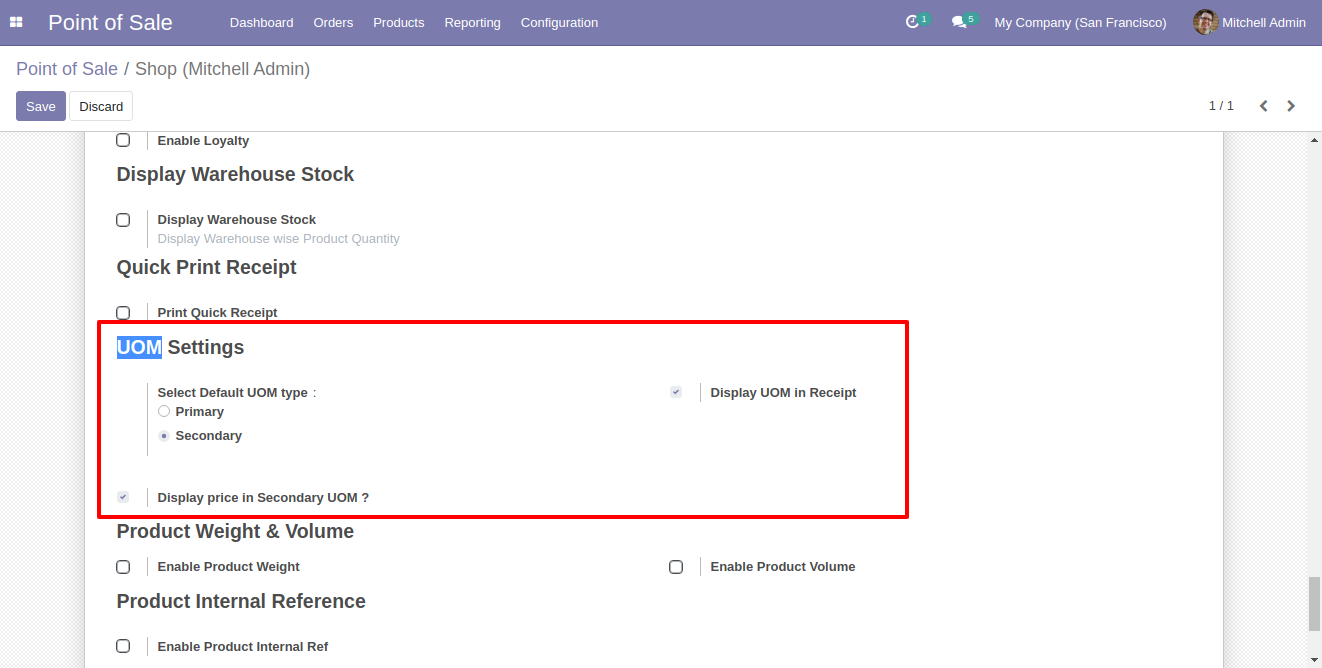
Go to pos setting and select default uom, check uom in receipt and display price in sec UoM.
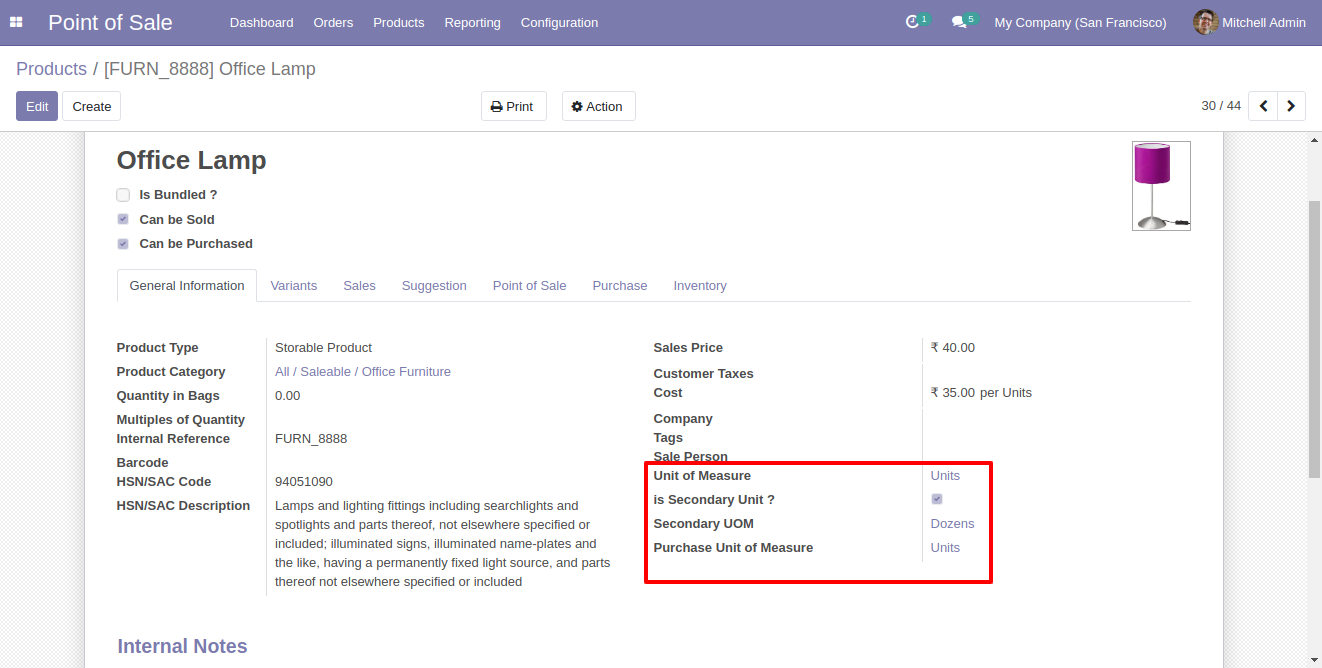
Goto products and set appropriate secondary unit of measure.
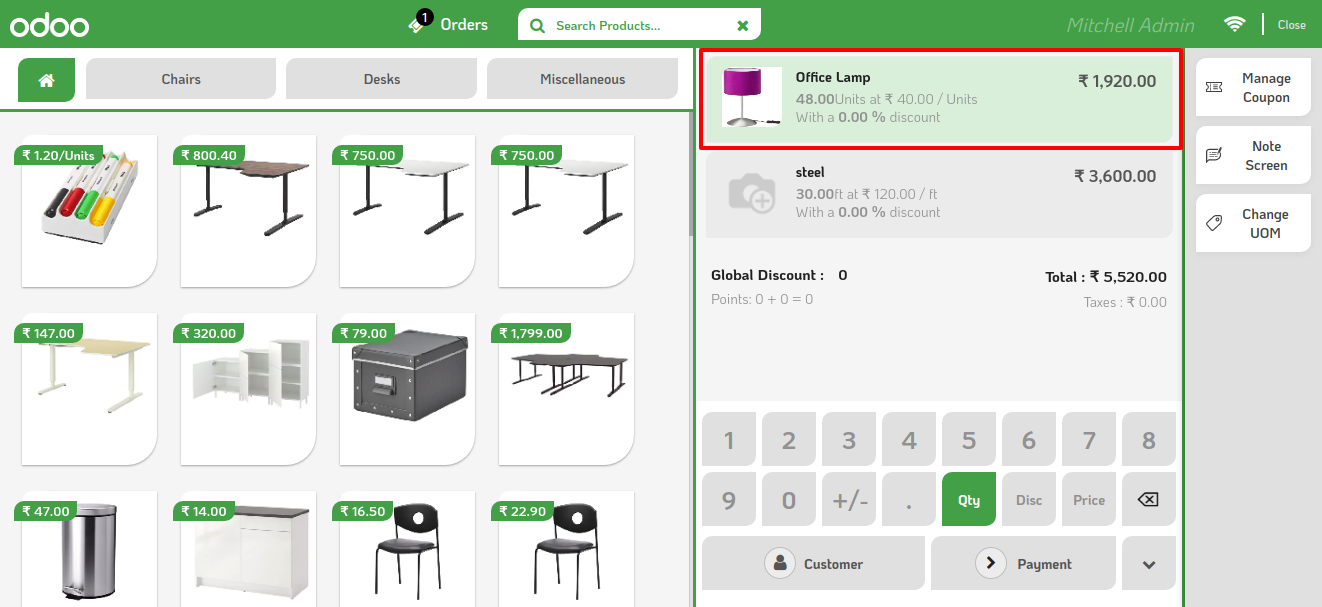
In Pos screen, you can change unit of measeure.
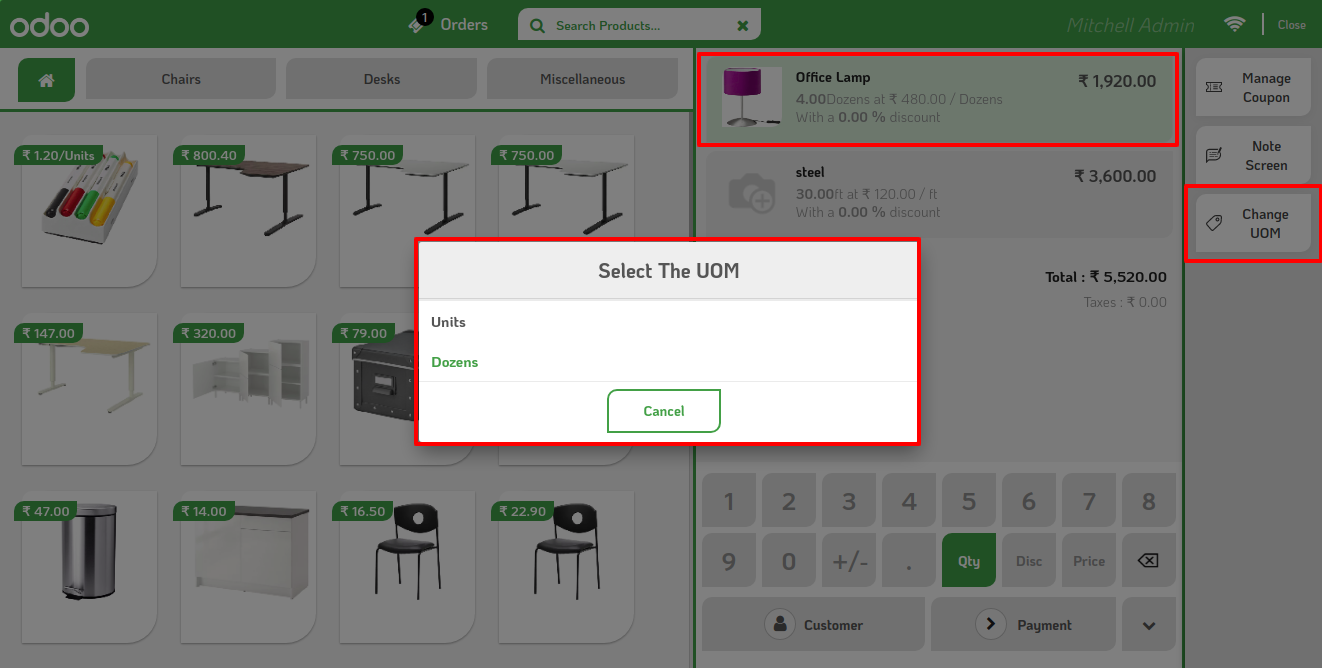
It will change unit of measeure with price.
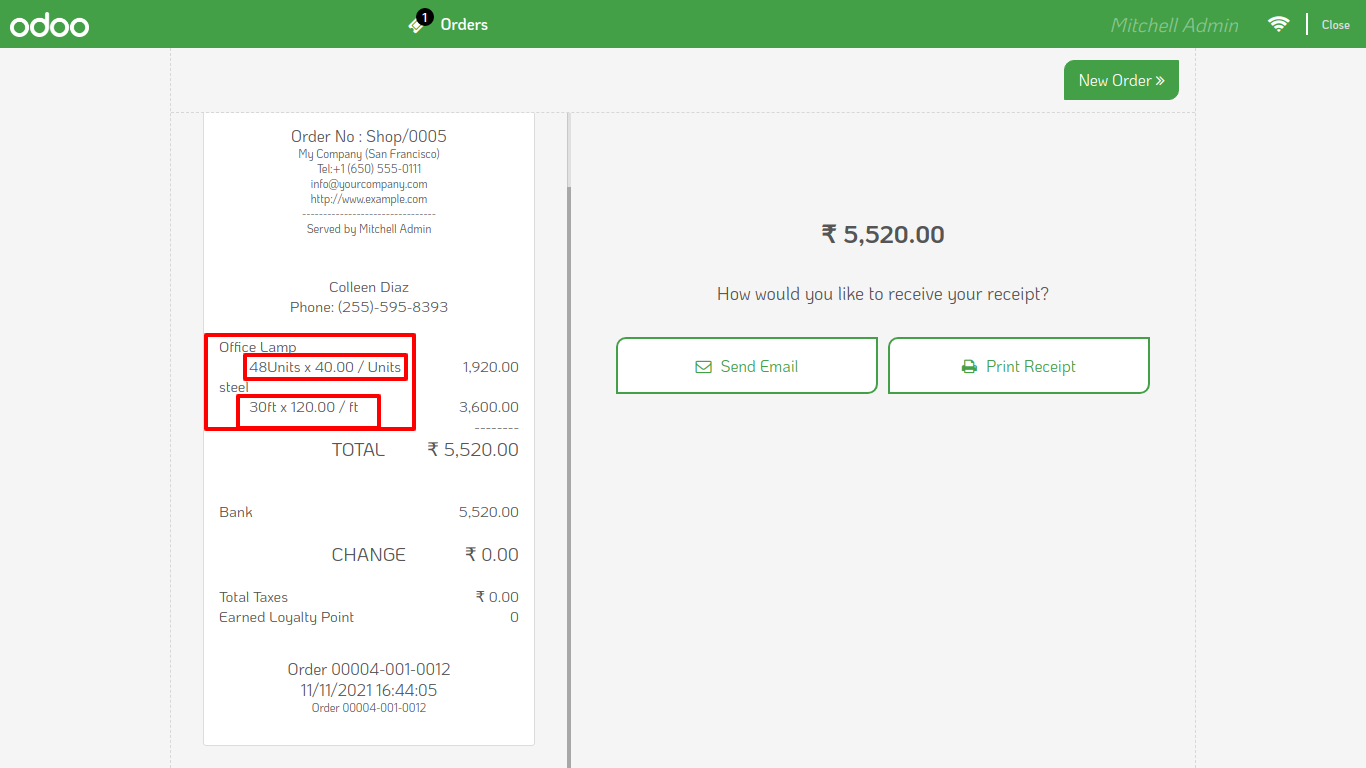
Unit of Measure details in receipt
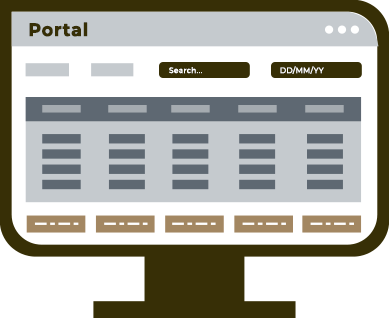
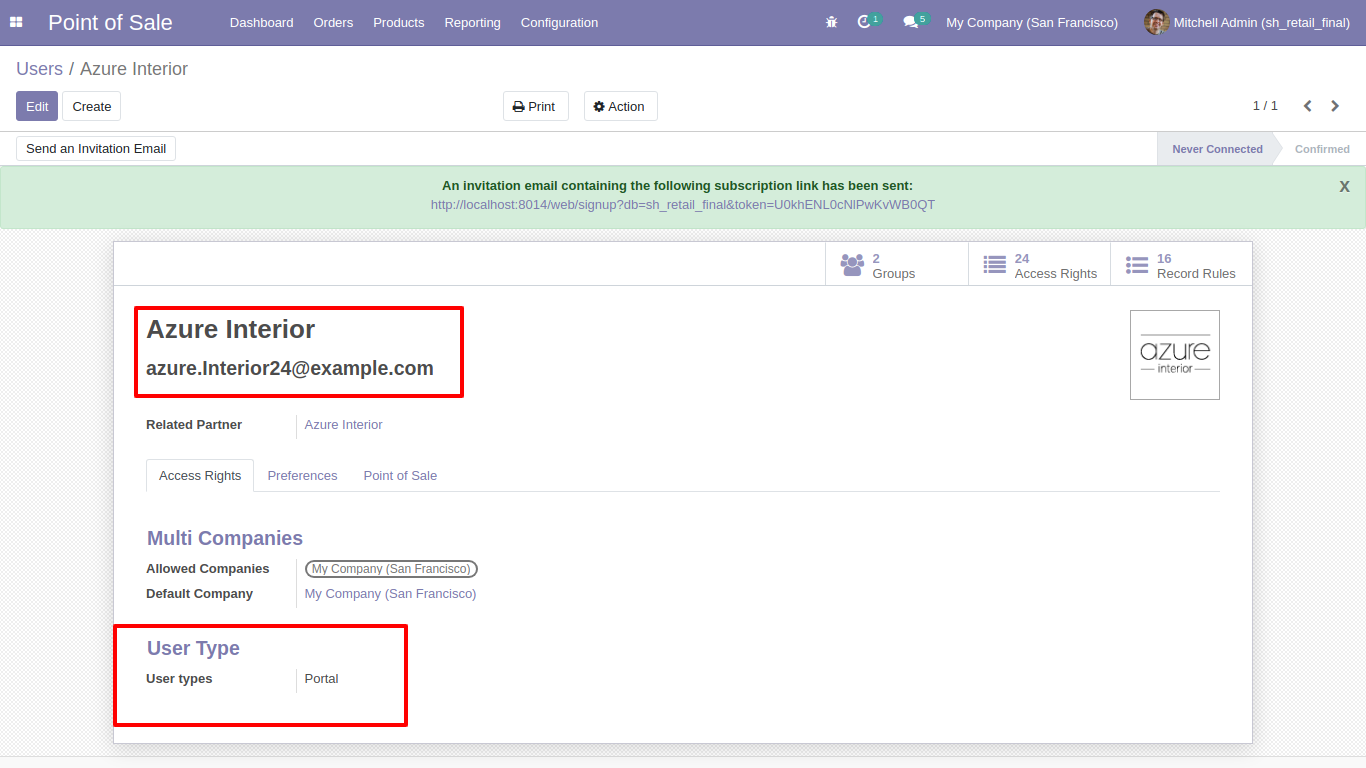
Goto User --> Allow to Portal User.
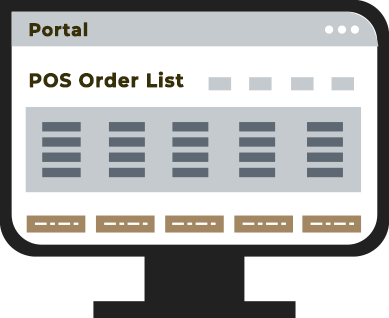
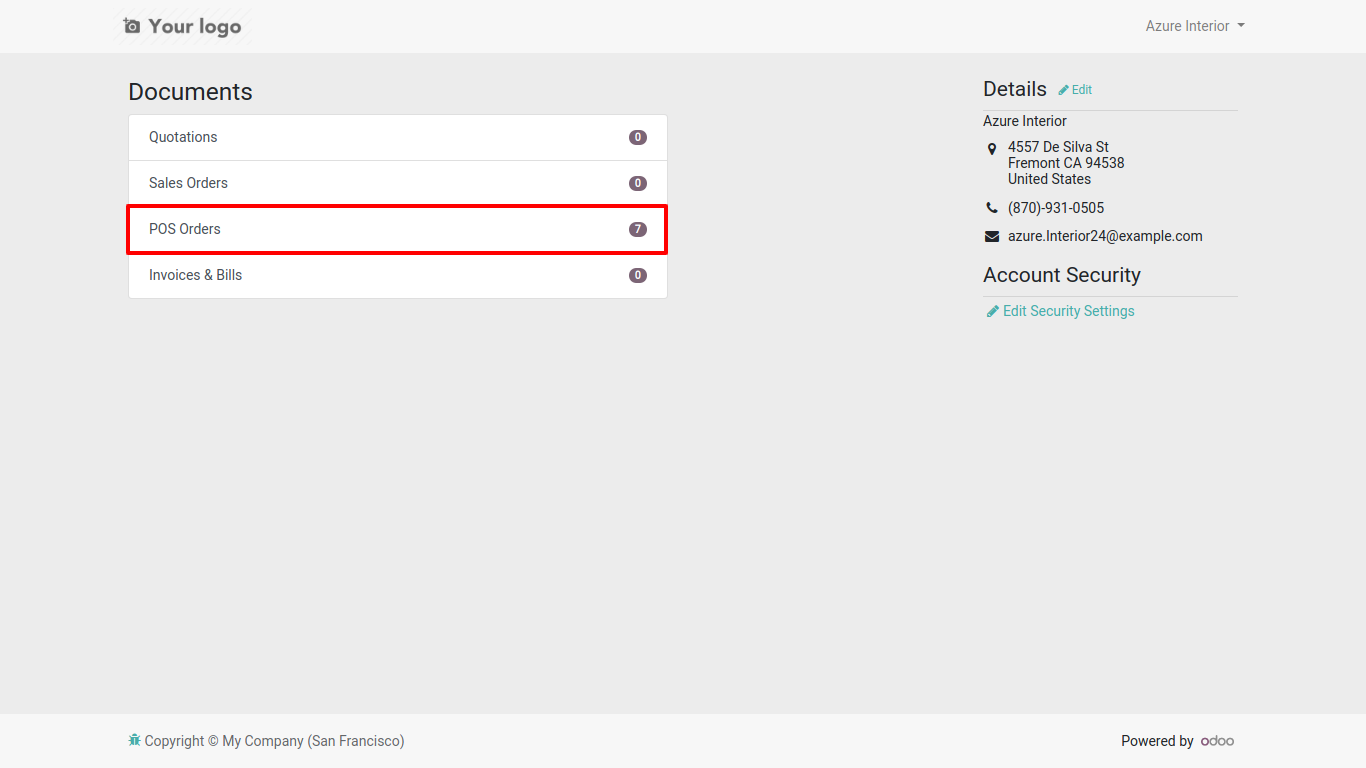
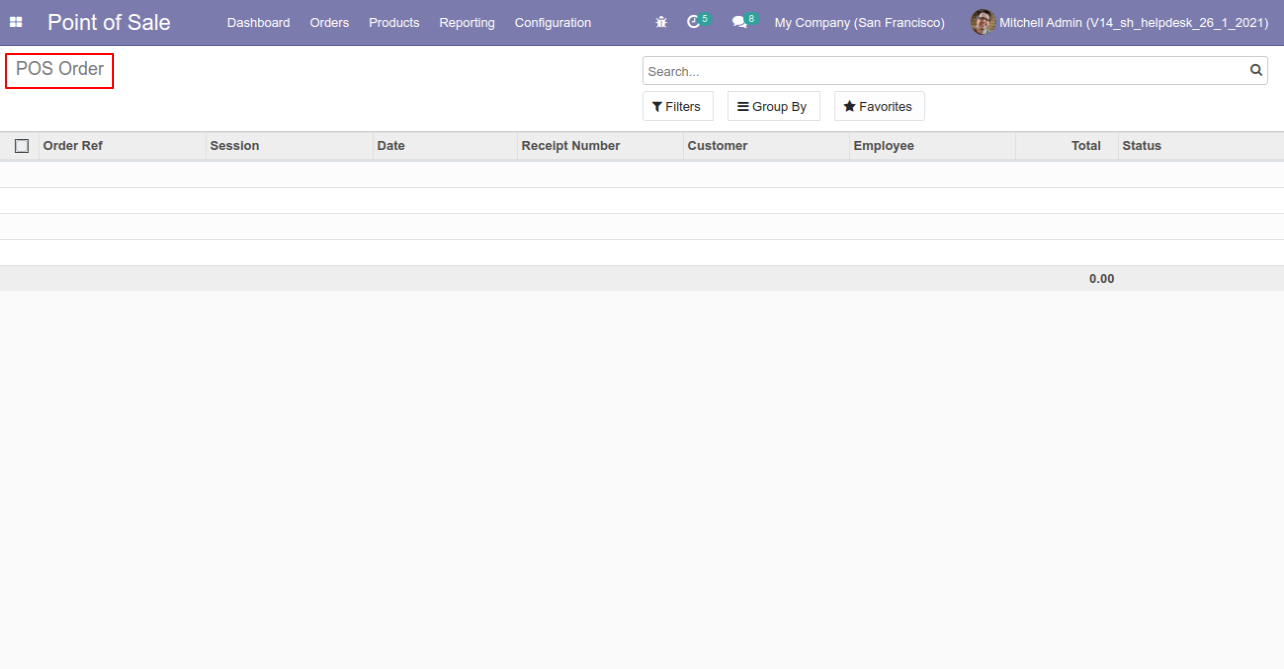
In portal those user can see his pos orders
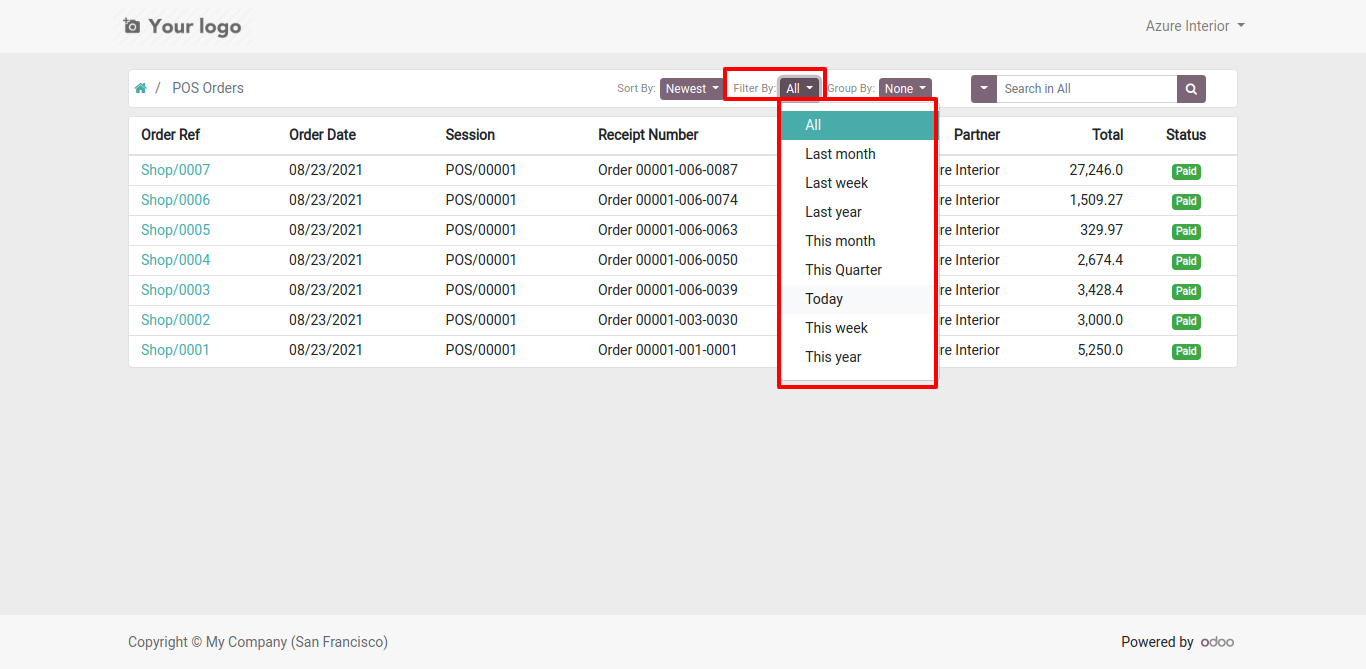
PoS Order Filter by Days and Months.
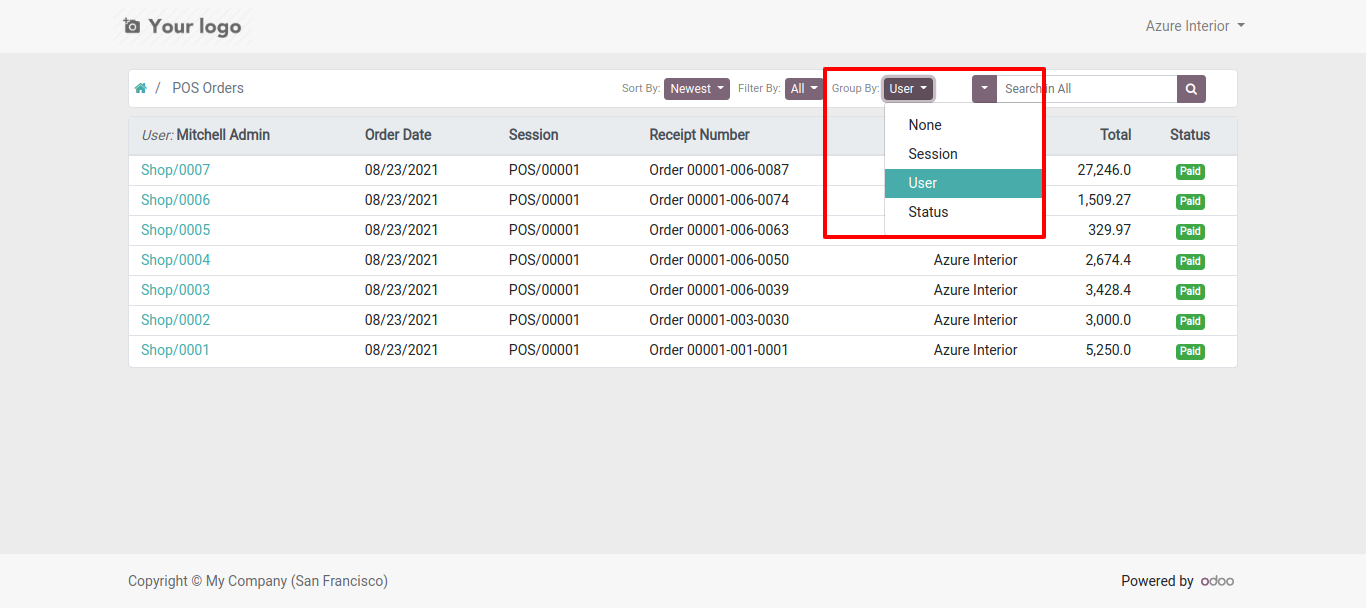
PoS Order group by users, session and status as well.
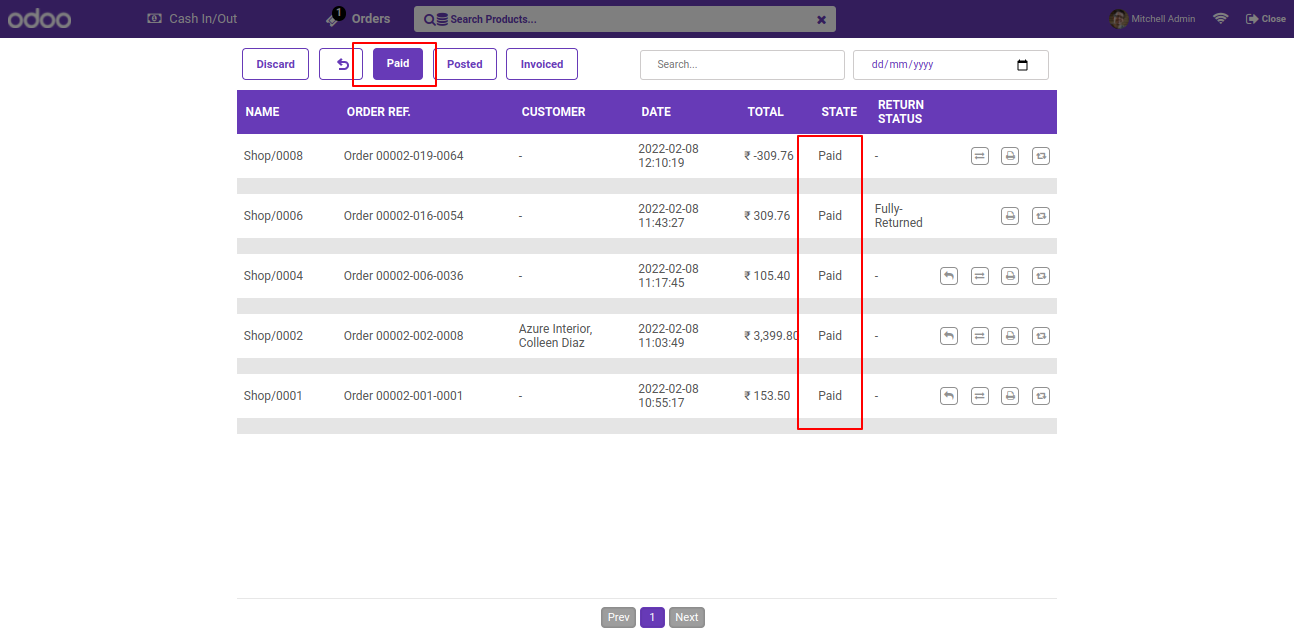
Order list filter by 'Paid'.
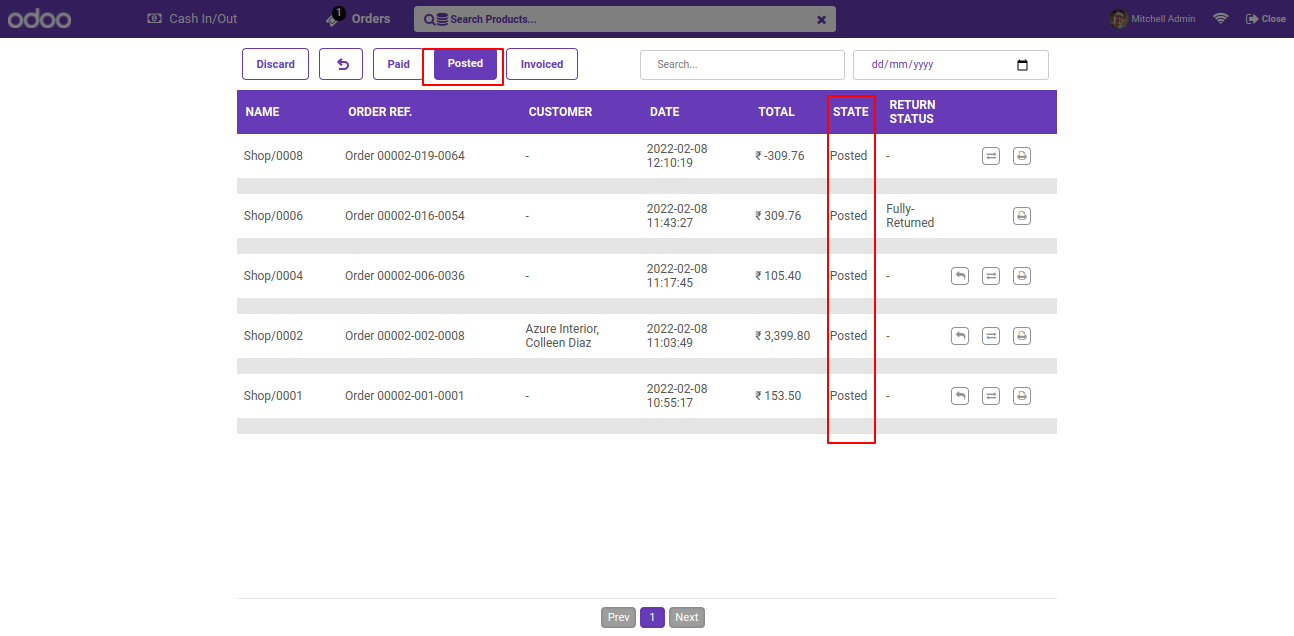
Order list filter by 'Posted'.
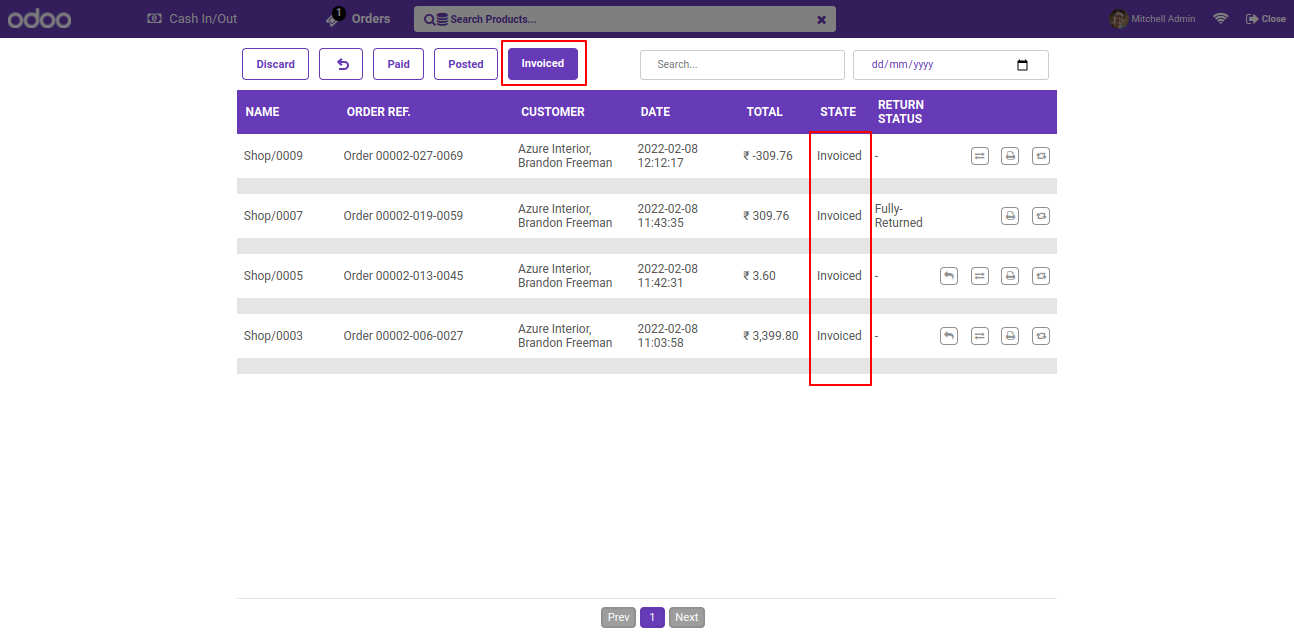
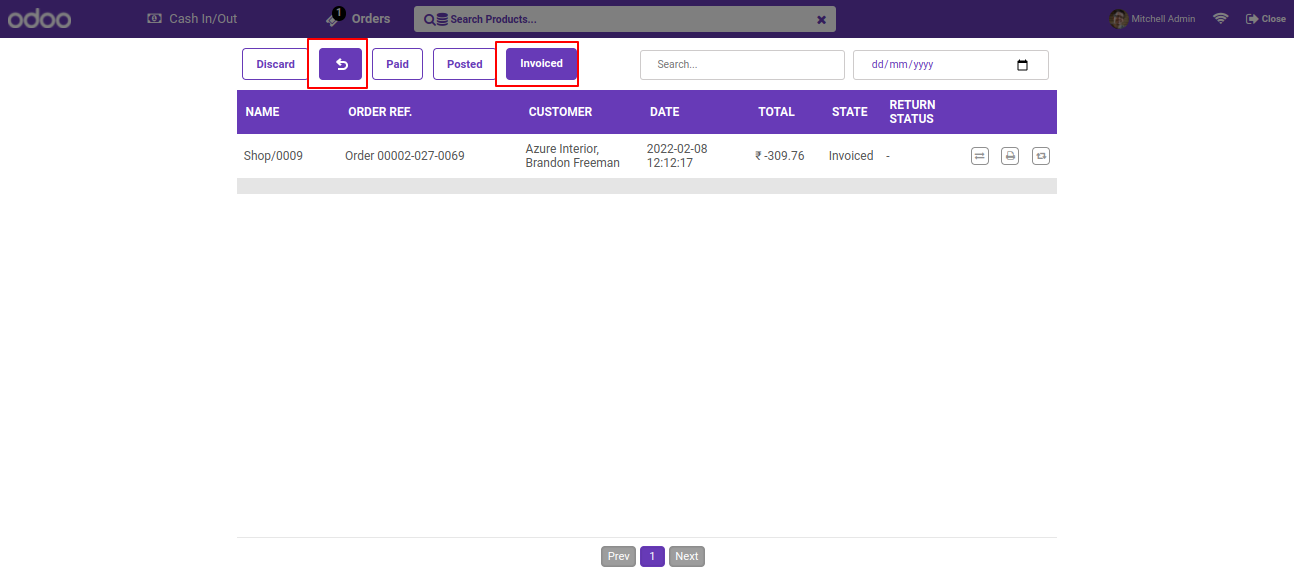
Order list filter by 'Invoiced'.
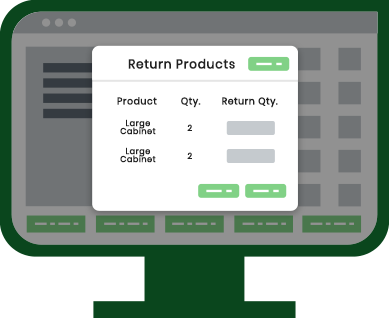
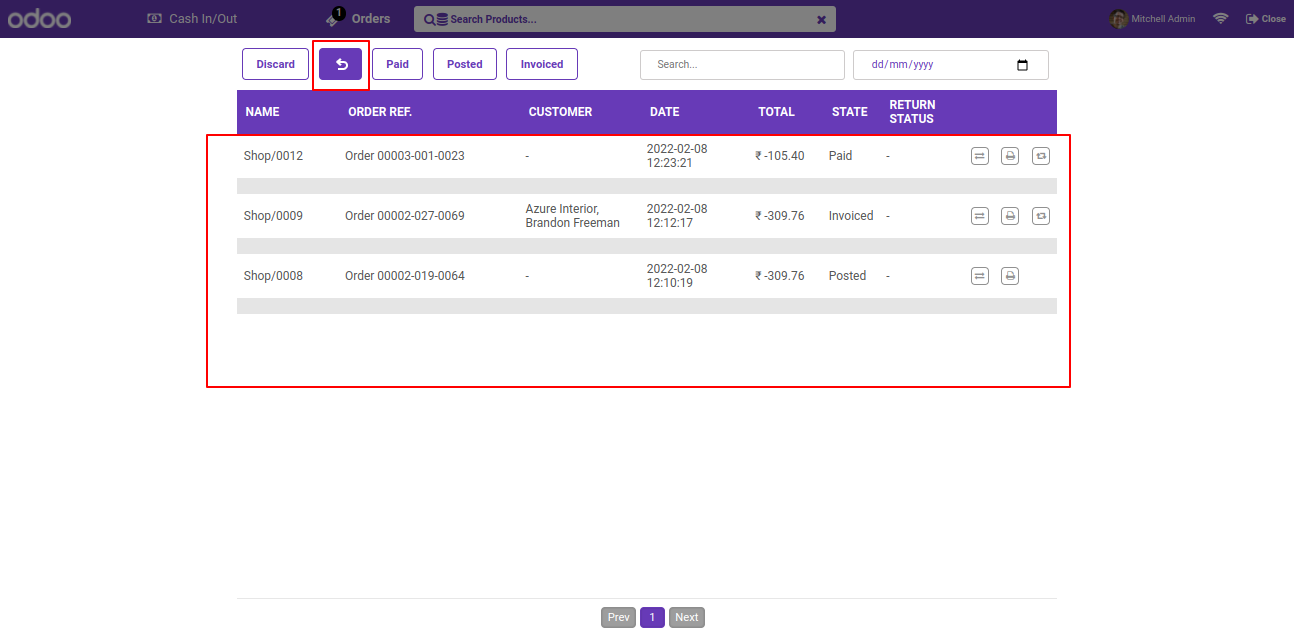
Order list filter by 'Return Orders'. It will show the only returned orders.
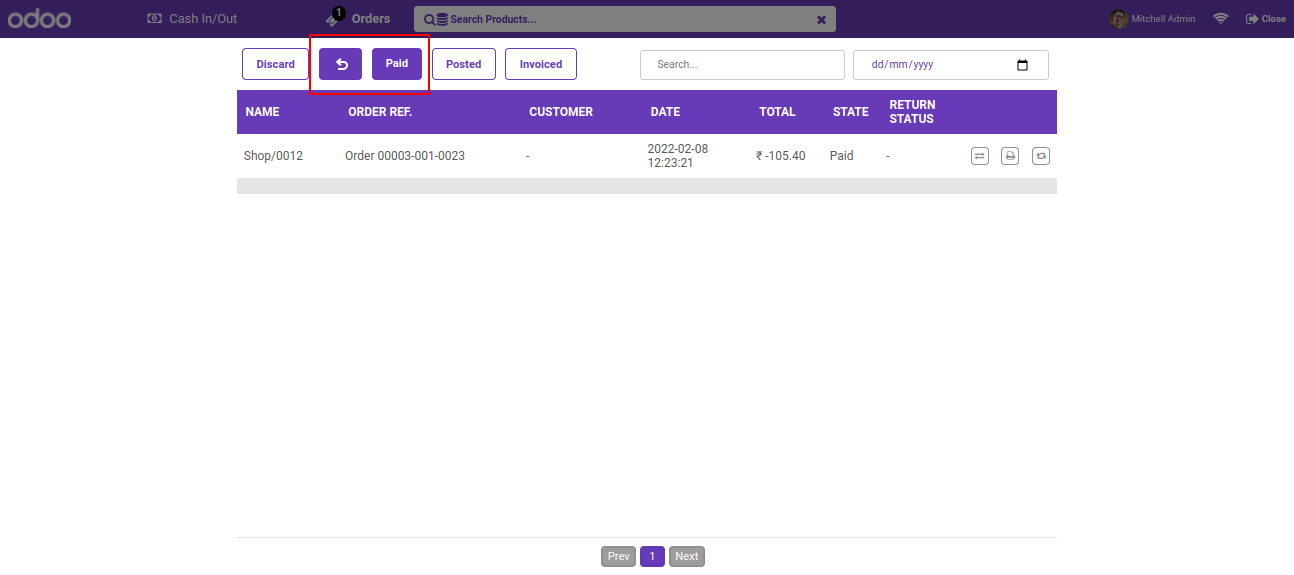
You Order list filter by 'Returned' and 'Paid'.
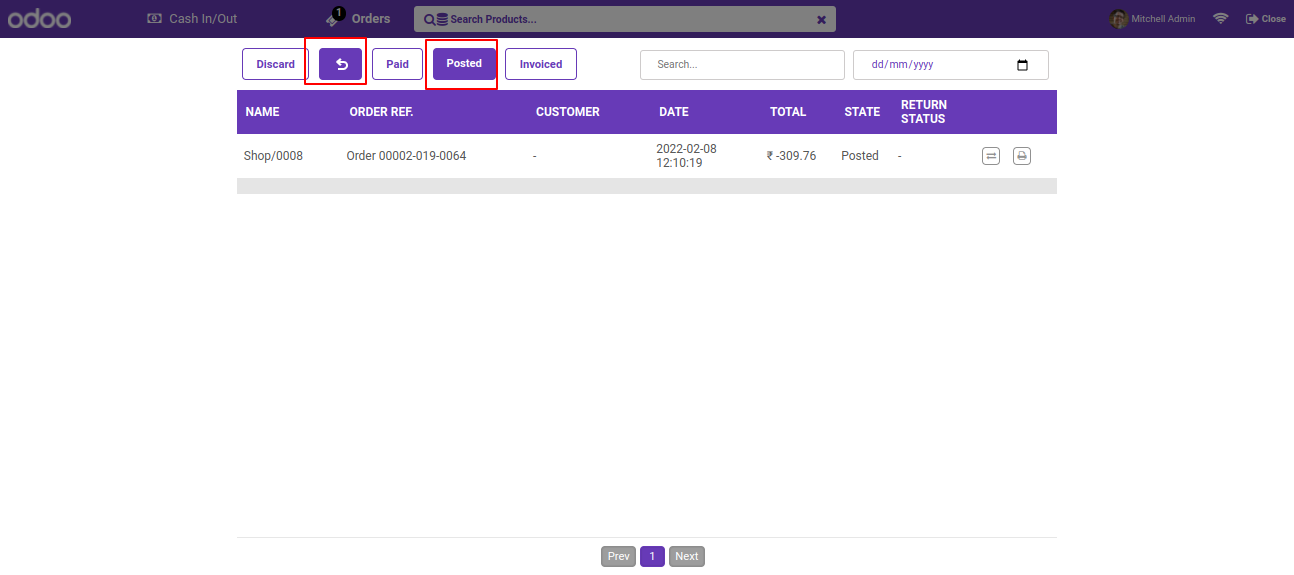
You Order list filter by 'Returned' and 'Posted'.
You Order list filter by 'Returned' and 'Invoiced'.
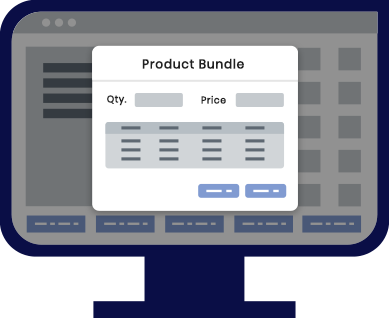
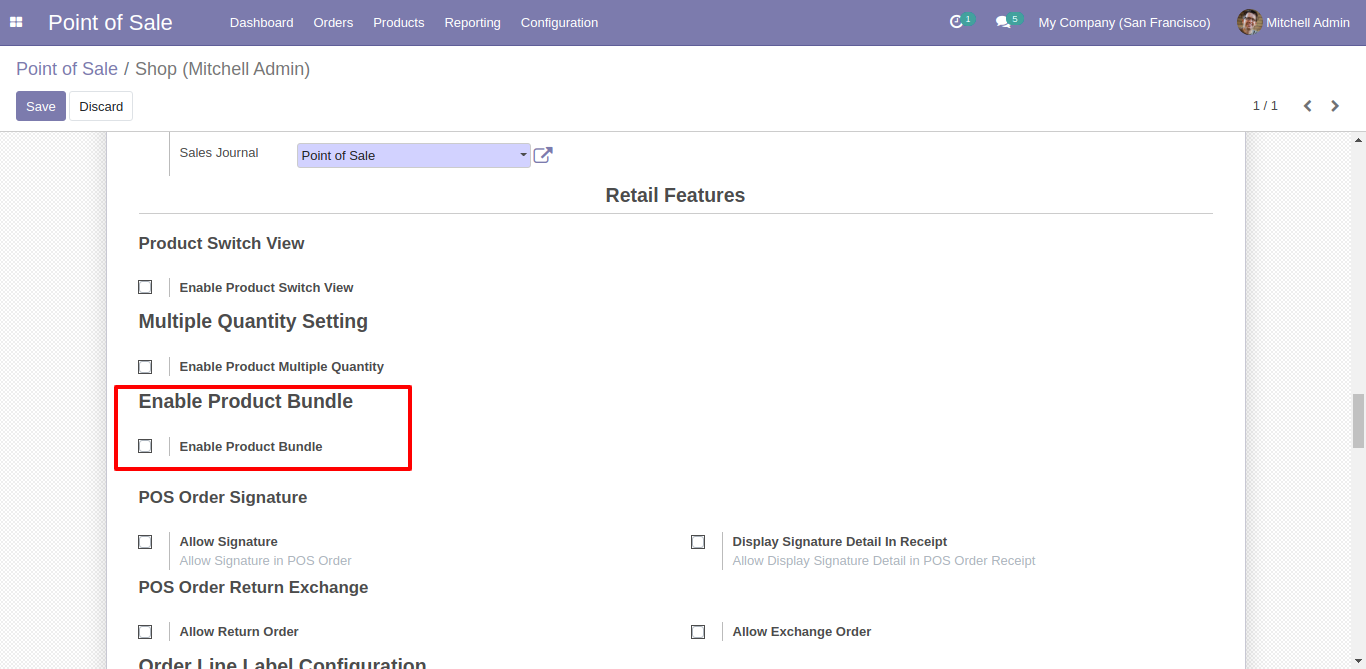
Goto theme setting --> enable product bundle option.
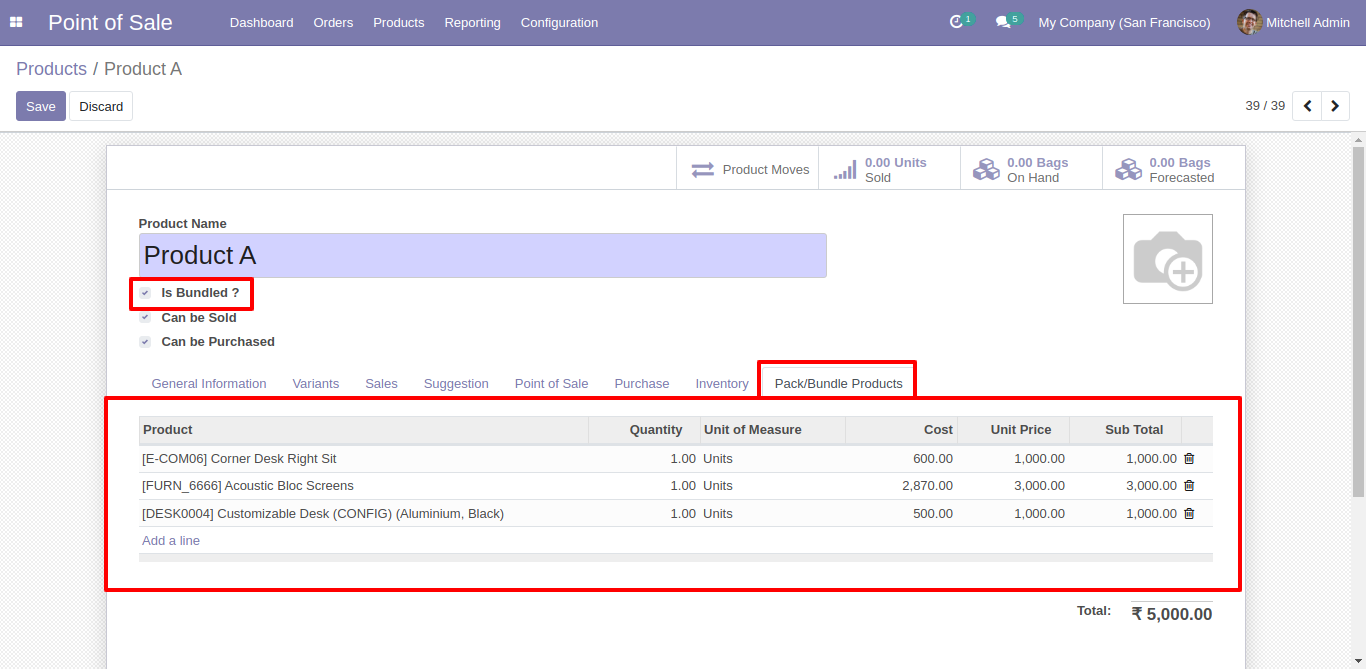
Now create product and enable 'Is Bundle' and add bundled products in 'Pack/Bundle Product' Tab.
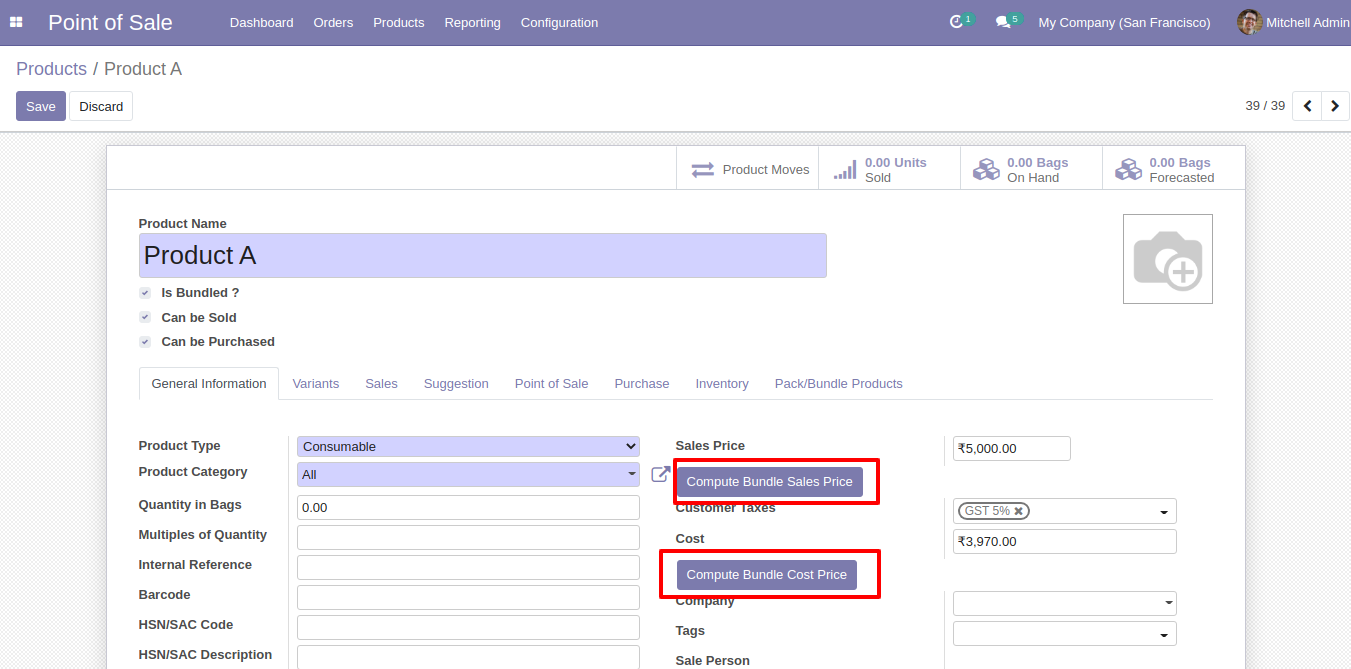
Now click on those buttons so it will calculate your bundle cost prise and sell price.
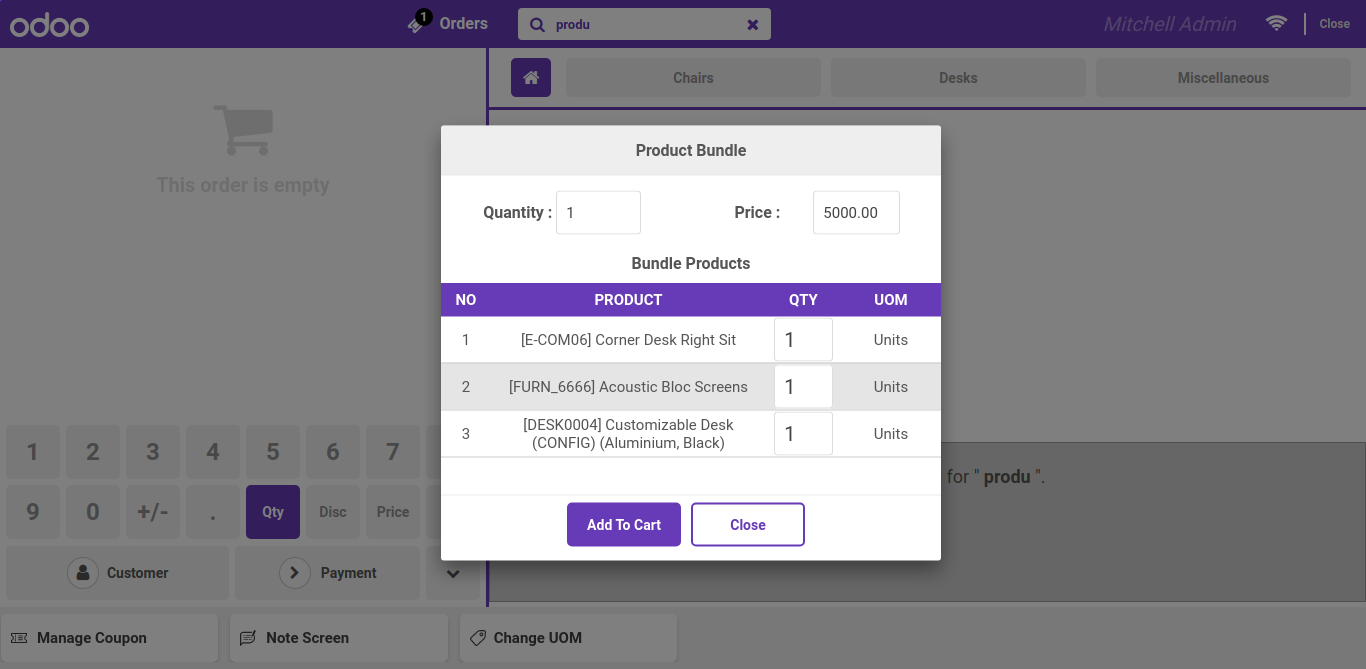
Bundle product in pos.

After select bundle product it will raise this wizard here you can see all products which are included with this bundle and select qty.
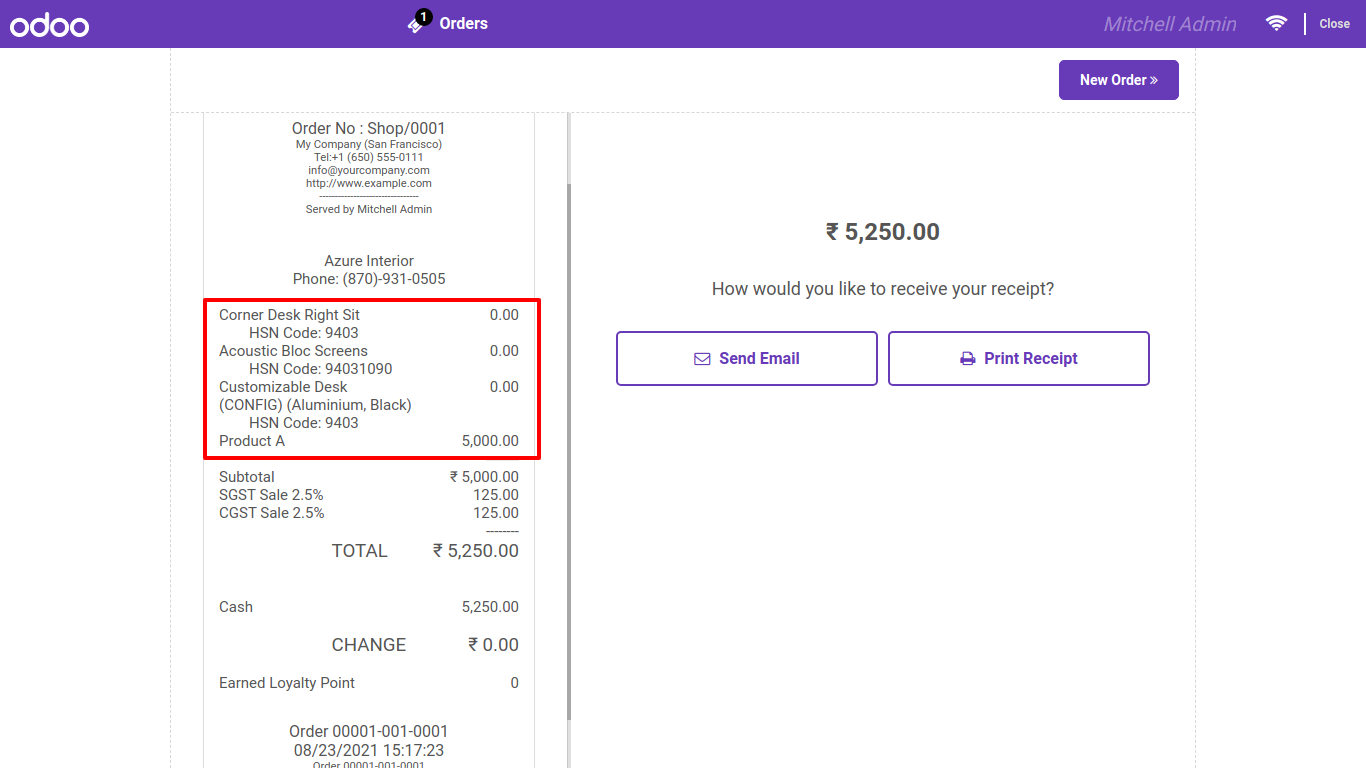
Bundle product in pos receipt.
Goto user setting --> Enable all pos setting which are require for spacific users..
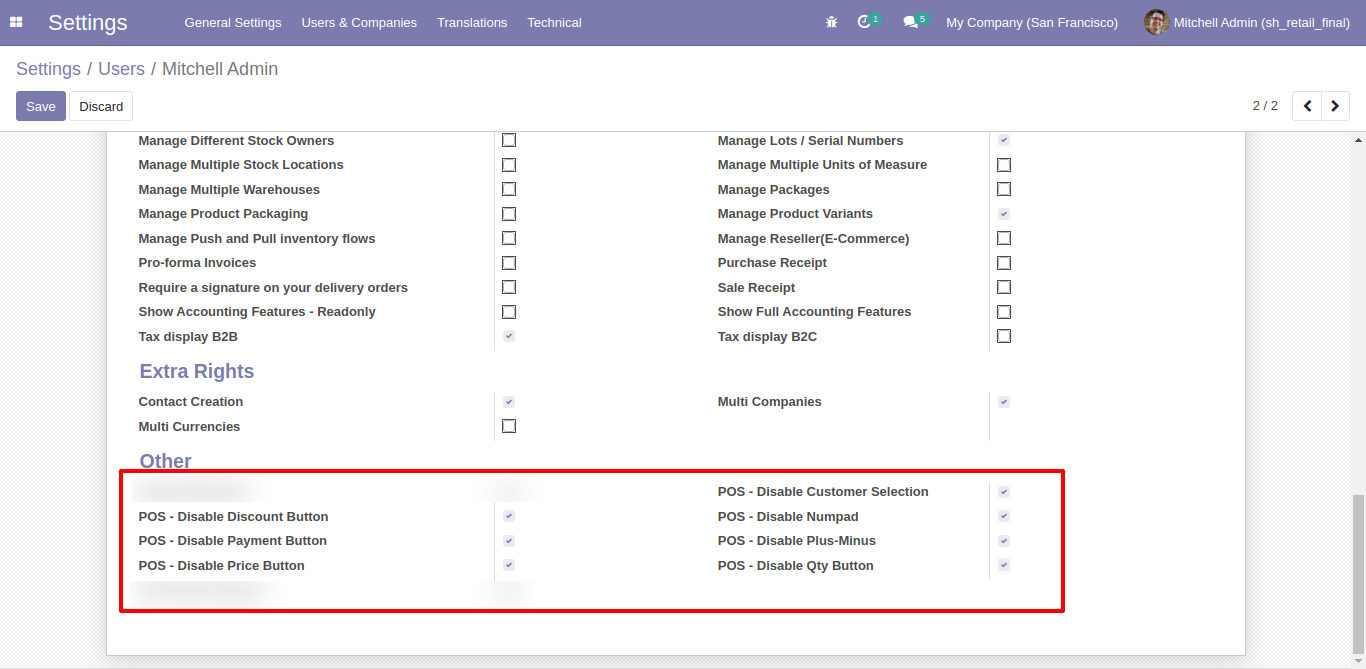
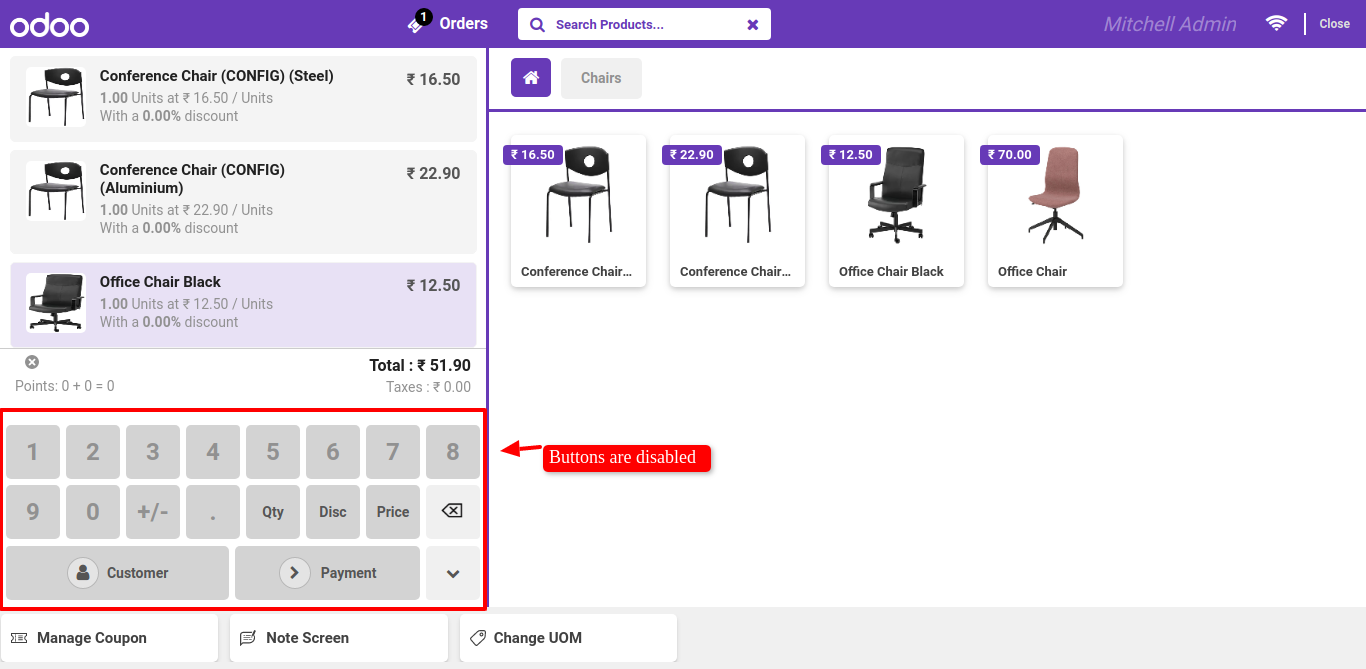
After Apply.
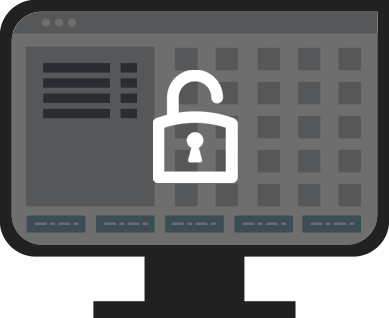
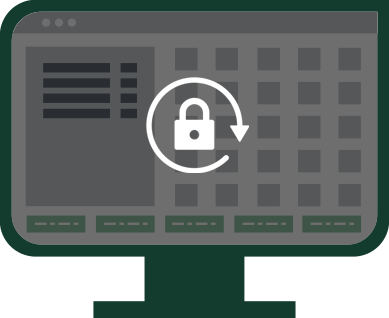
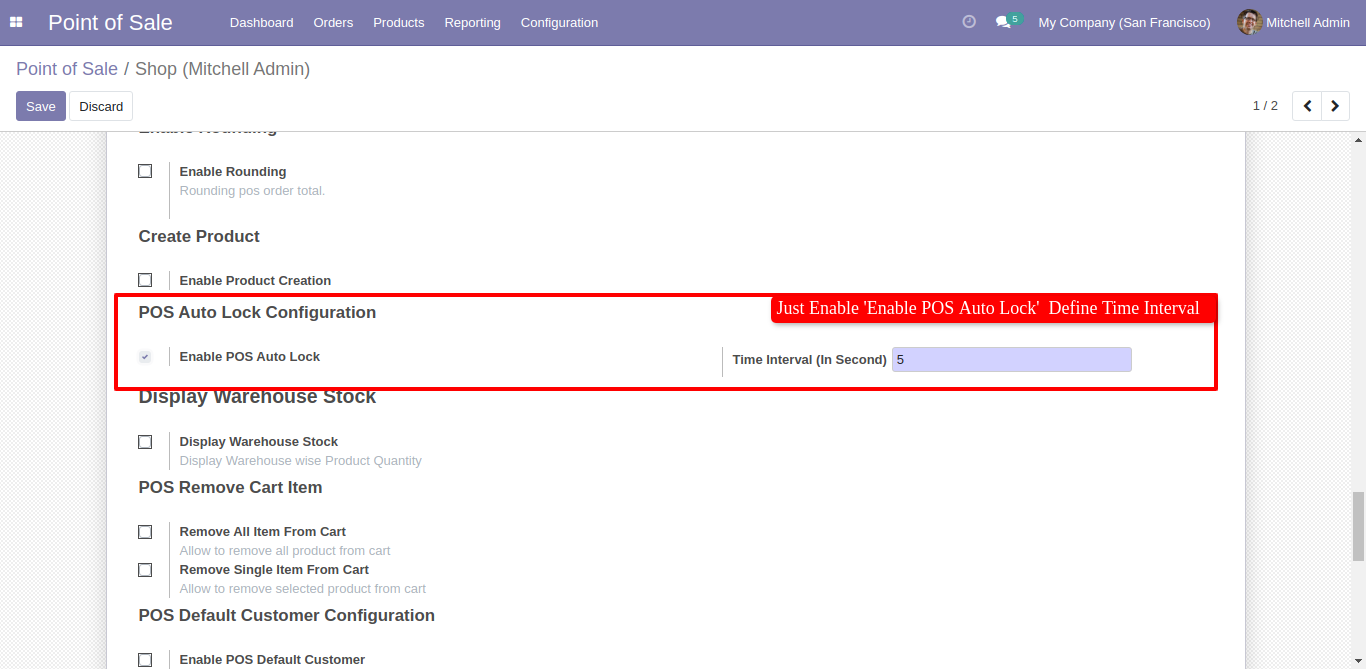
Goto theme setting ---> Enable Auto Lock and set auto lock apply after delay time.
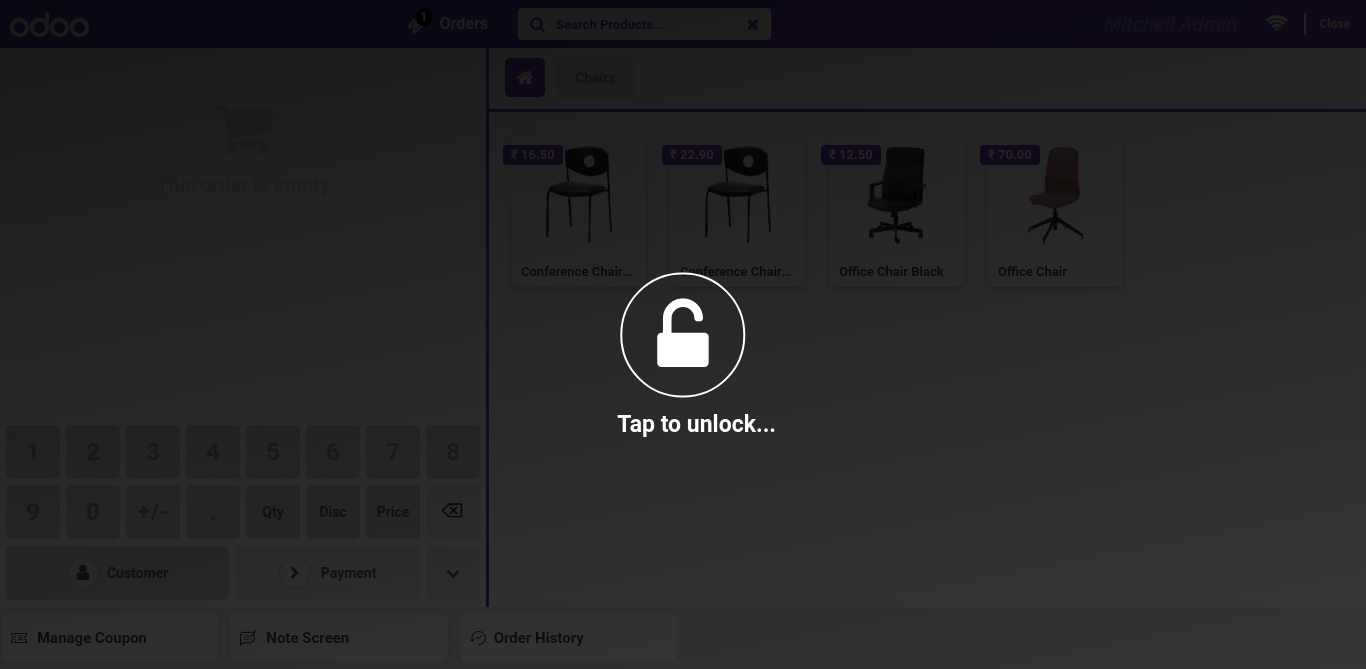
POS Screen Locked
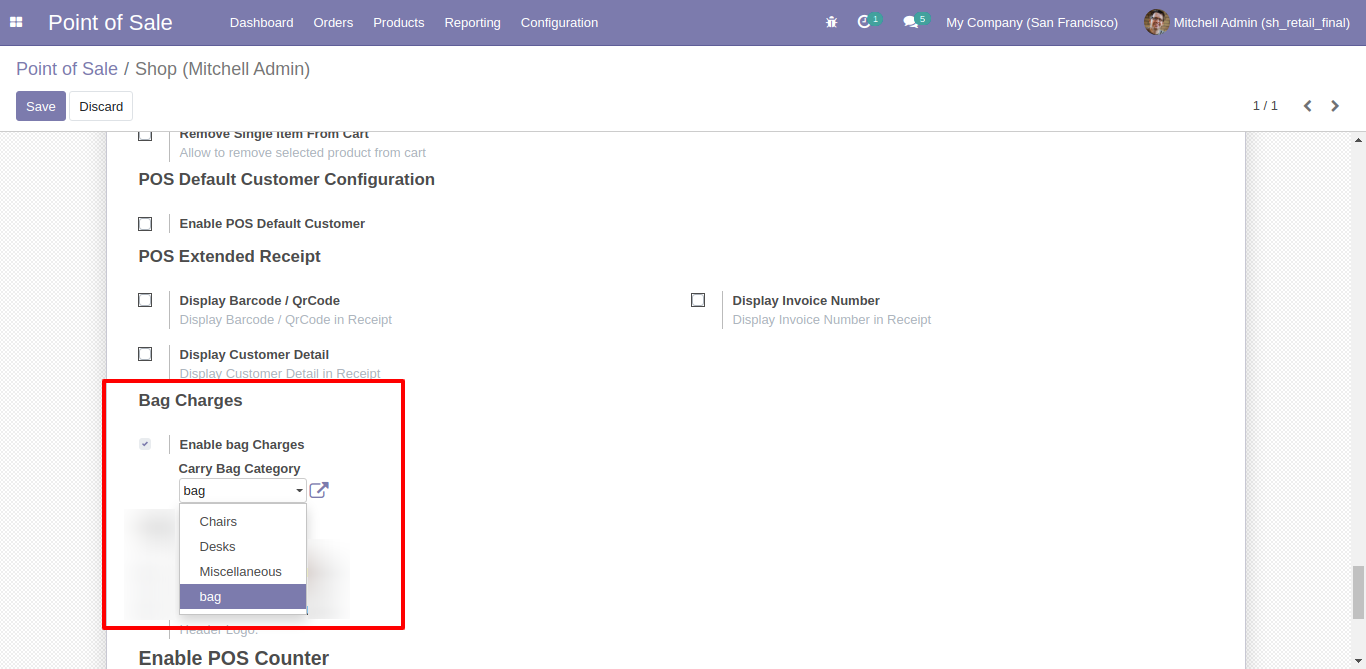
Goto theme setting ---> Enable bag charges and add bag product category.
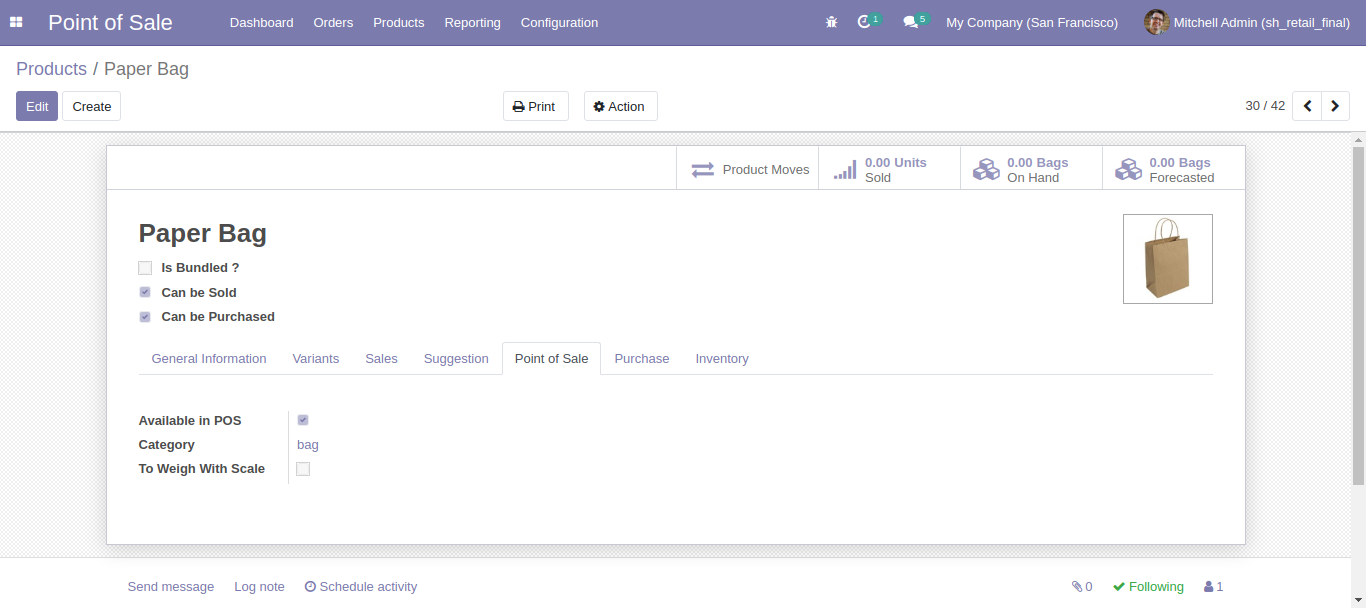
Make your bag products ...
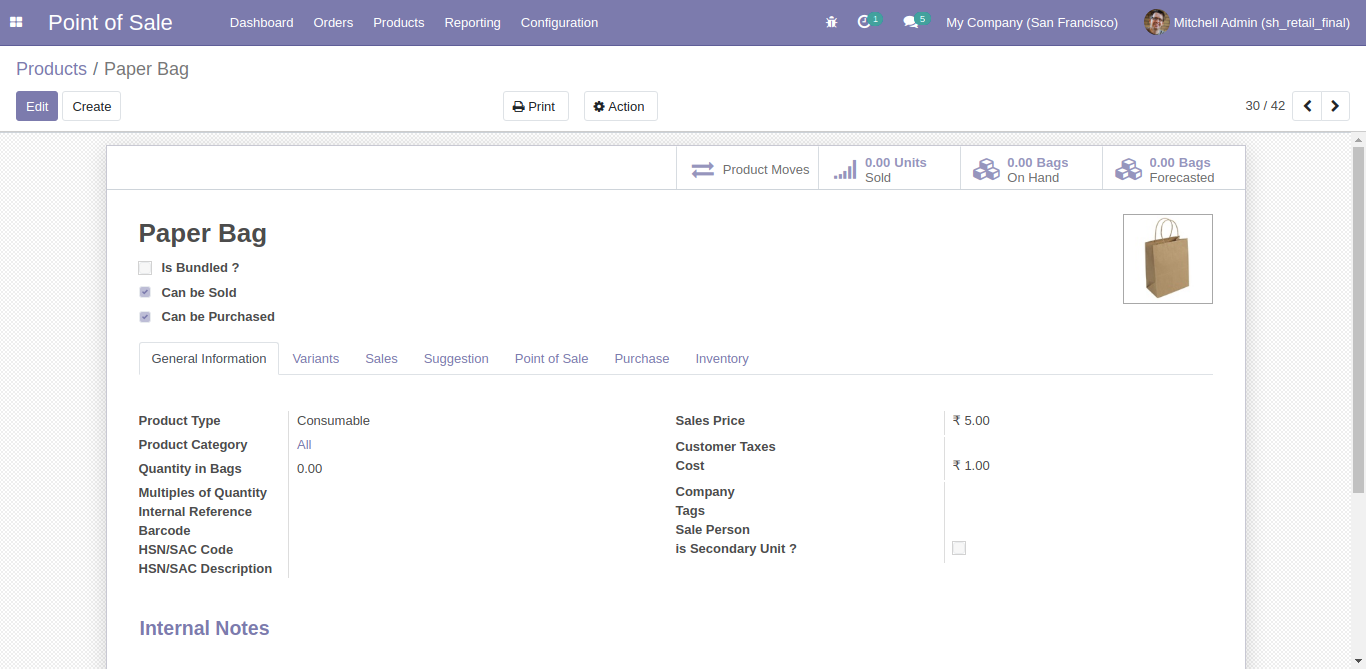
set pos category 'bag' and set available in pos.
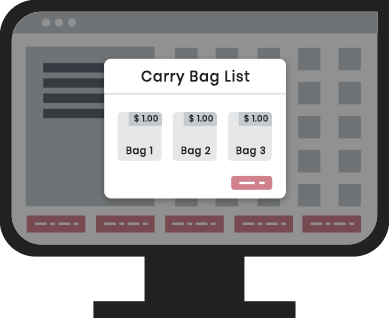
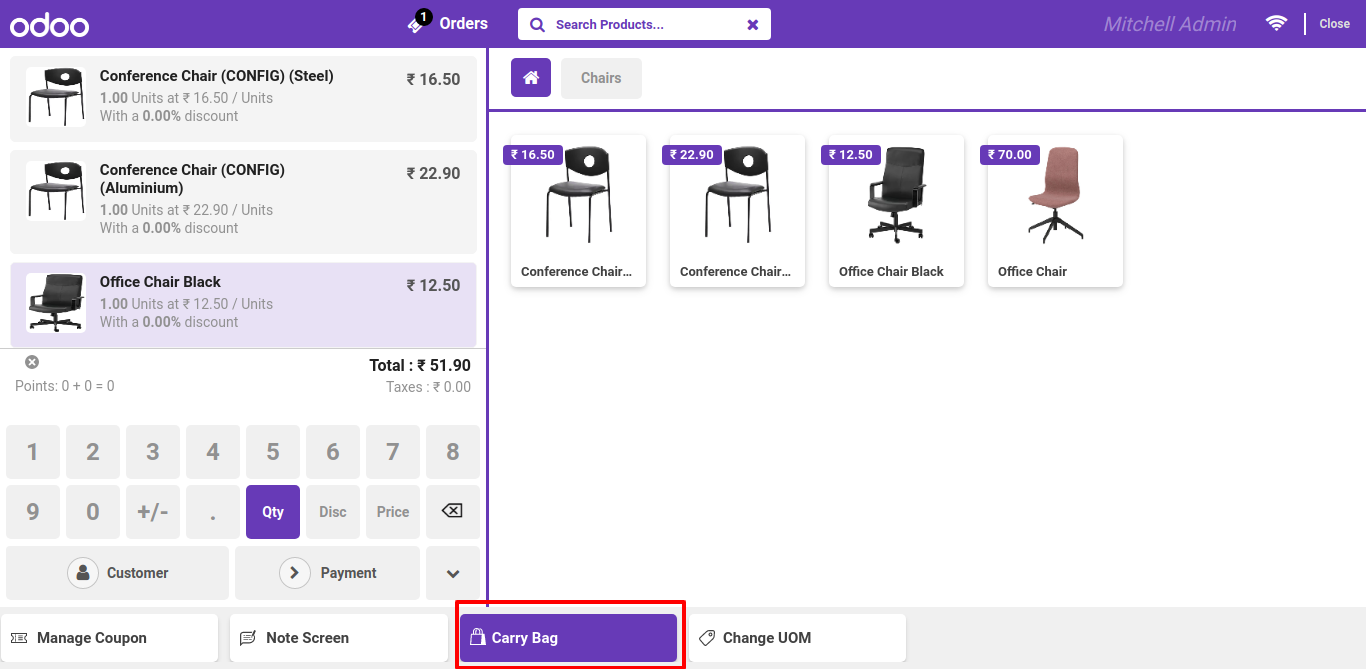
Here in pos, 'Bag Charges' button visible.
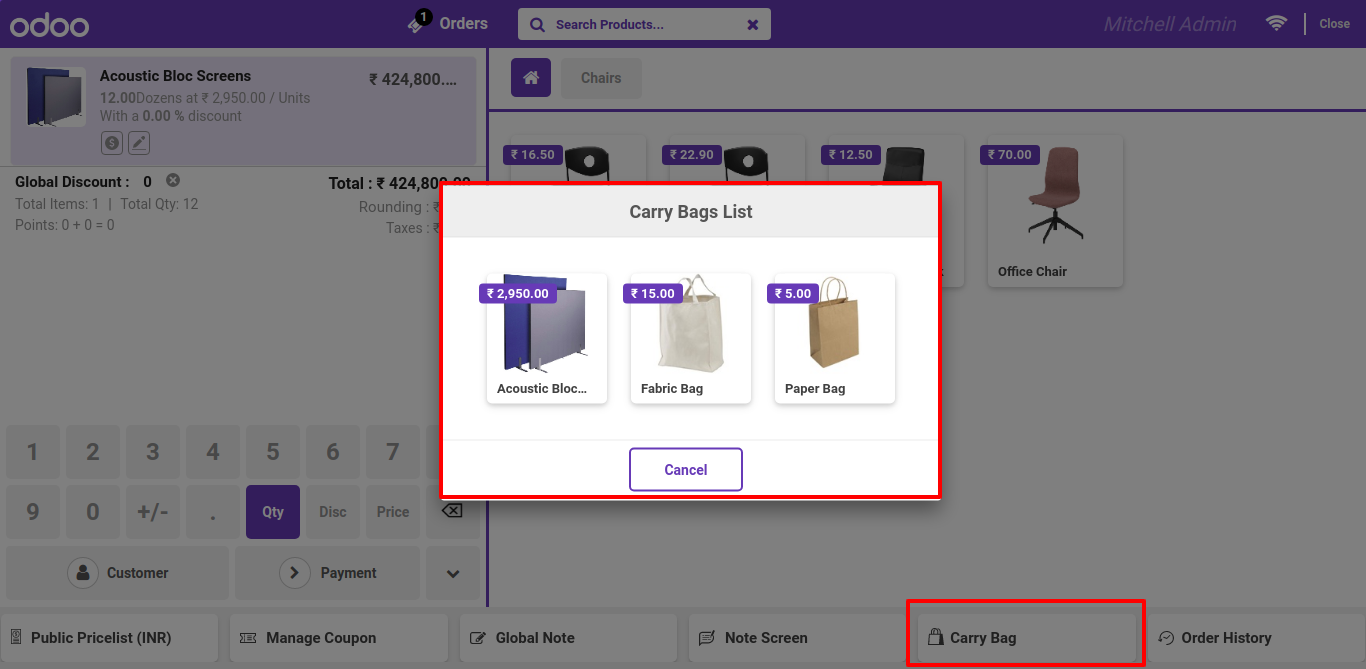
After click on that button, this wizard will popout, here you have to select one or more bag products.
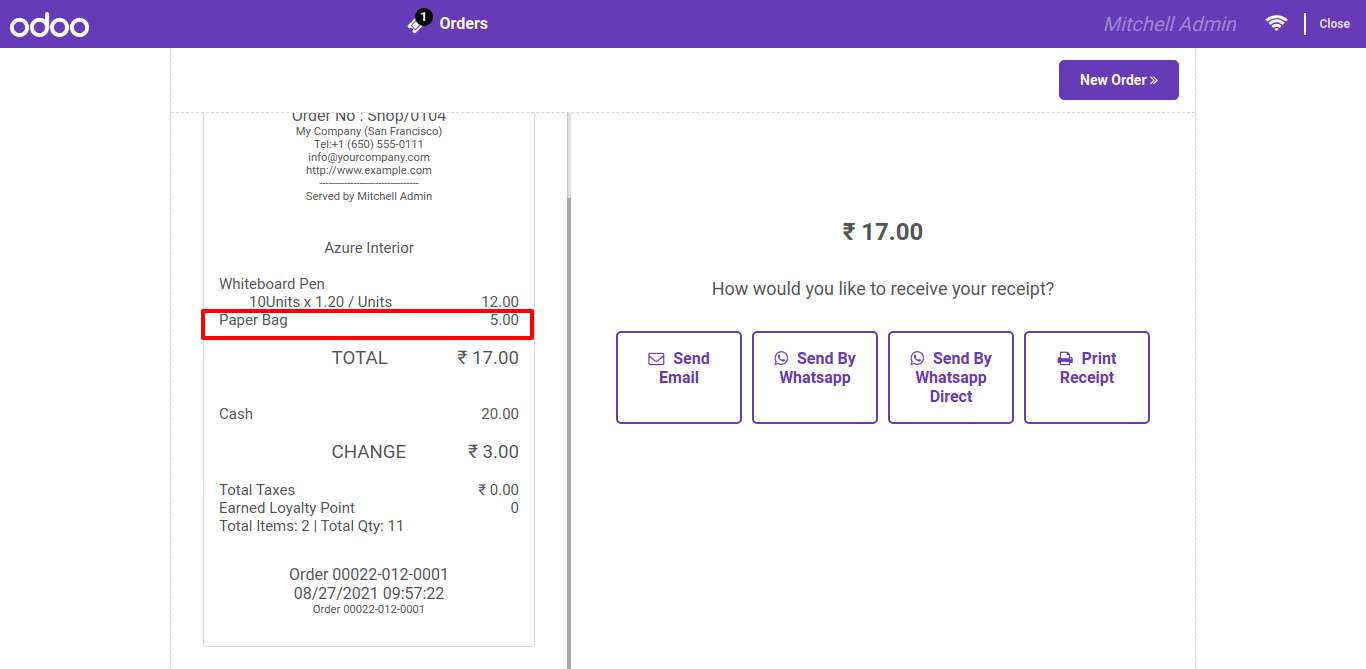
Bag charges applied, see this info on pos receipt.
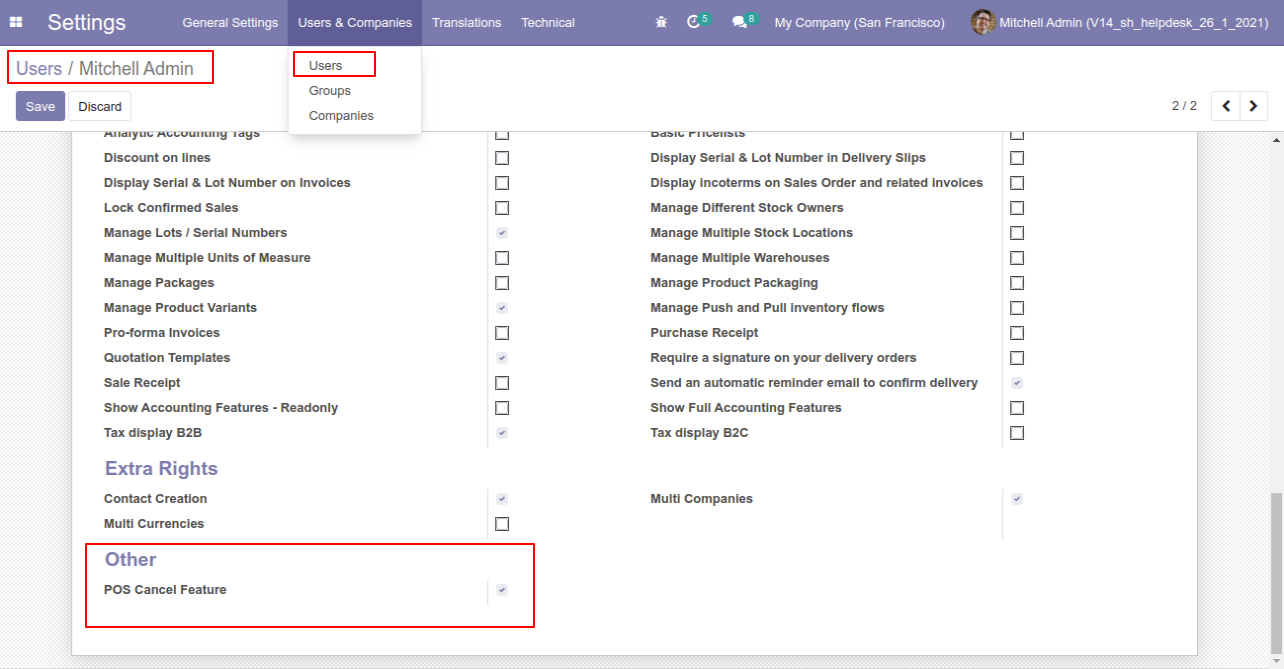
Goto user setting and enable 'POS Cancel Features'.
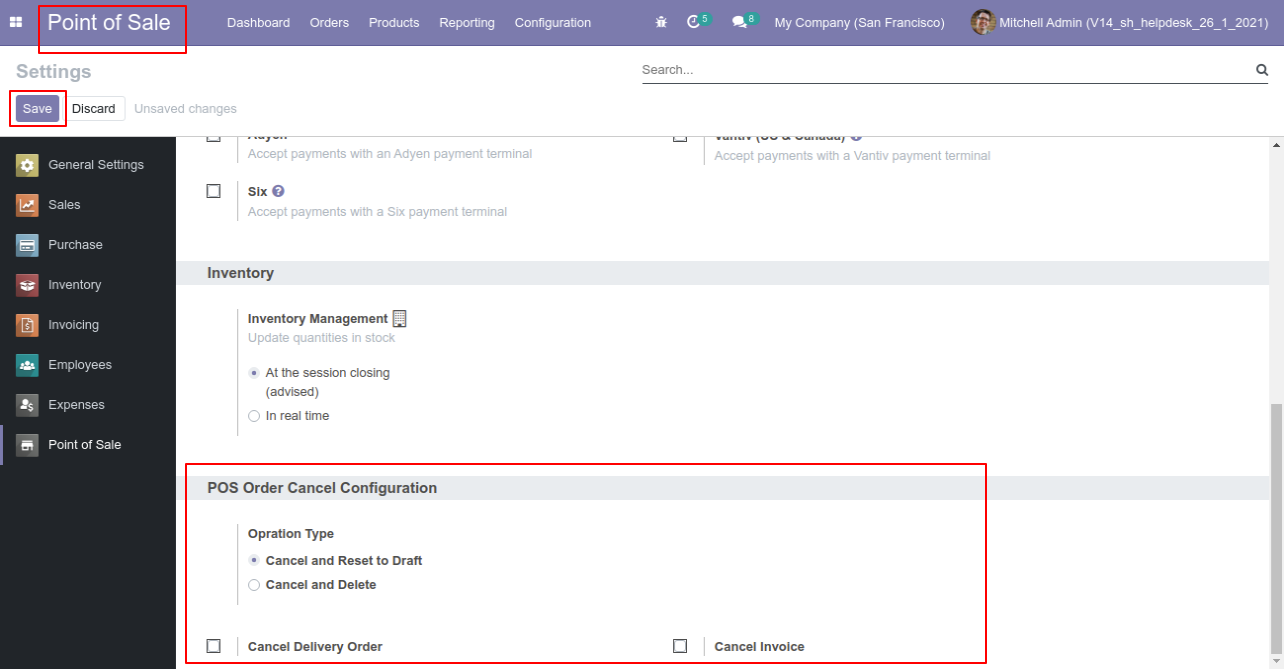
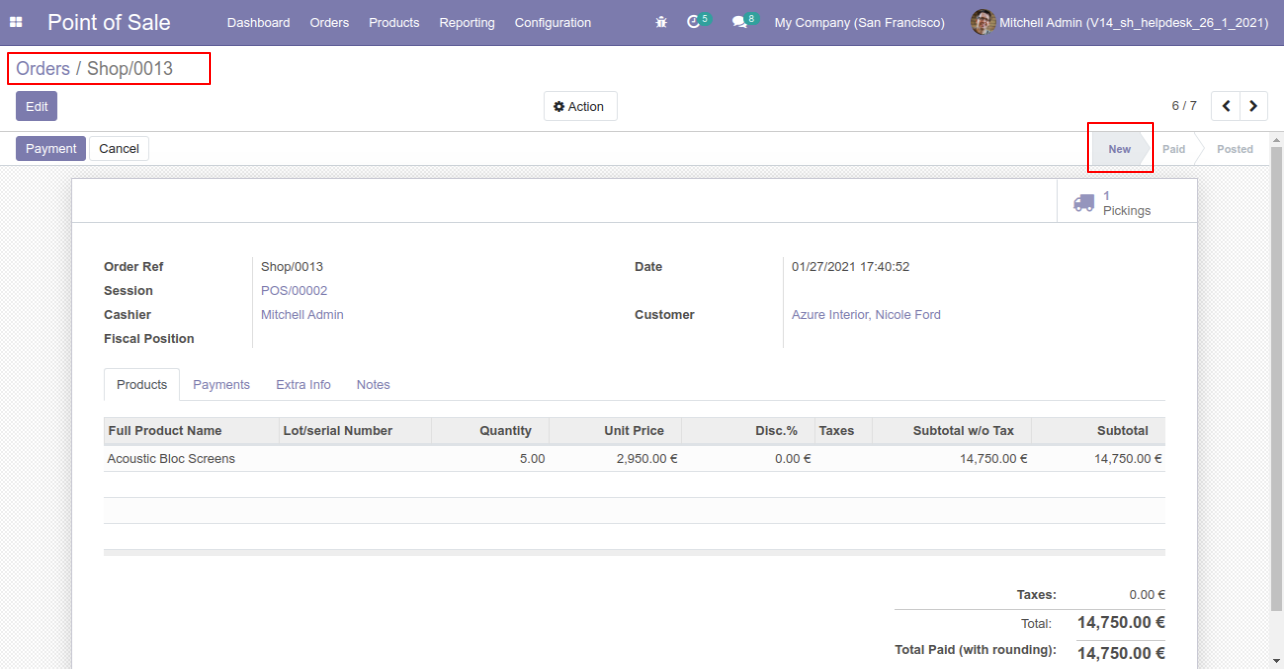
Now got point of sale setting and enable 'Cancel and Reset Draf' option.
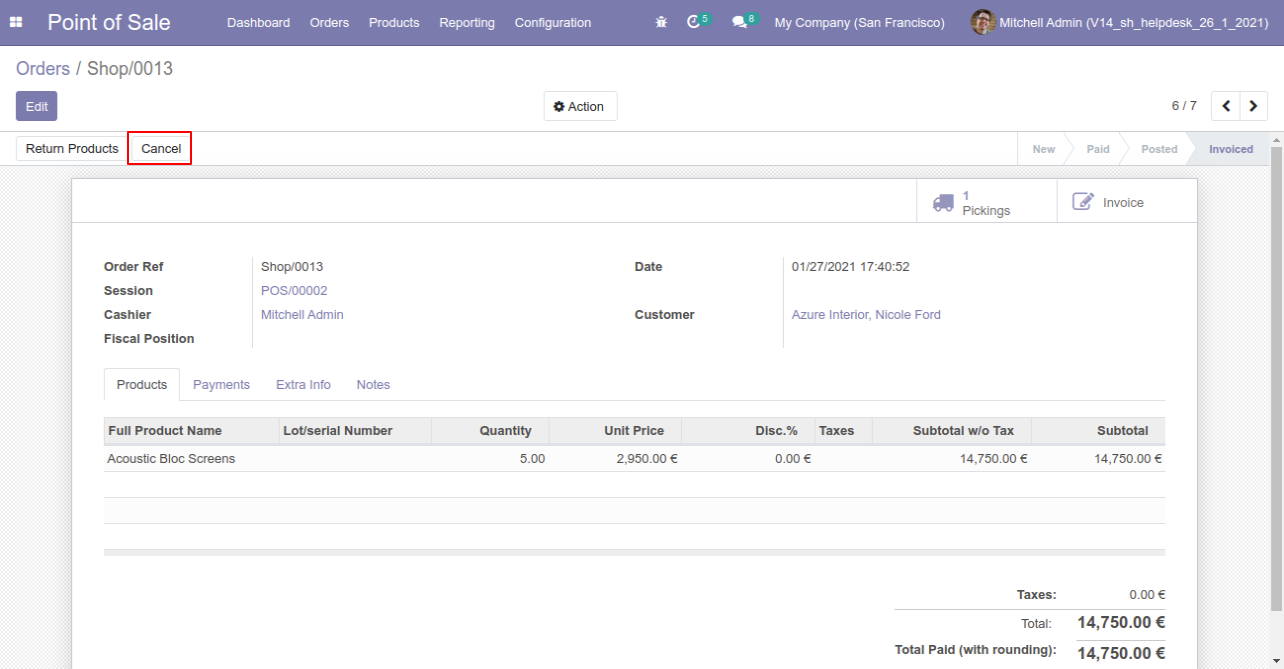
pos order 13 in invoice stage
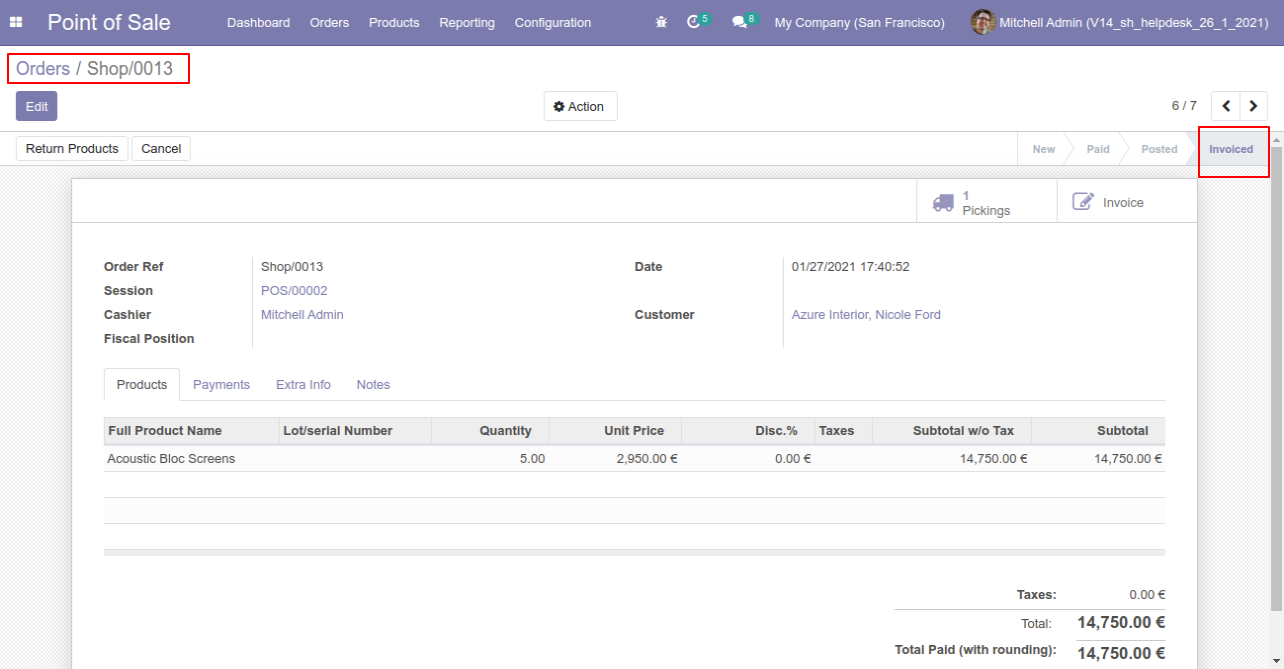
Now click on 'cancel'.
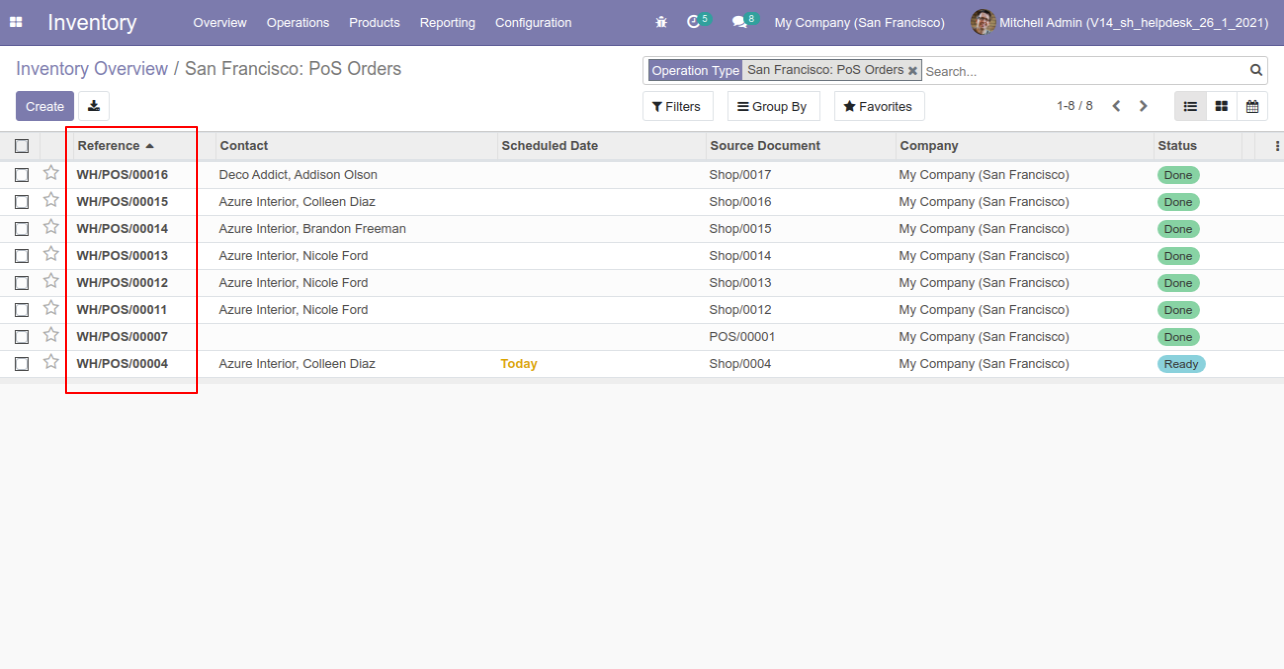
After click cancel order set on draft stage but delivery order and invoice are not canceled.
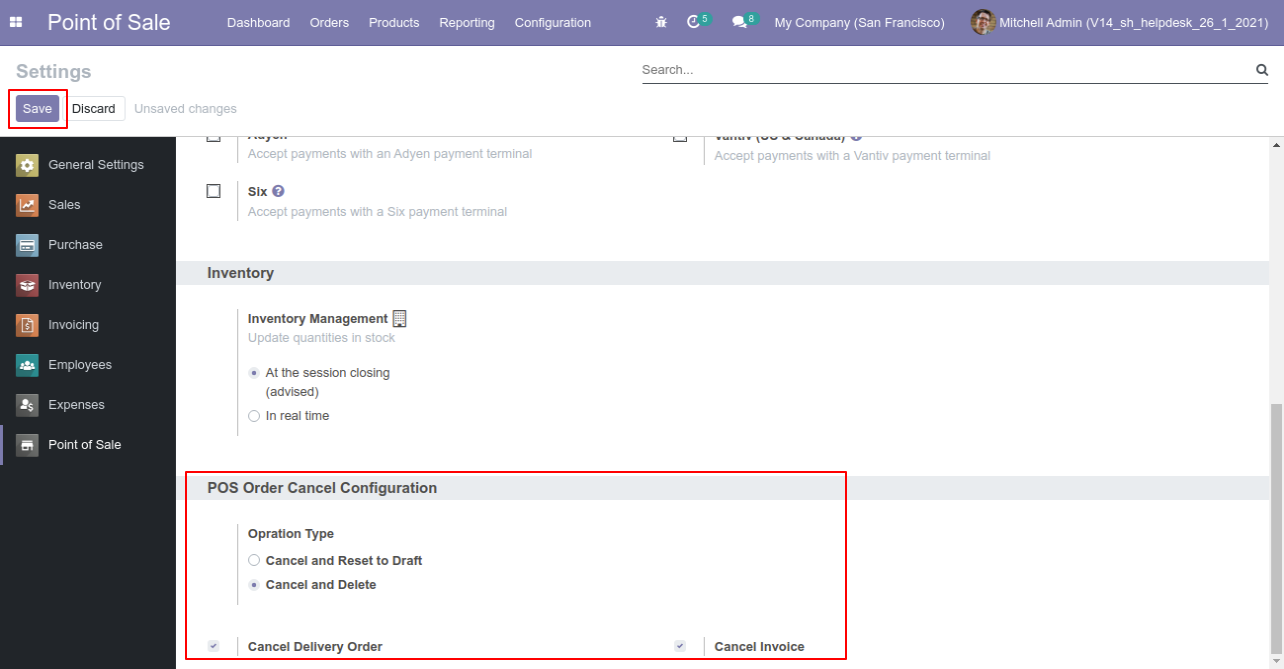
Now got point of sale setting and enable 'Cancel and Delete' with 'Cancel Delivery Order' and 'Cancel Invoice'.
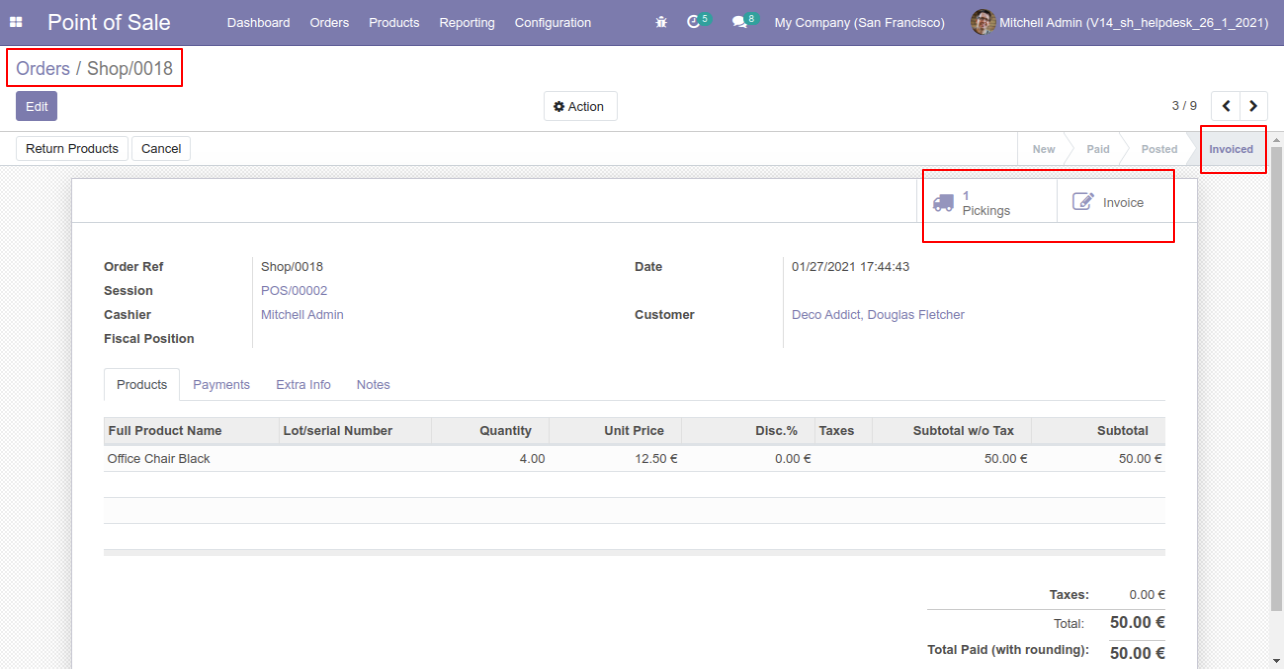
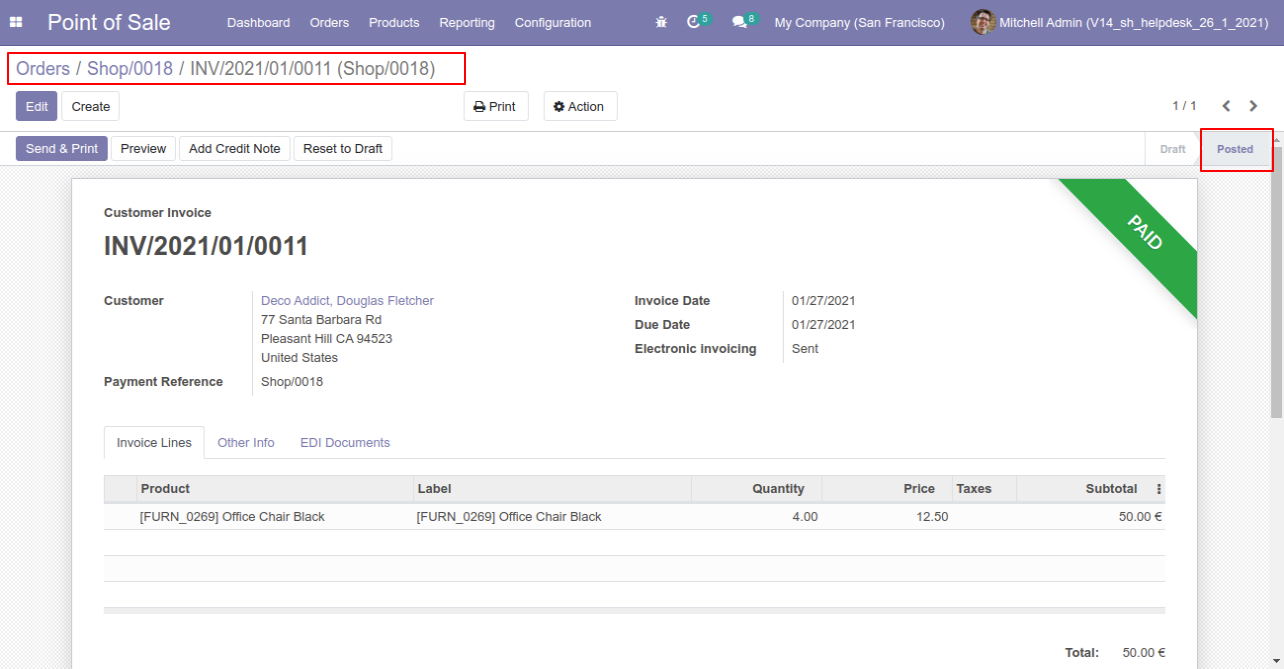
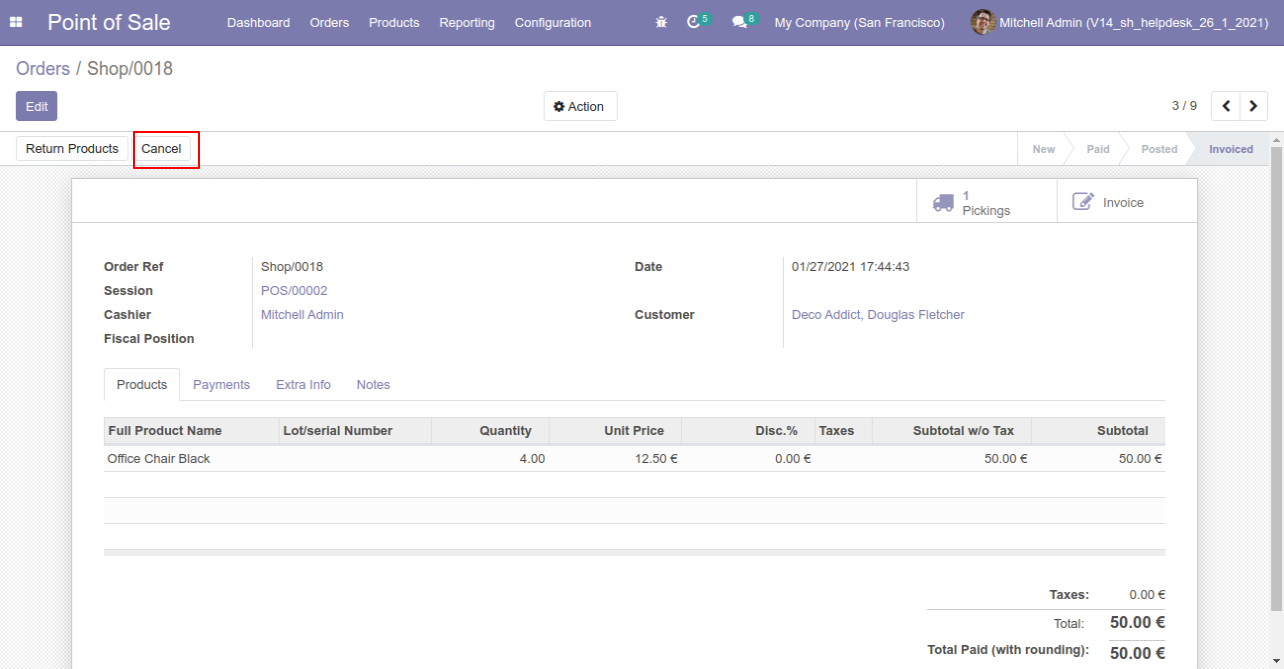
Here pos order 18 in invocie stage with delivery order.
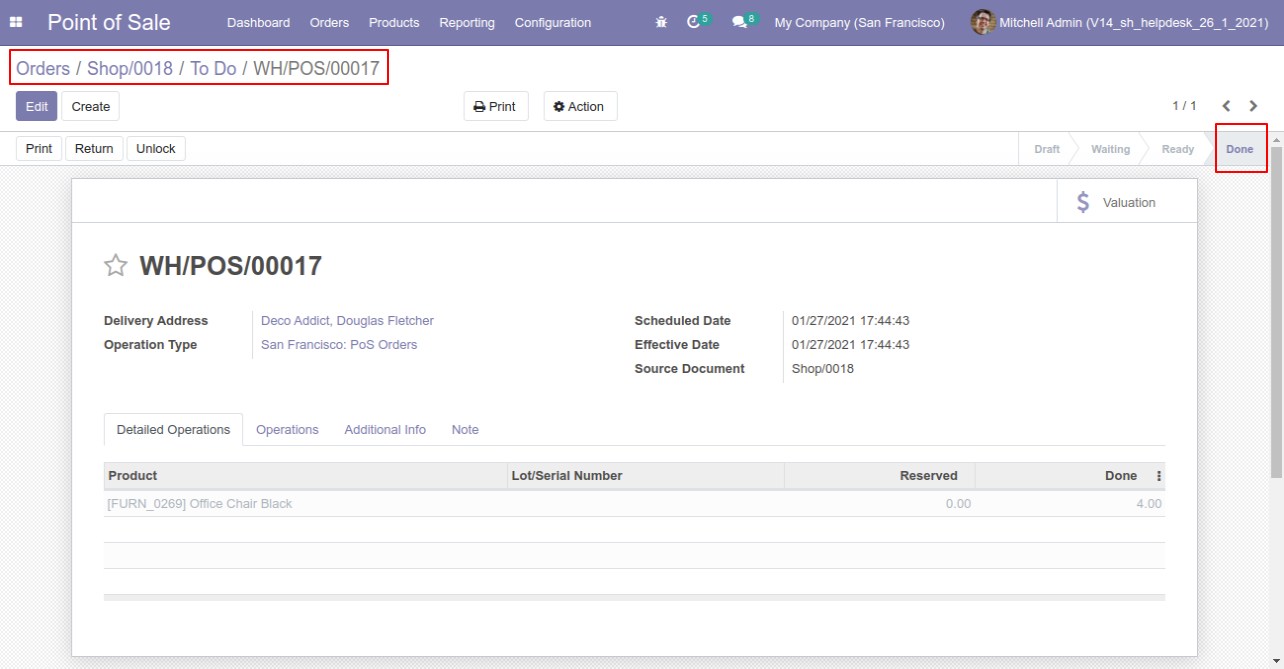
Delivery order in 'Done' stage.
invoice in paid stage.
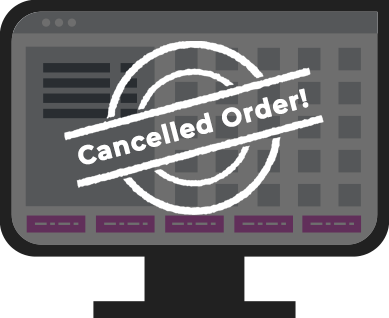
Now goto pos order and click cancel button.
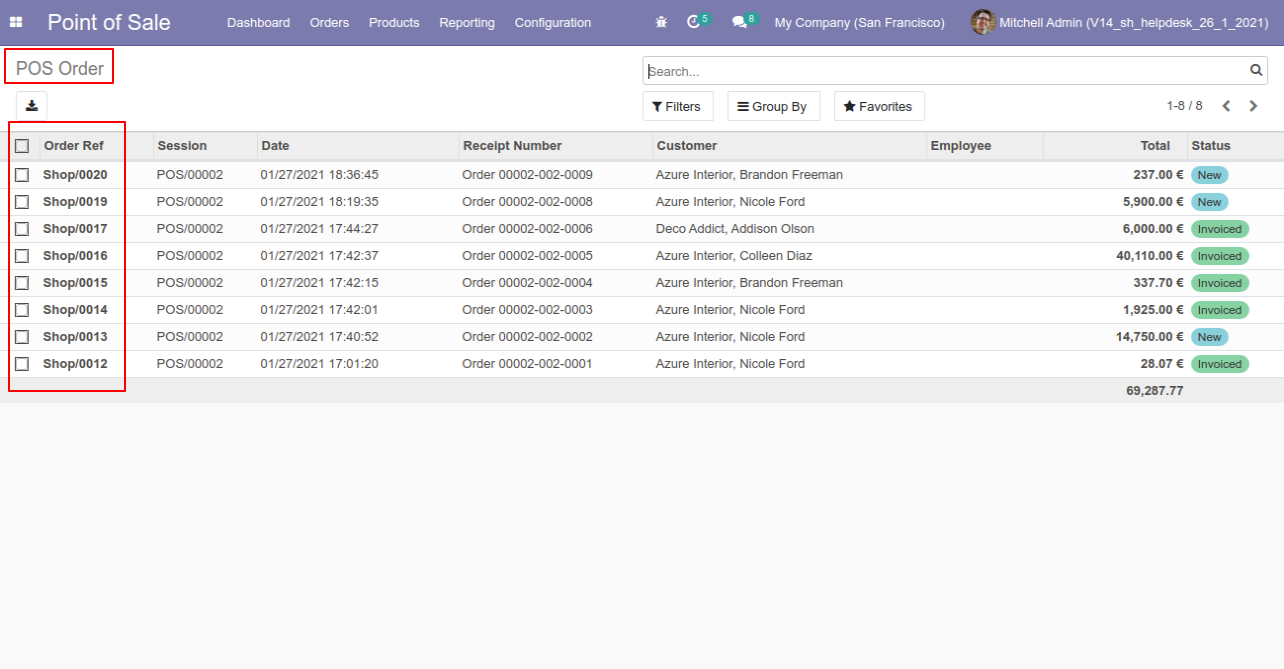
After cancel that order will be deleted from the list.
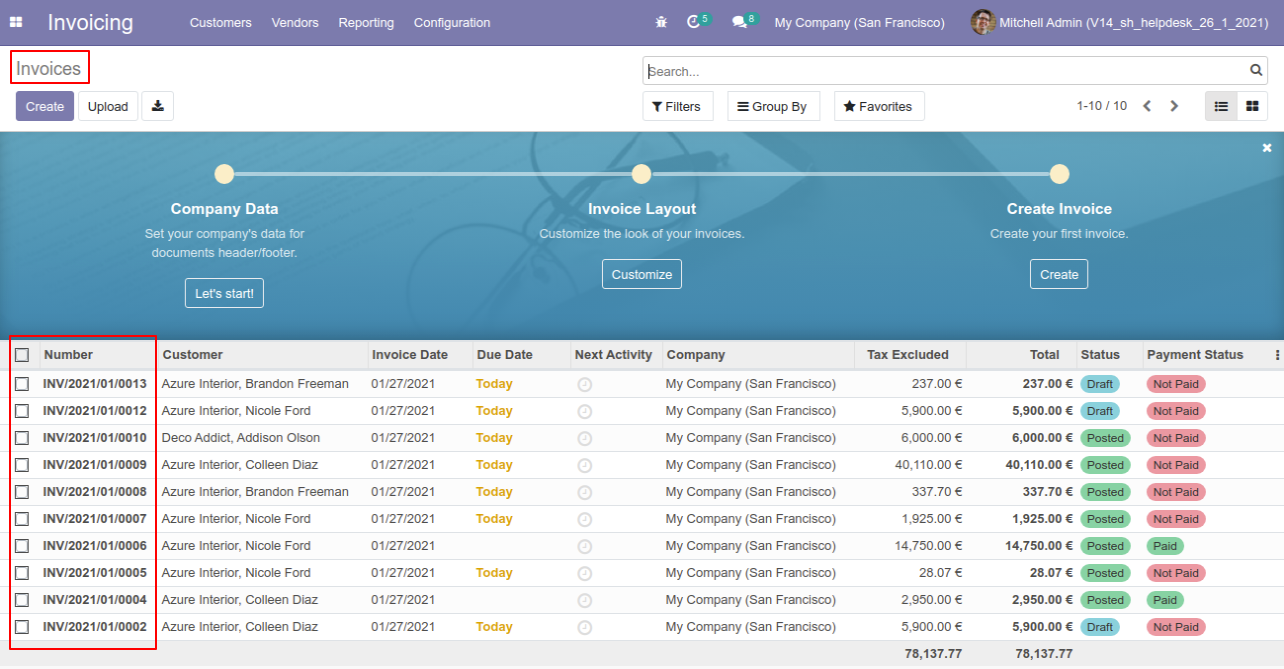
Invoice will also removed.
Delivery order also removed.
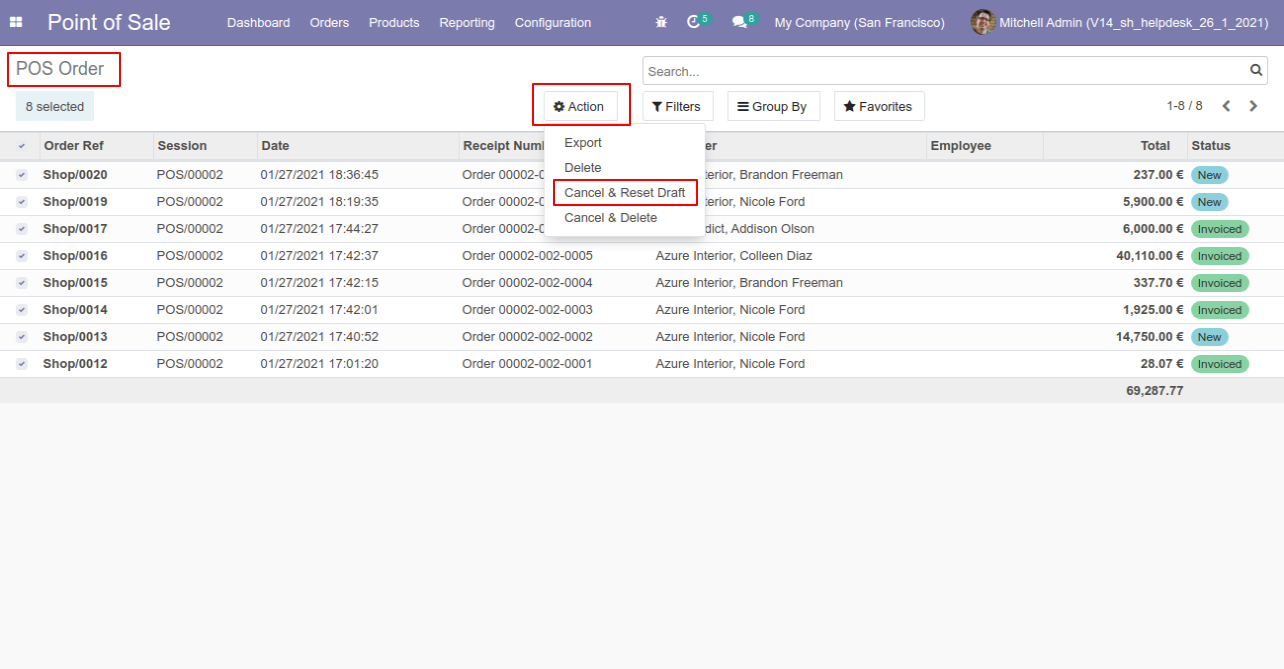
you can cancel more than one order. Just select order list and click 'Cancel and Reset Draft'
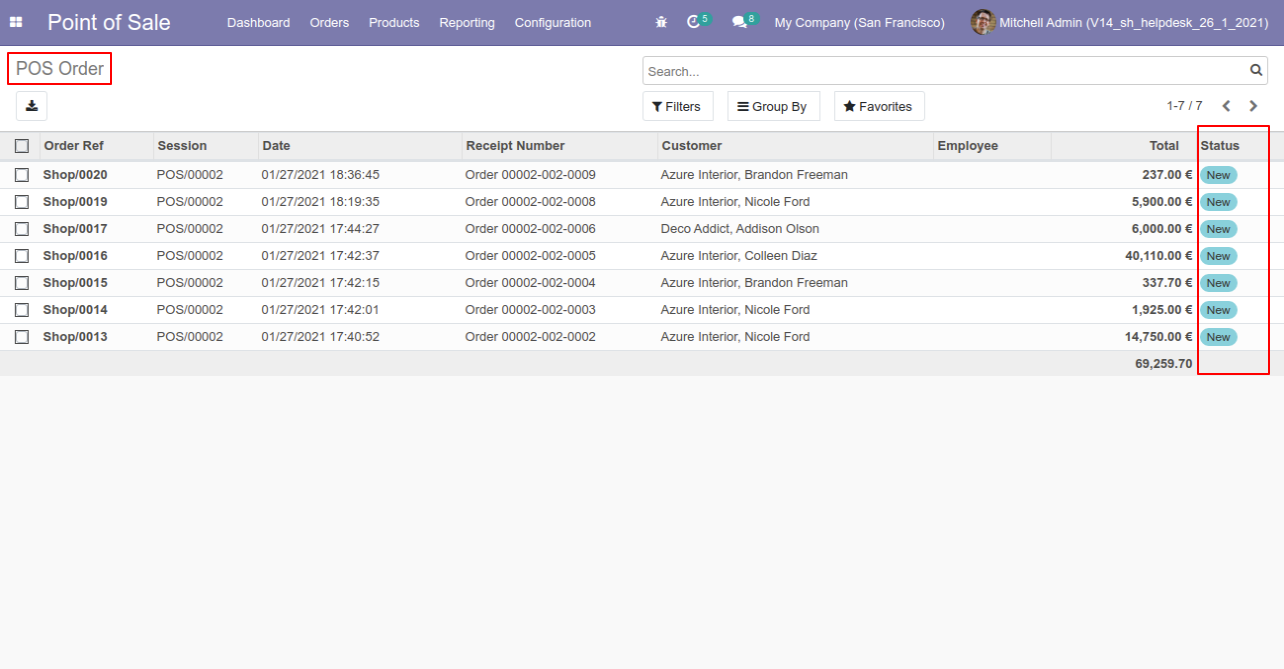
After that all orders are set in new stage.
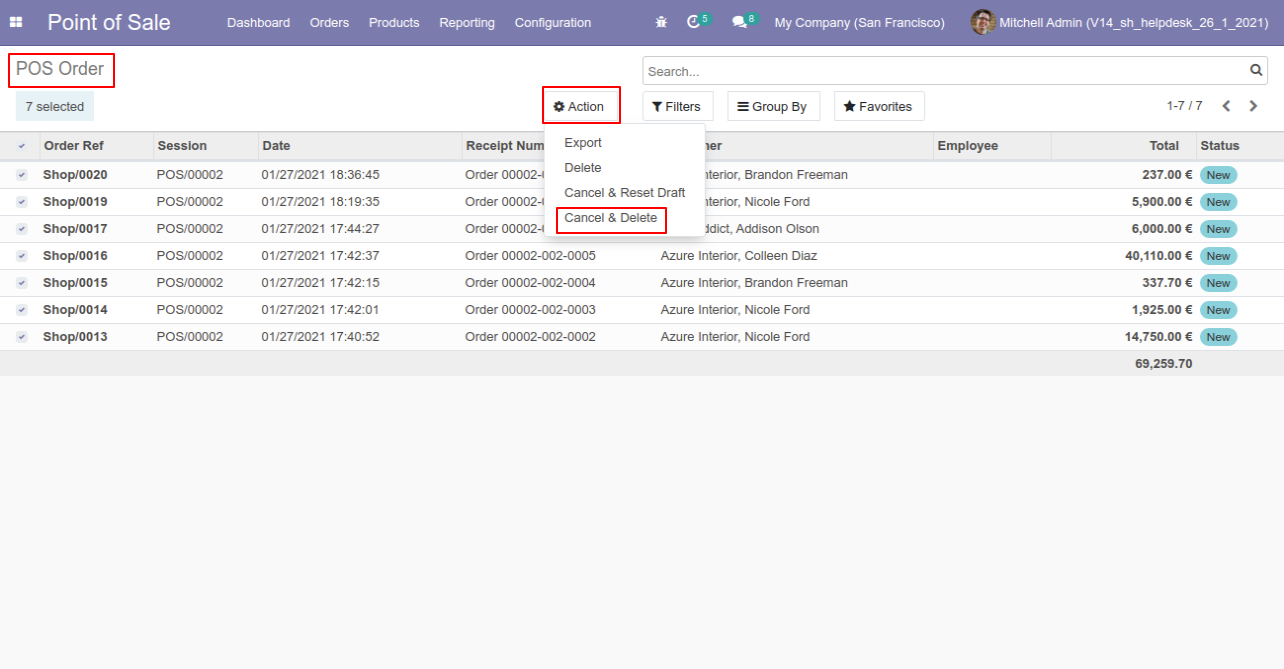
you can delete more than one order. Just select order list and click 'Cancel and Delete'
After that all order will be delete.
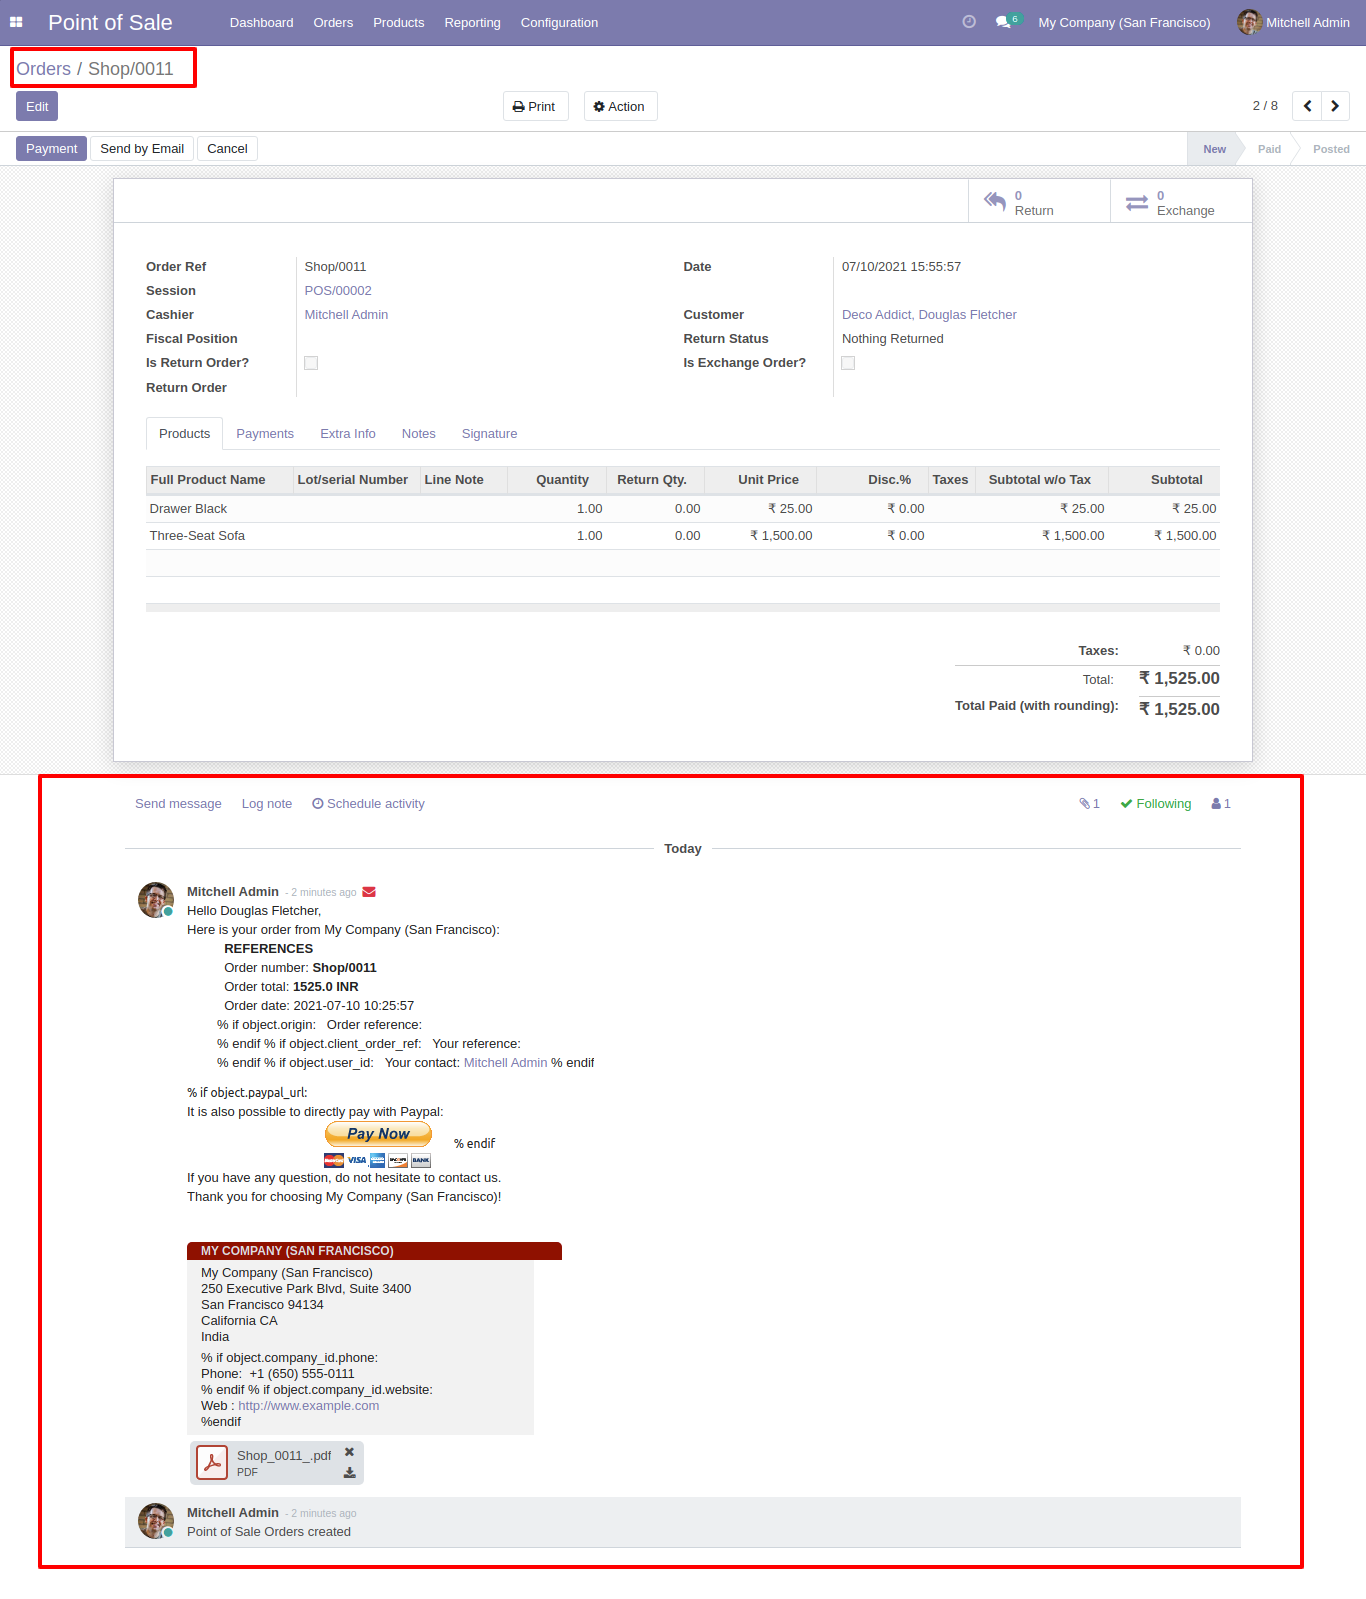
You can see the whole activity in pos order chatter option.
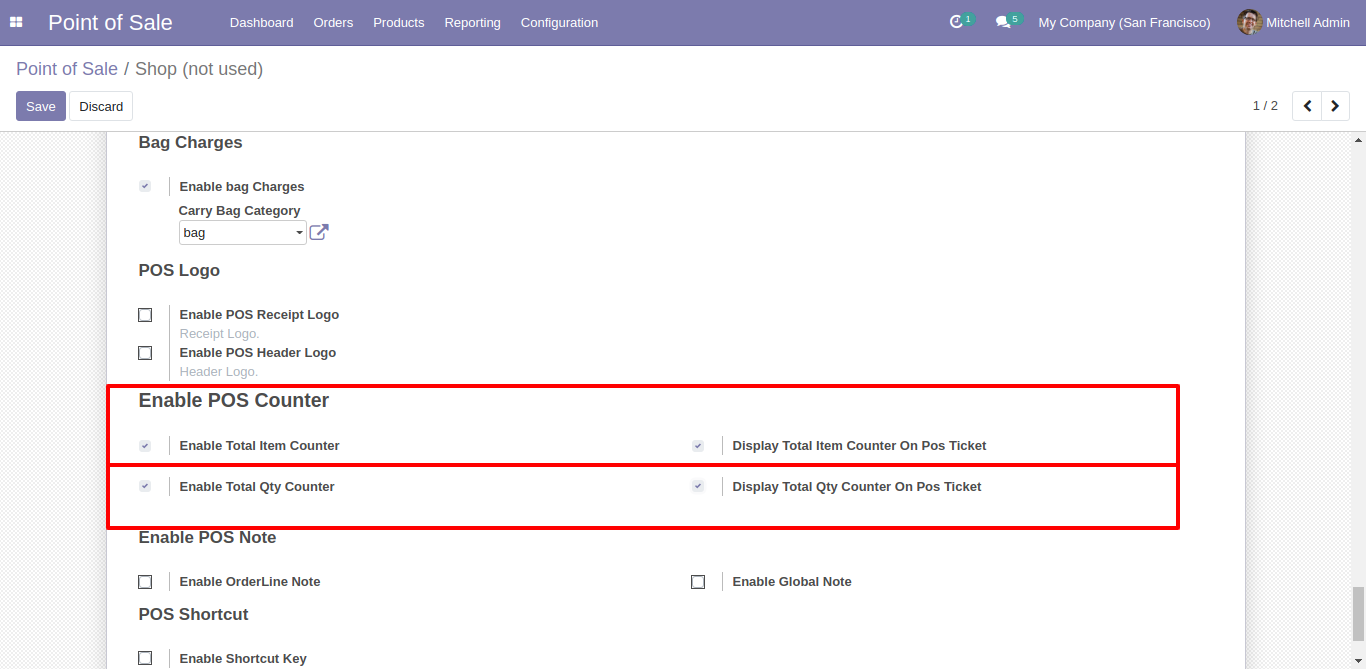
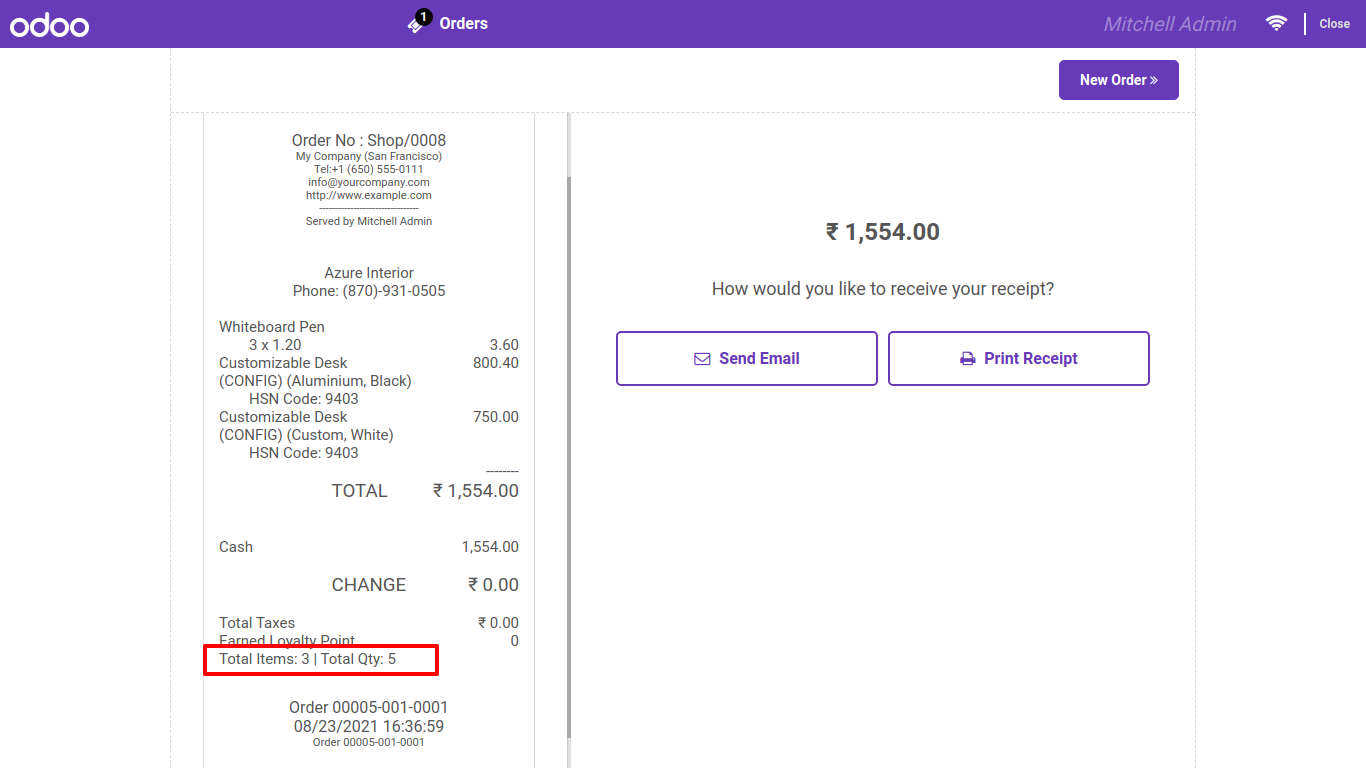
Goto pos setting and enable 'Enable Pos Counter'. and enable appropriate options.
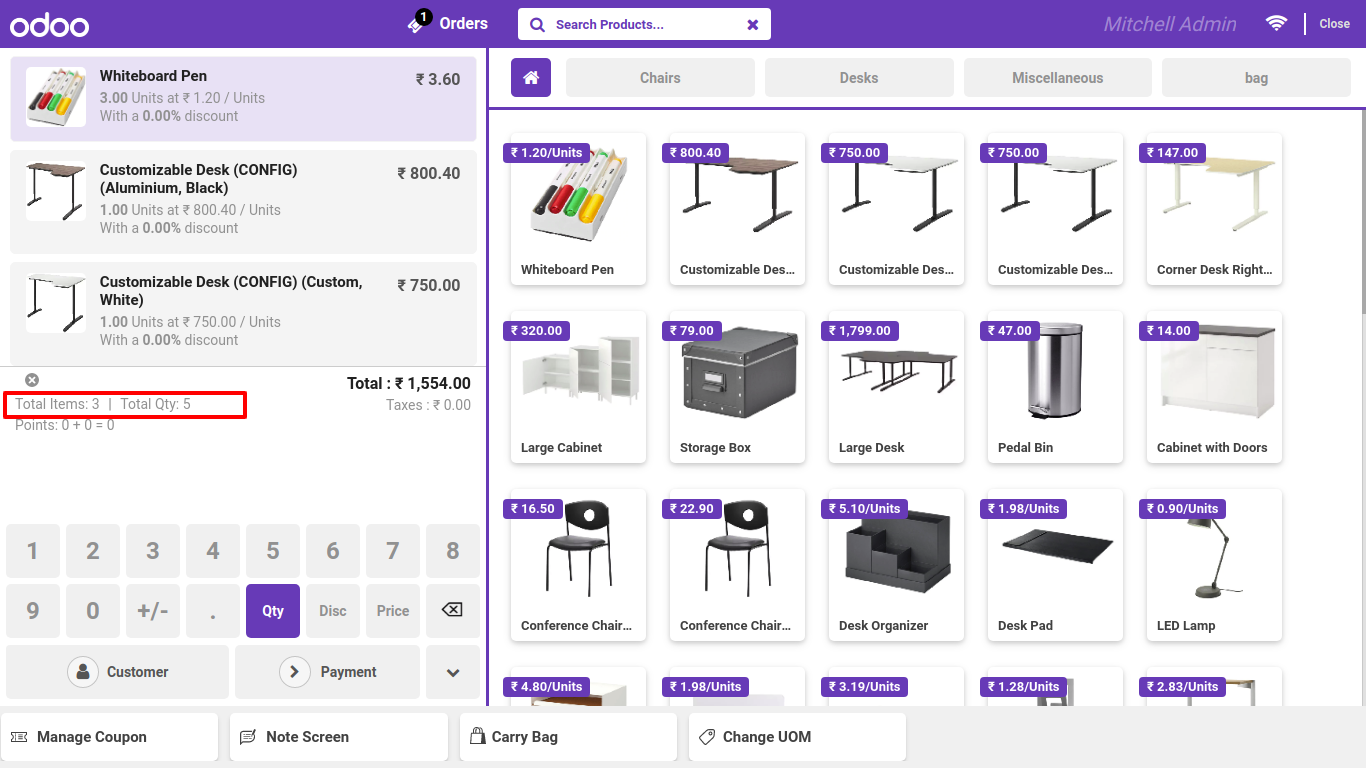
You can see the counter in pos cart.
product counter details in pos receipts
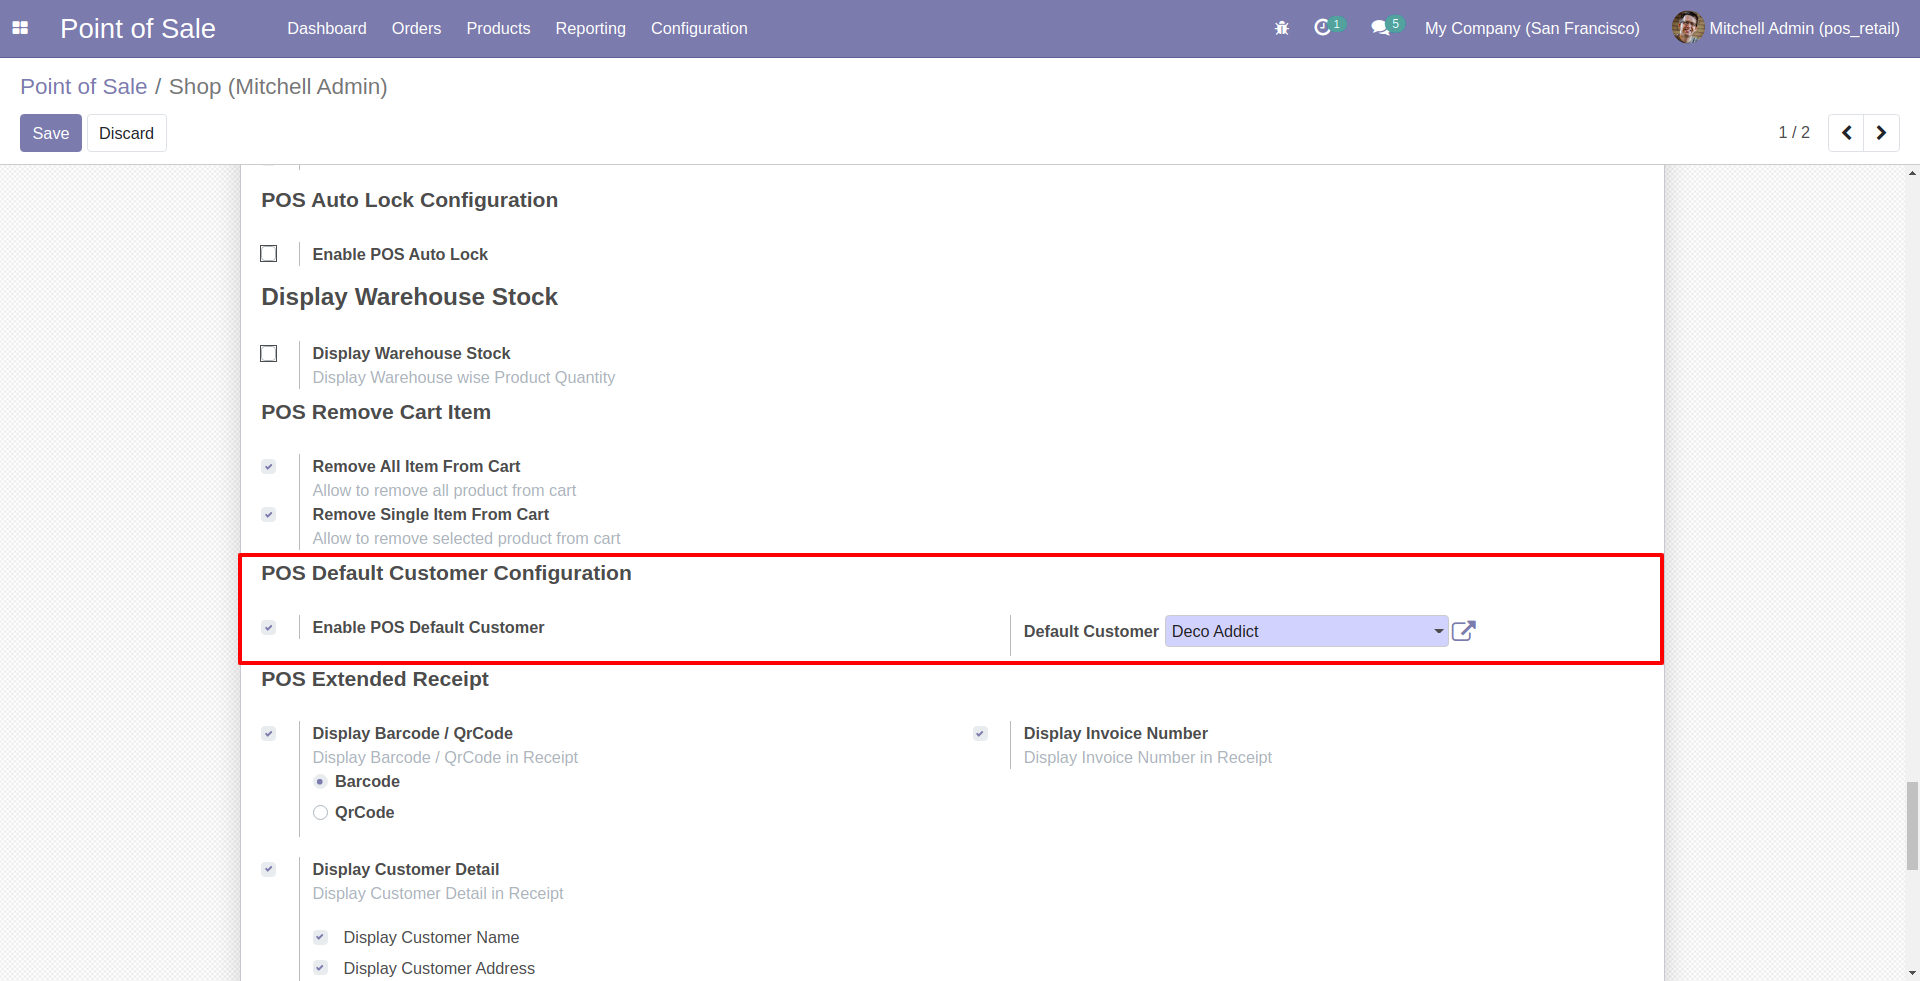
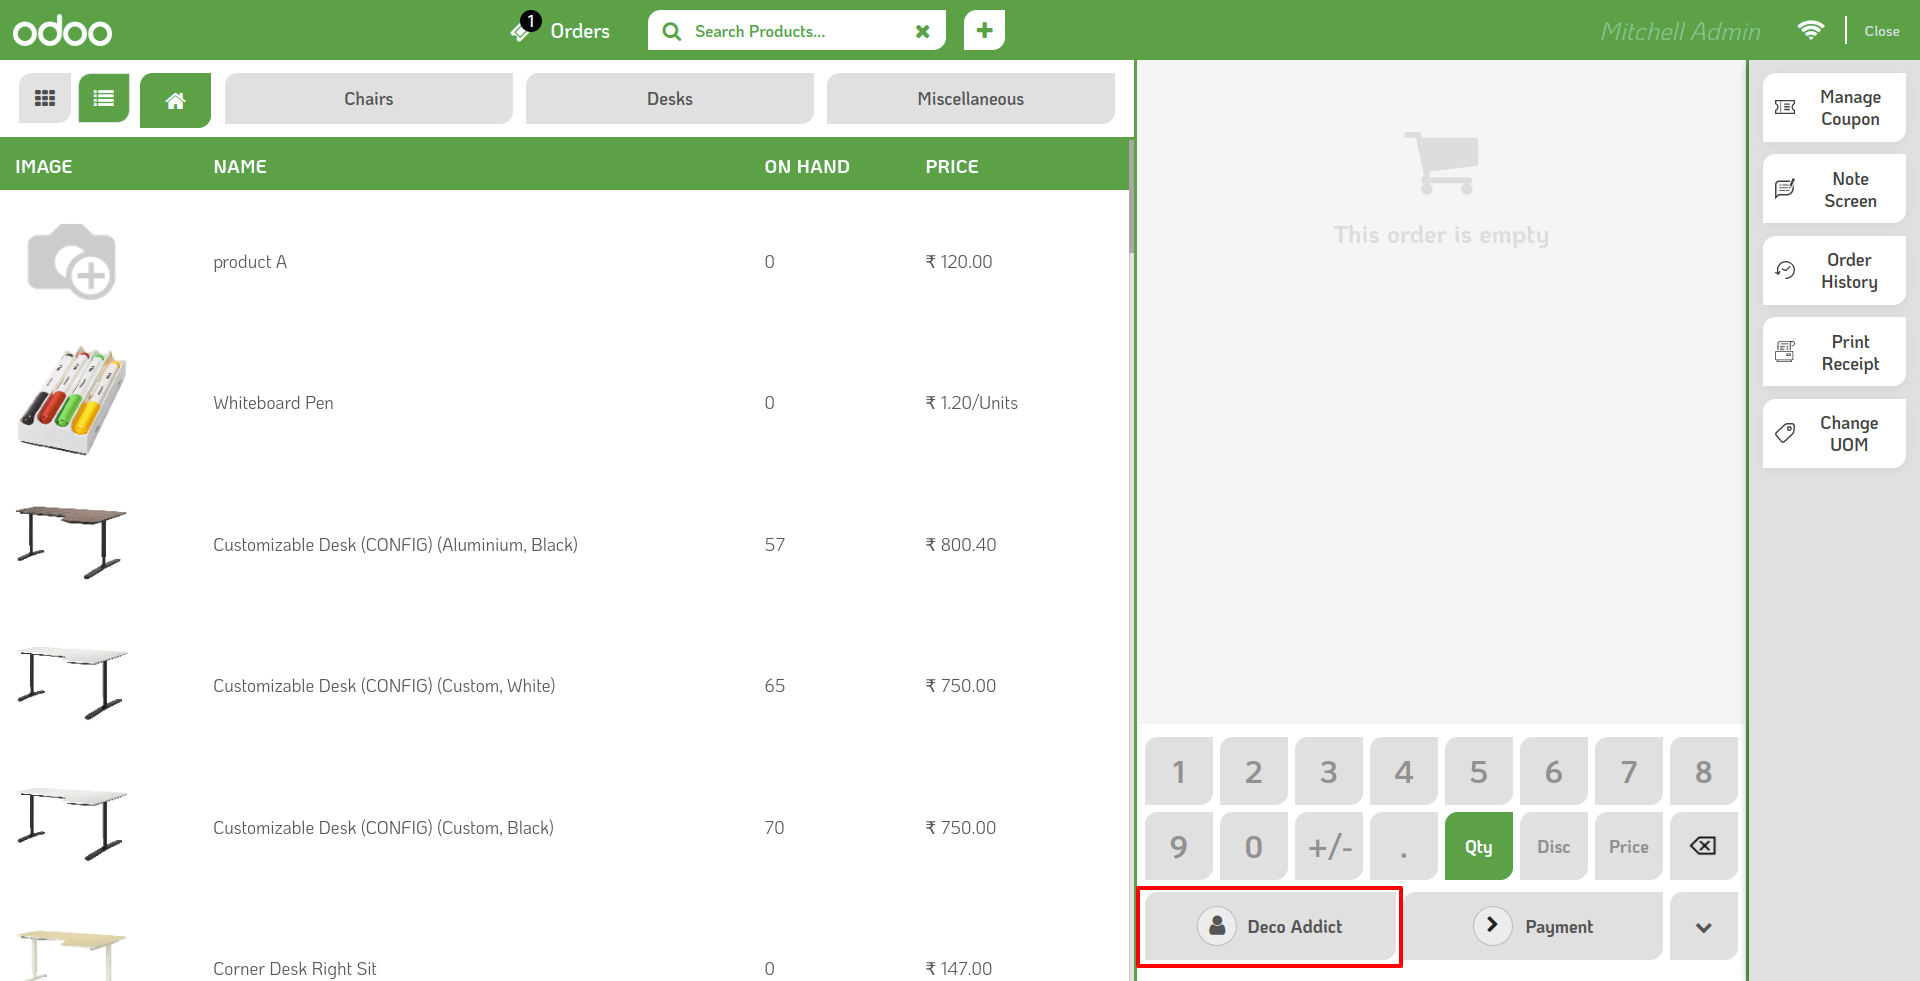
Goto pos setting and enable 'Default Customer Feature' and set default customer.
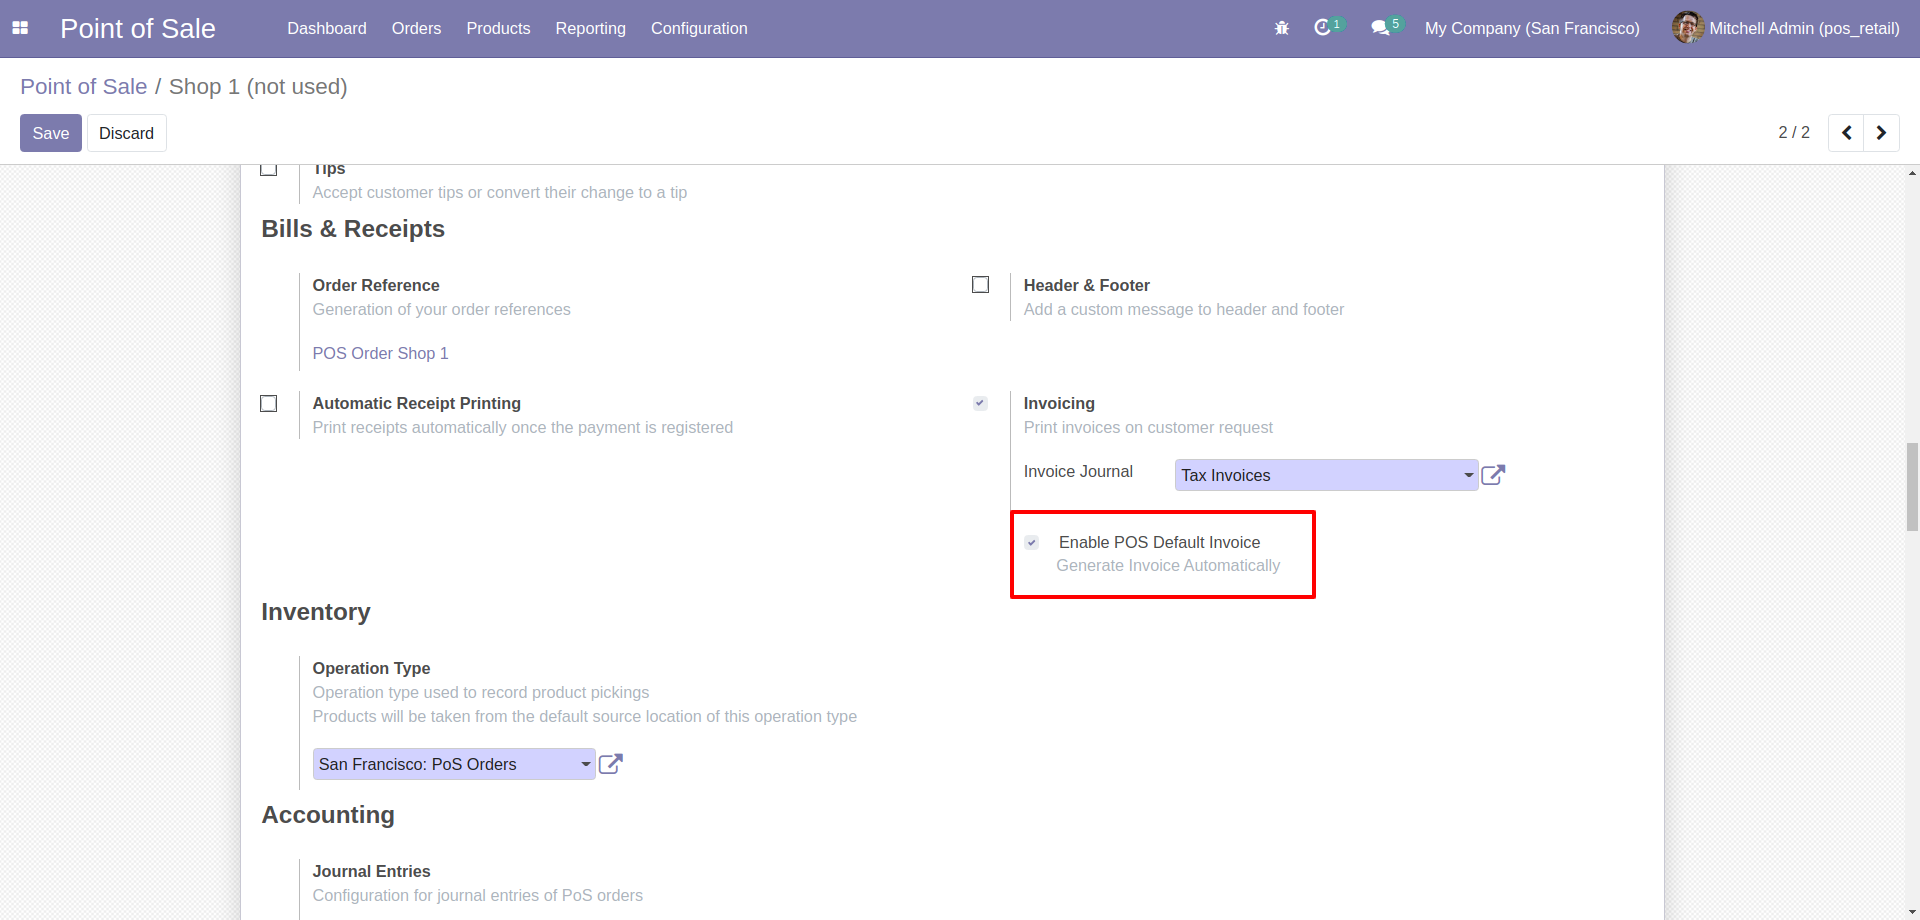
Goto pos setting and enable 'Default Invoice'.
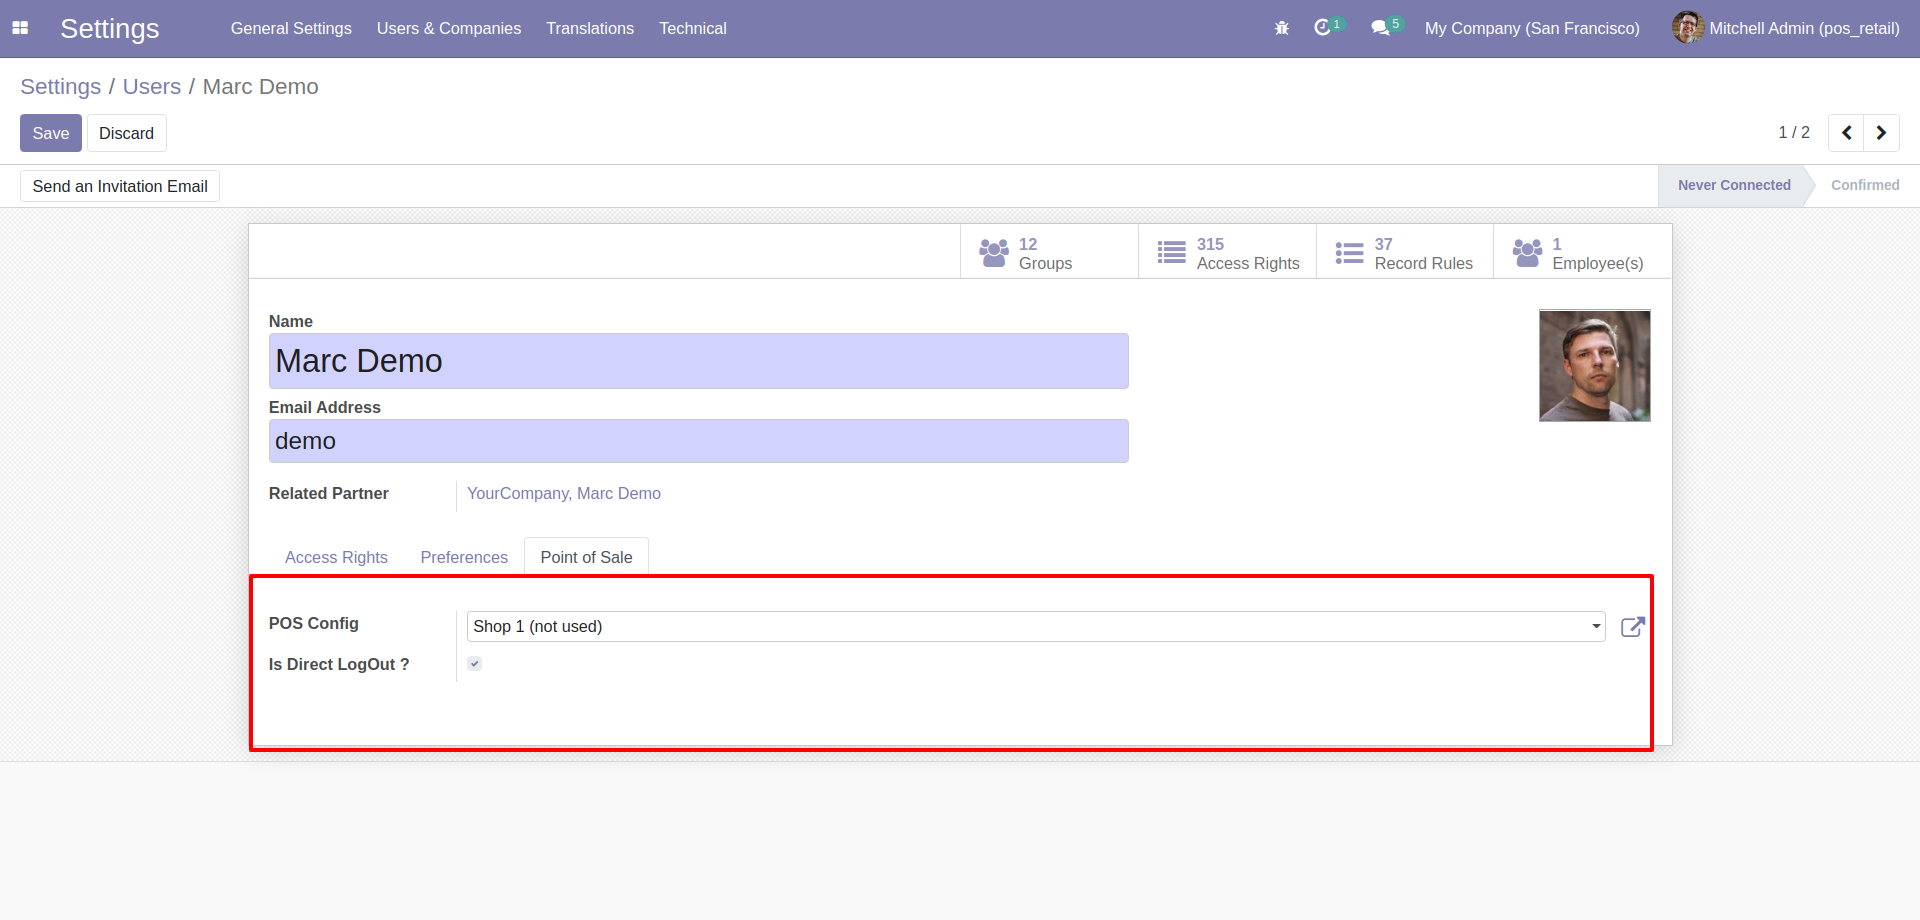
Goto user setting ---> Goto pos tab and enable direct logout and set default pos config.
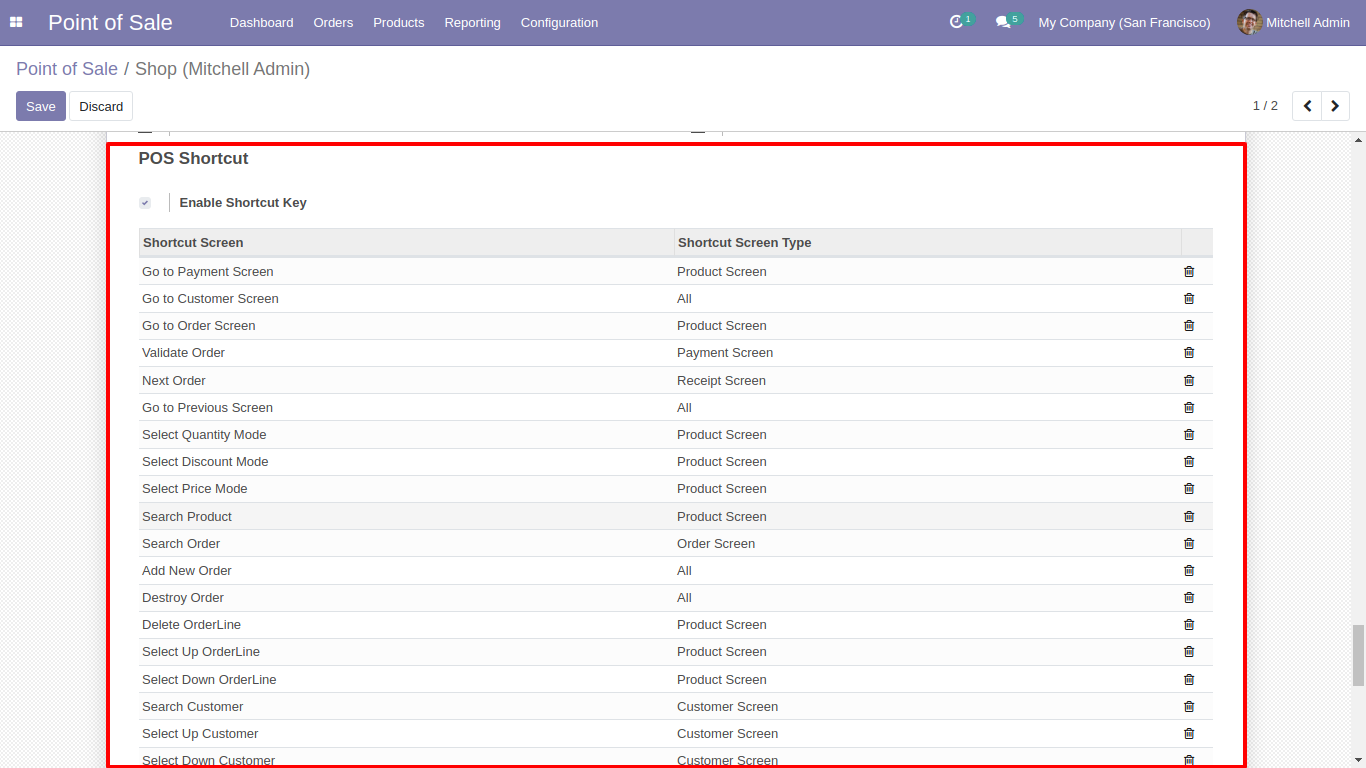
Goto pos setting and enable pos shortcut keys and config them as per your requirement.
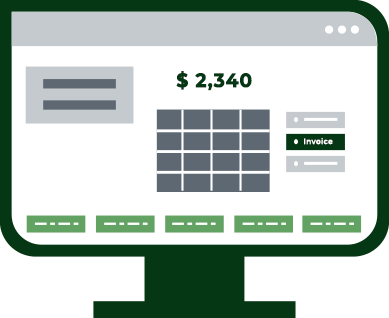
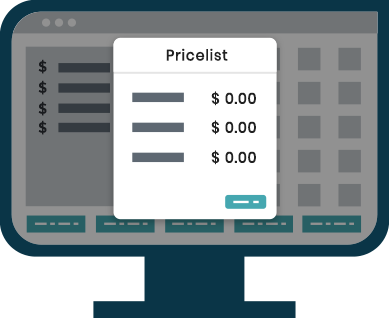
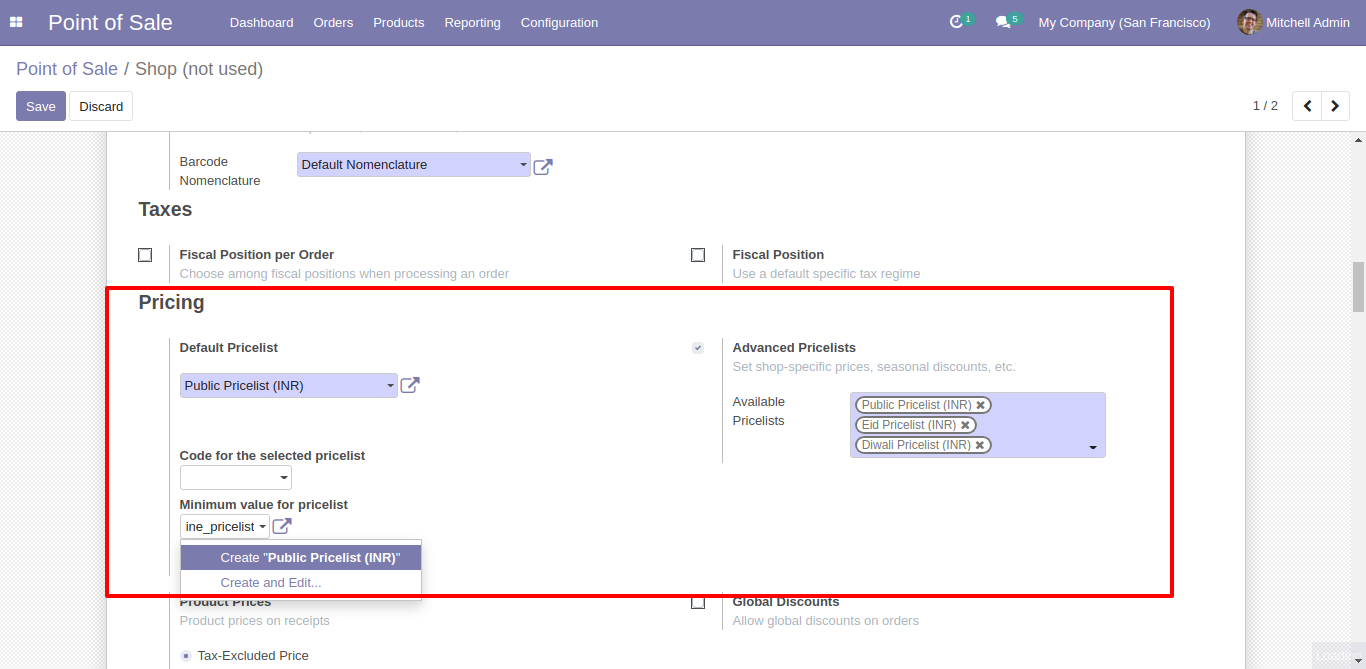
Goto pos setting and enable pricelist ---> Advance Pricelist, after that hare add your pricelist. Also set minimum value pricelist.
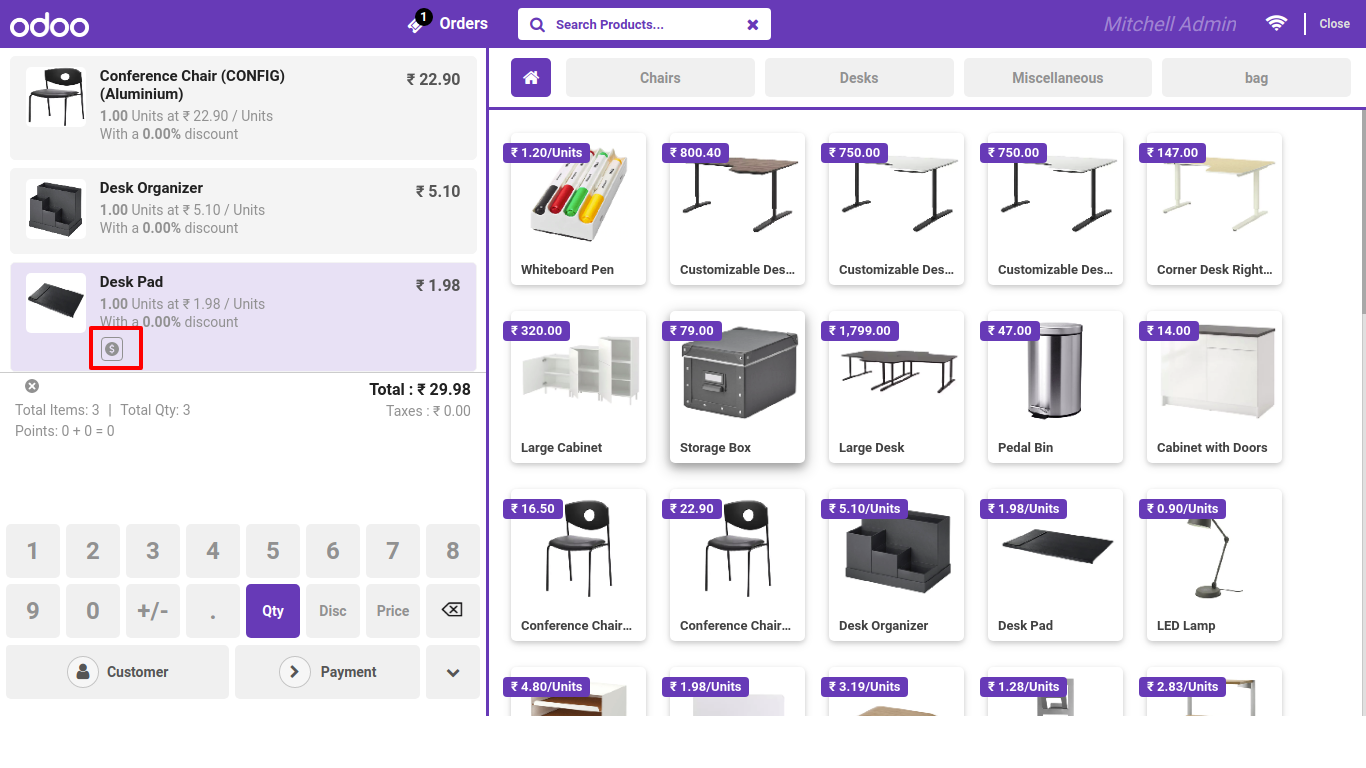
Here in pos cart you can set the pricelist among the product just click on highlighted icon.
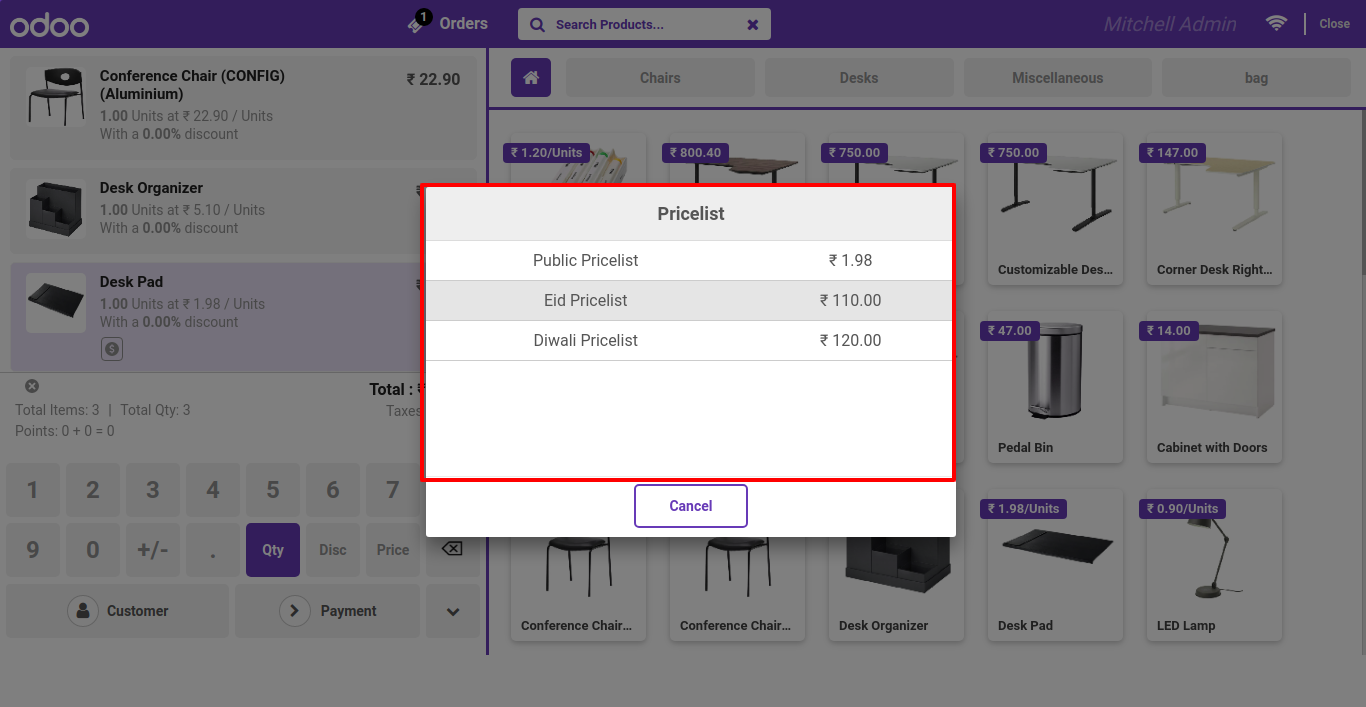
After that this wizard will popout here you can select your appropriate pricelist.
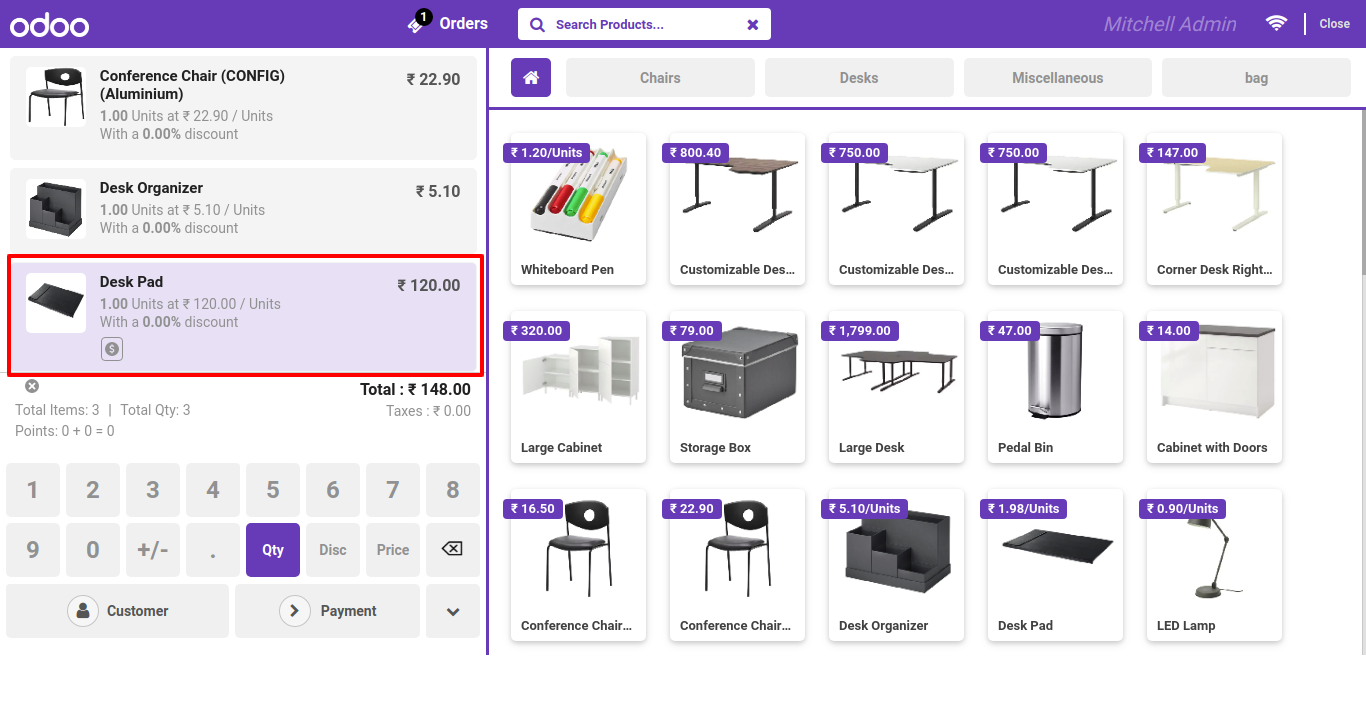
Price applied for that product only.
Pos receipt.

Goto point of sale setting , enable pos logo for receipt and header. Set your logo here.
Header Logo.
Logo in receipt.
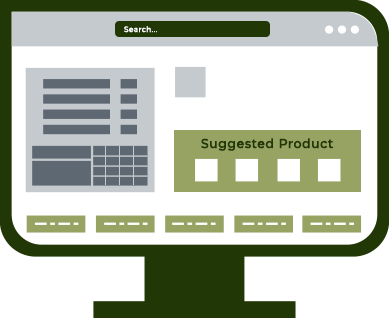
Enable the "Show Menu Global Search".

We can configure object for global search from here. Global Search Bar

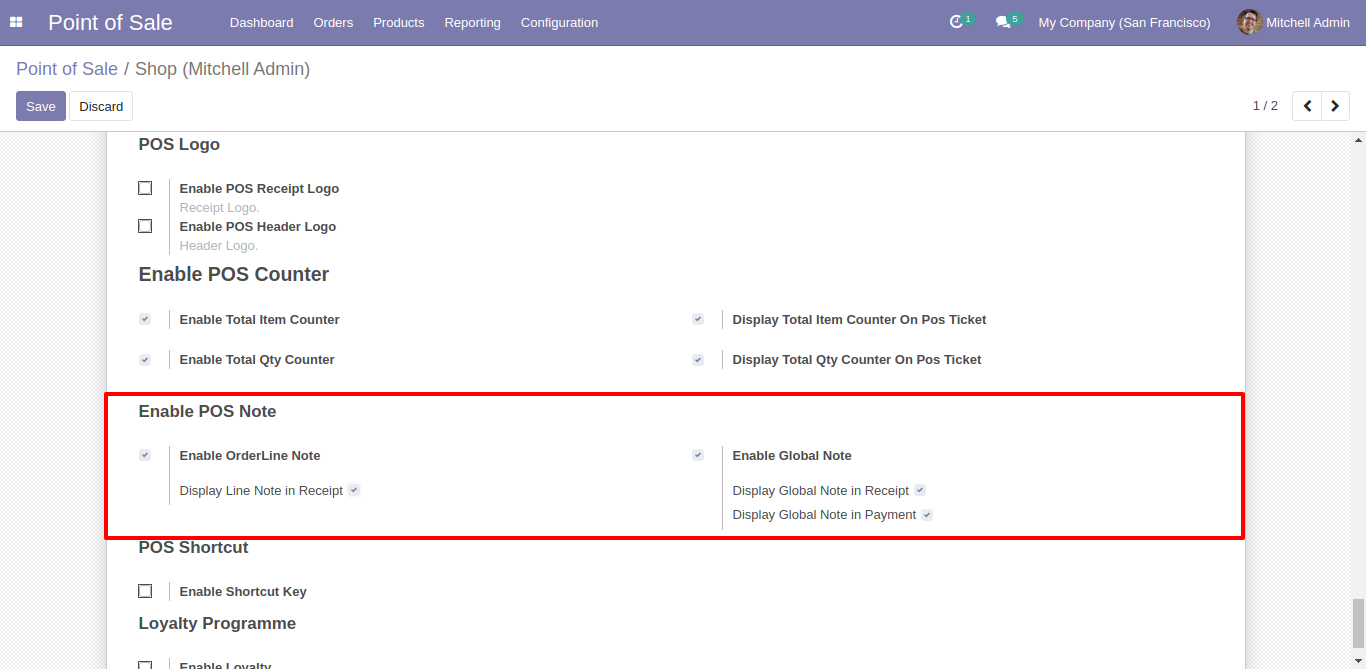
Goto pos setting and enable "Enable PoS Notes"
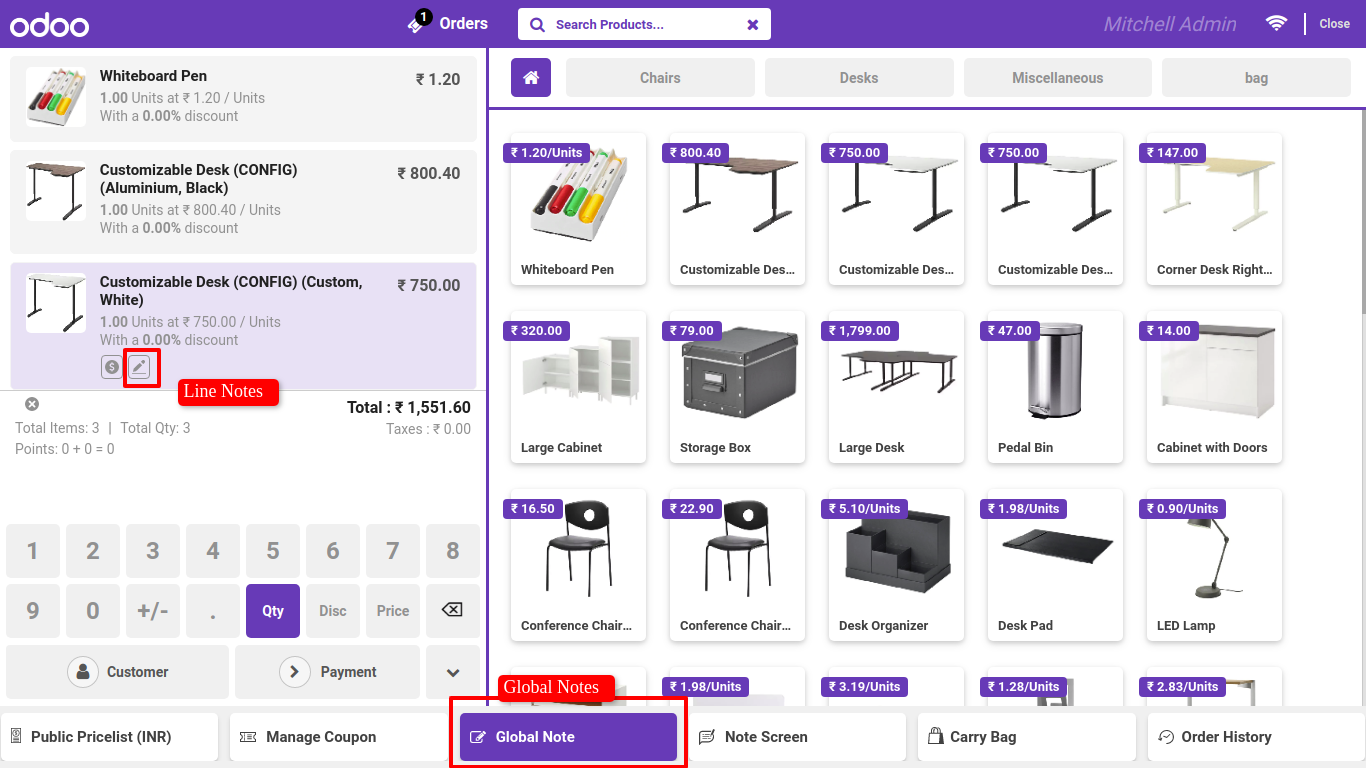
We After enable that feature you can see those button in pos screen. One for global notes and another for line notes.
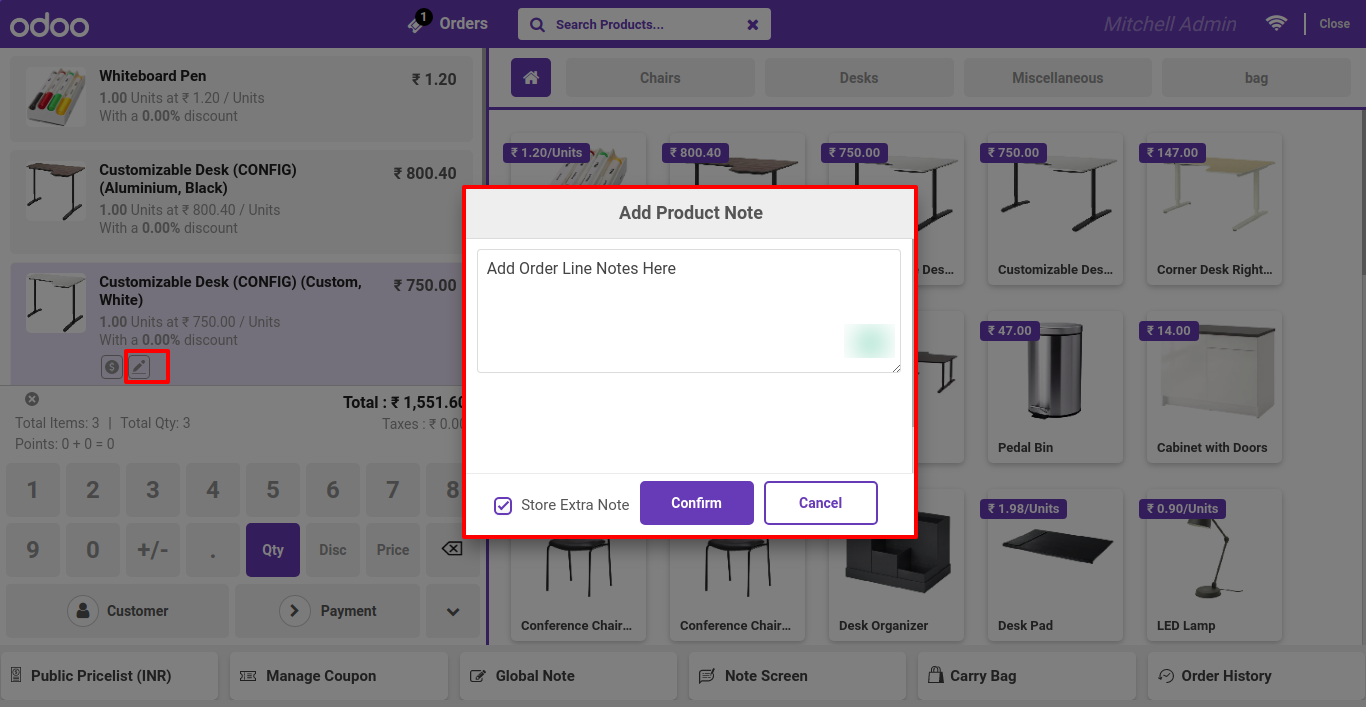
We After click on pen icon in order line, this wizard will popout, here you can add your line notes and also you can save this notes for future reference.
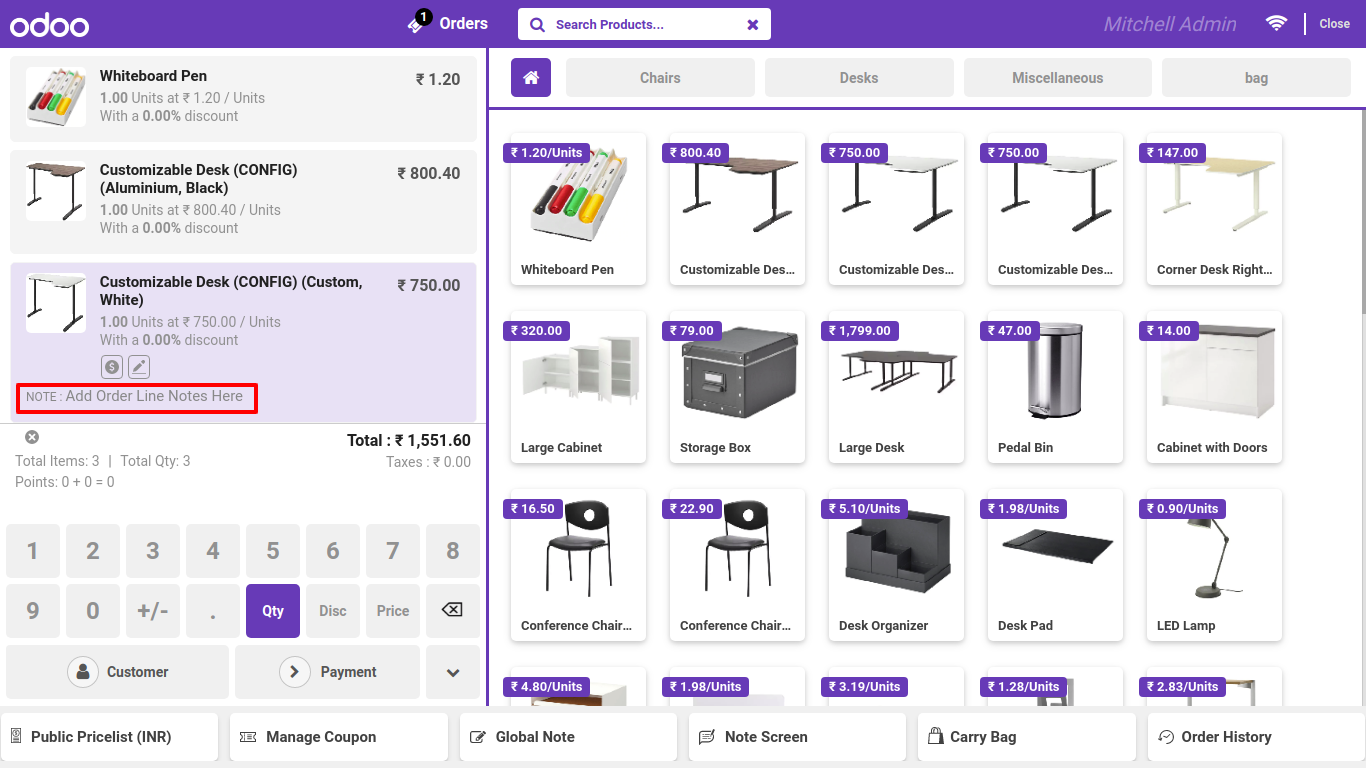
We Line notes added into line.
We Now click on "Global Notes", and add your global notes here.

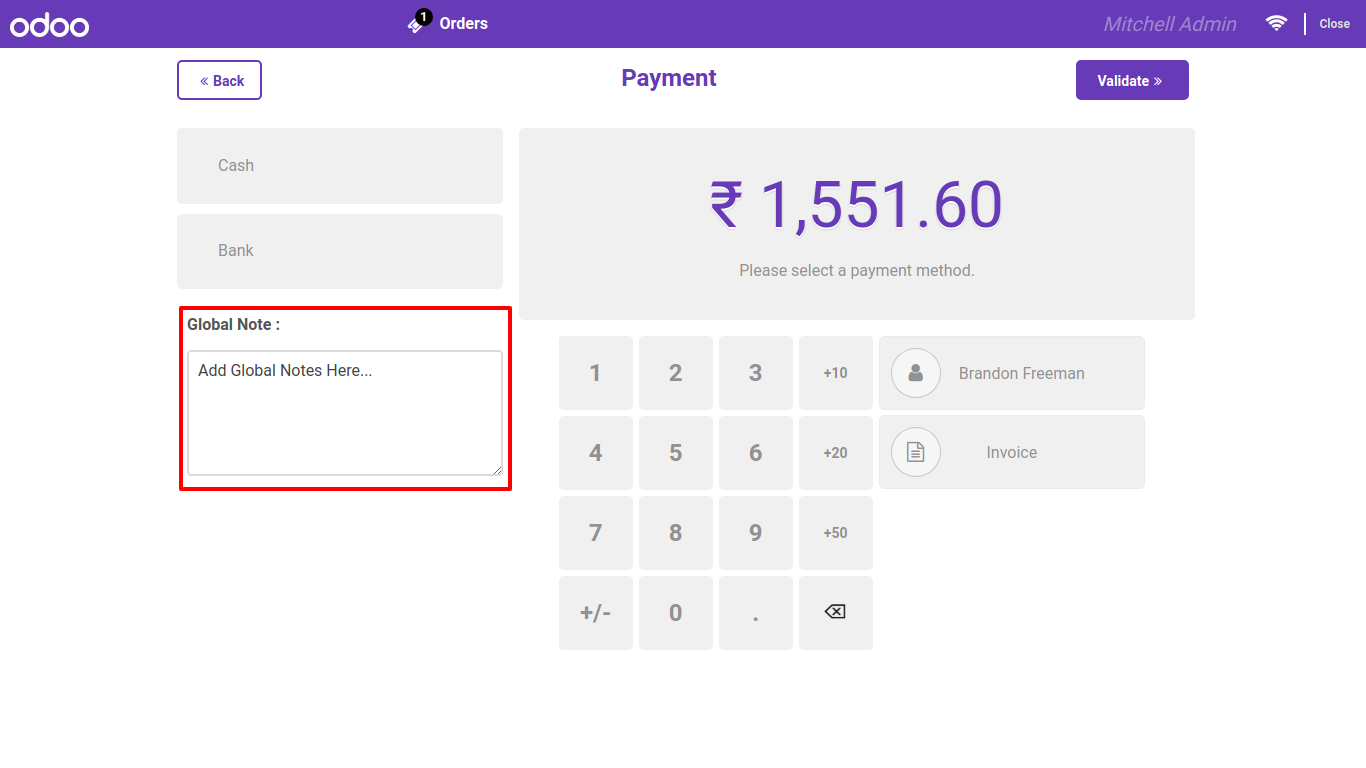
We In Payment screen, here also you can add global notes.
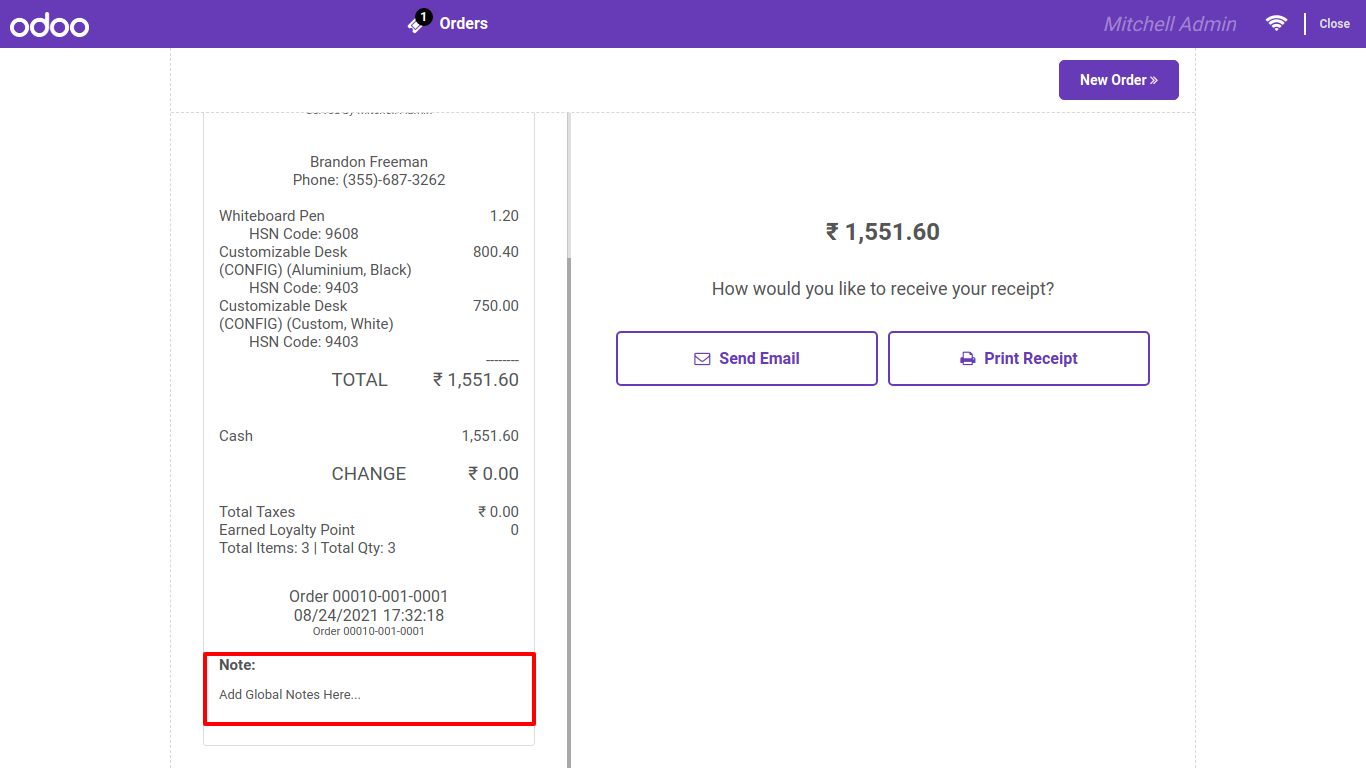
We On pos receipt you can see global notes as well.
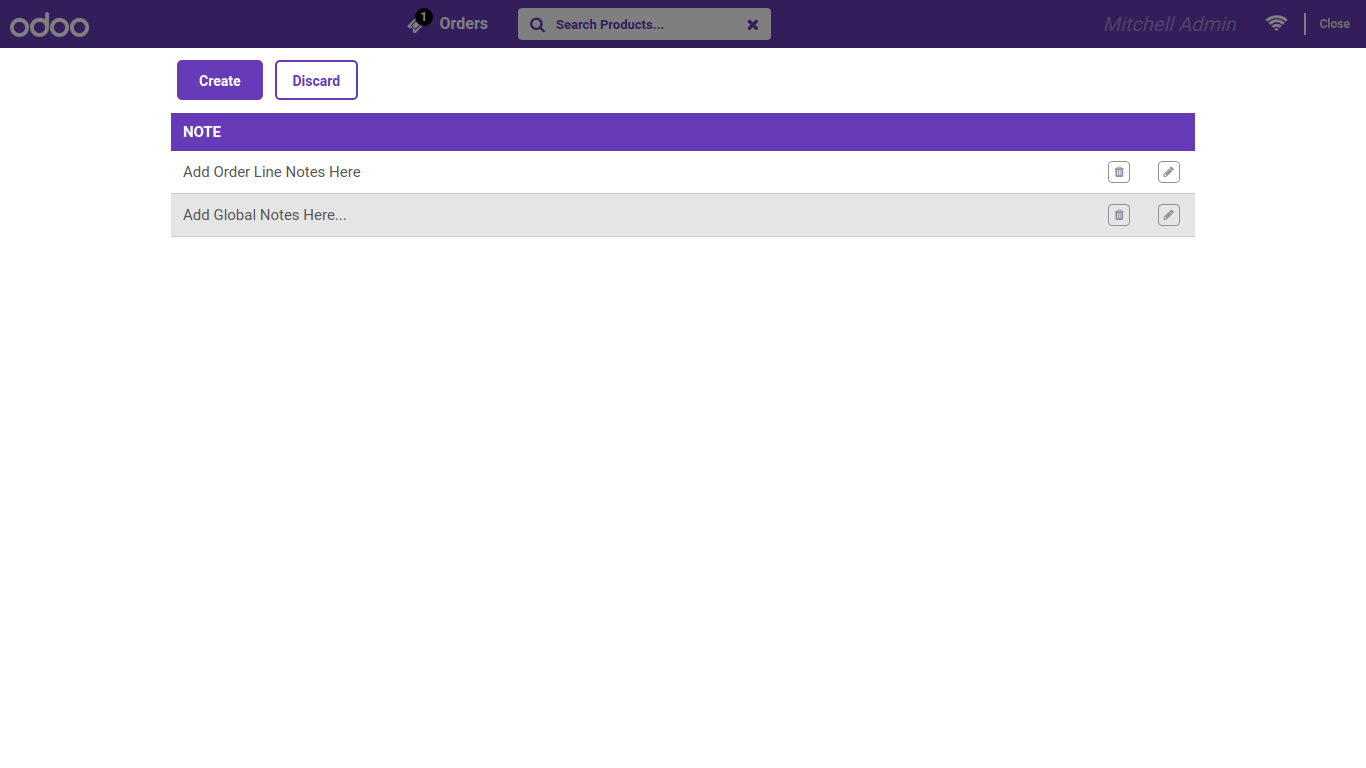
We Just click on 'Note Screen' Button, here you can see your save notes in pos.
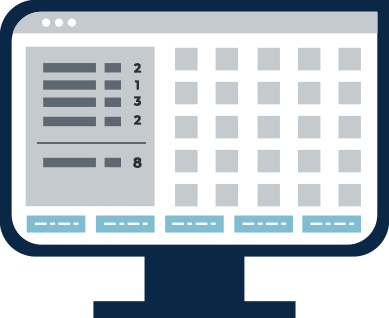
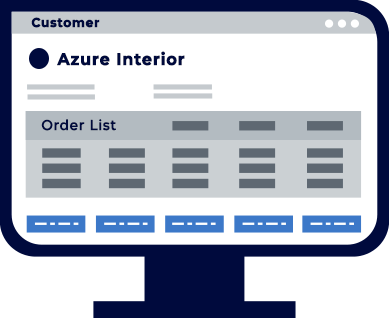
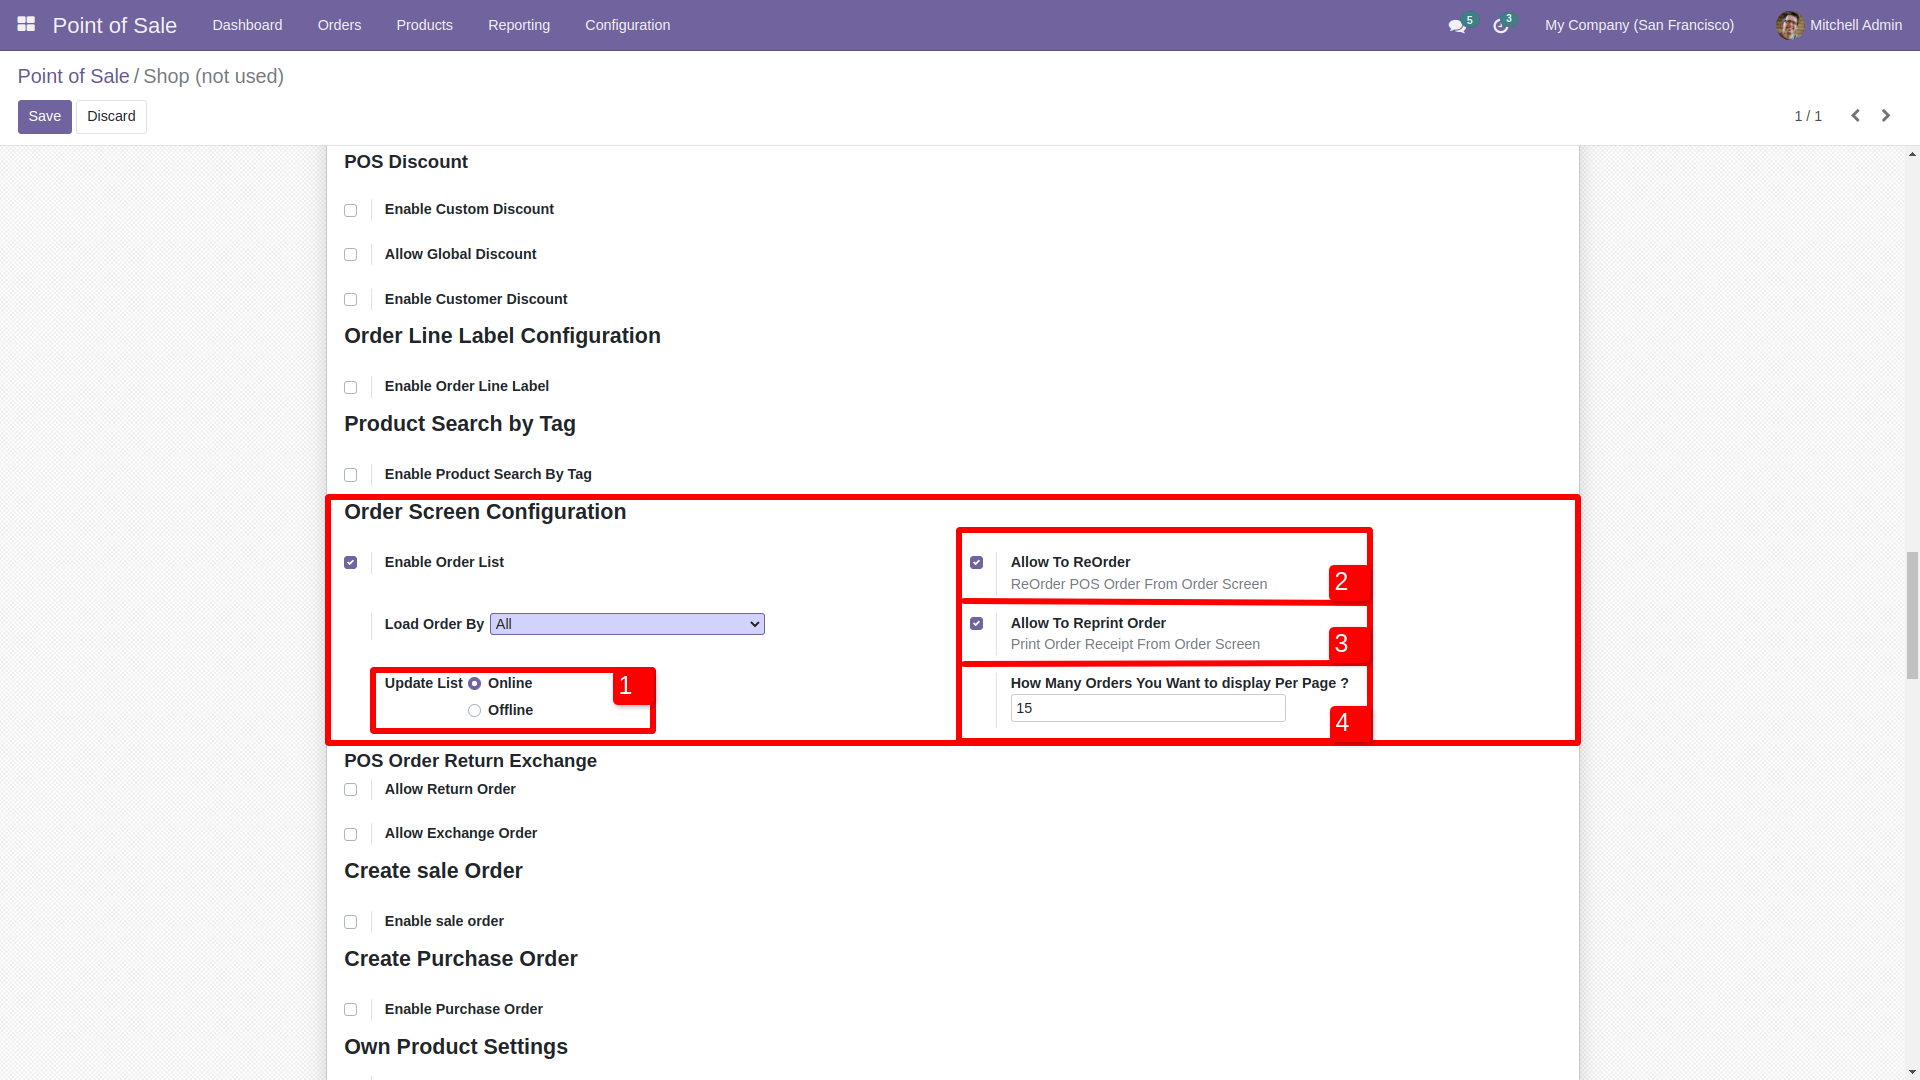
Goto pos setting and enable Order list. After enable that feture, there you can see many options. You can display order list by session wise, day wise. Easy to define the number of order in one page.
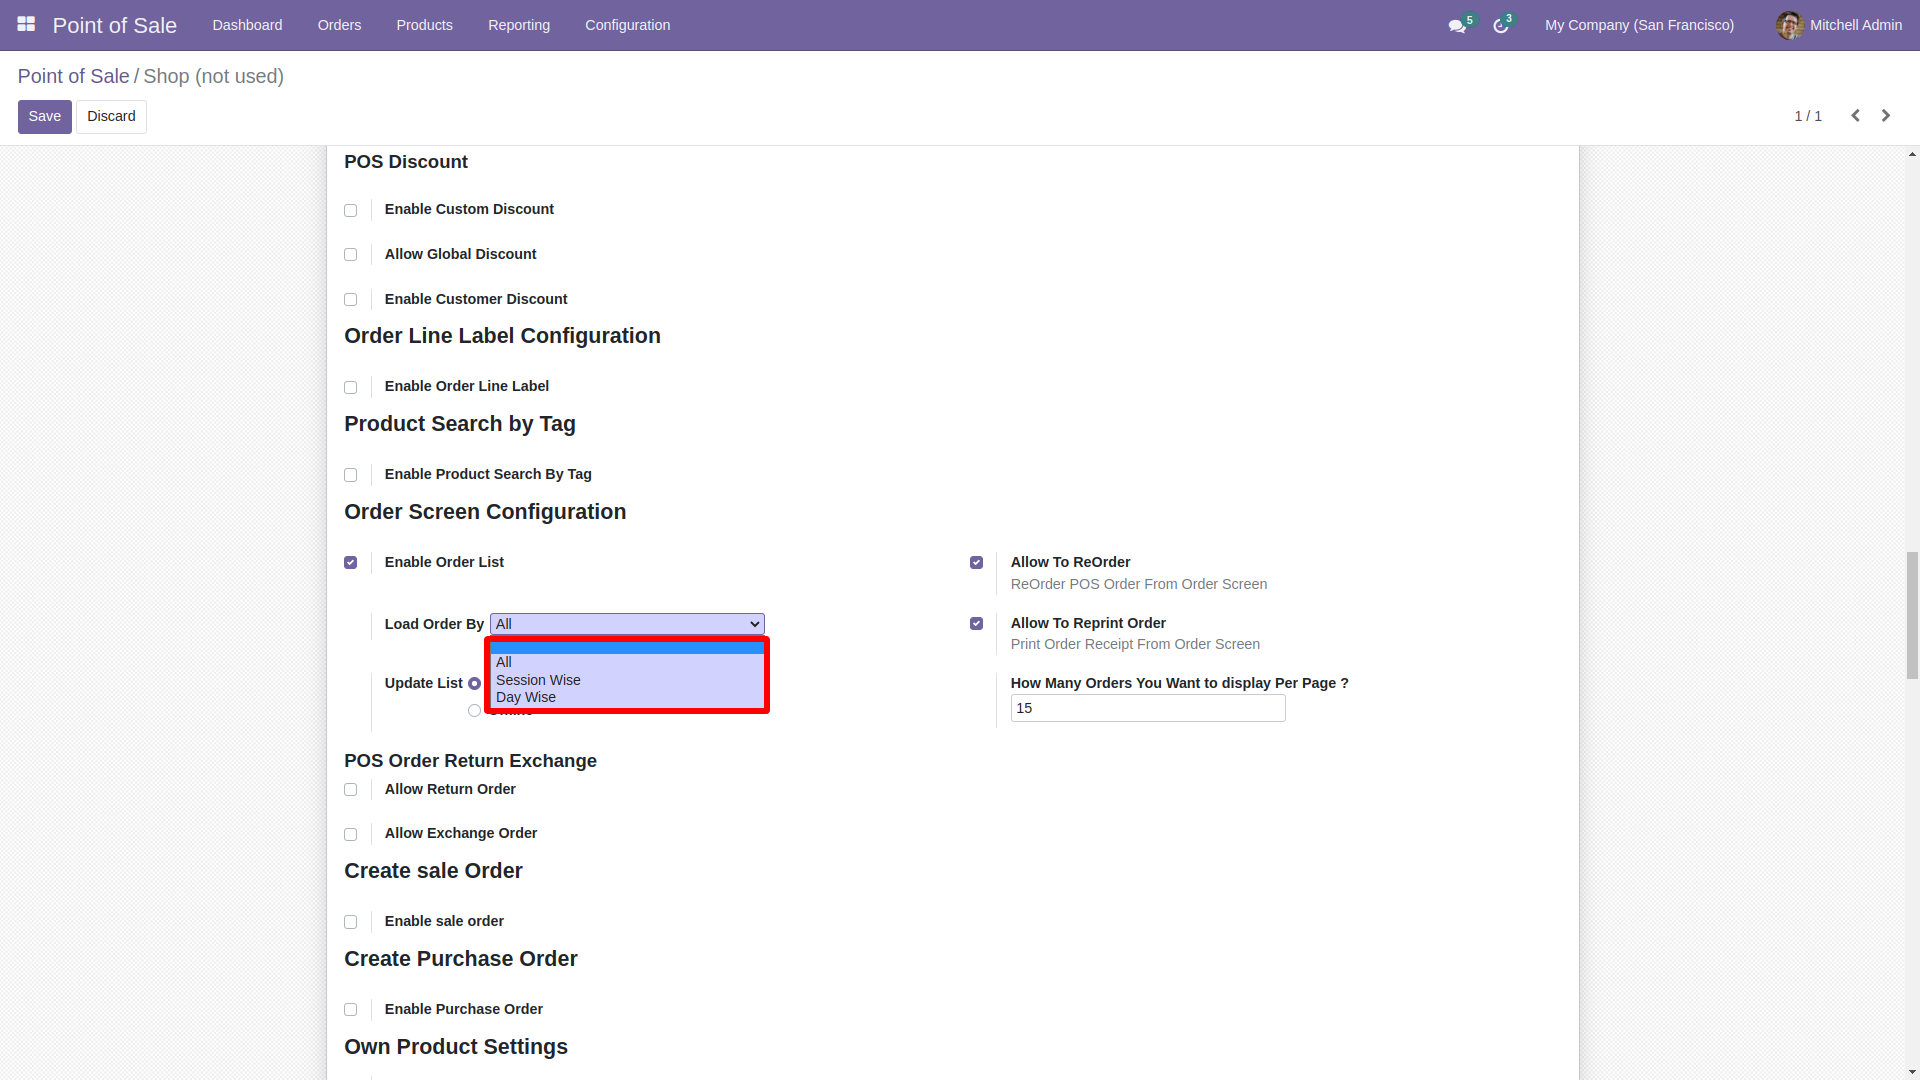
1. You can also define the update order based on the online and offline.
2. Enable option to ReOrder feature.
3. Enable option to RePrint feature.
4. Define the numeber of order display in one page
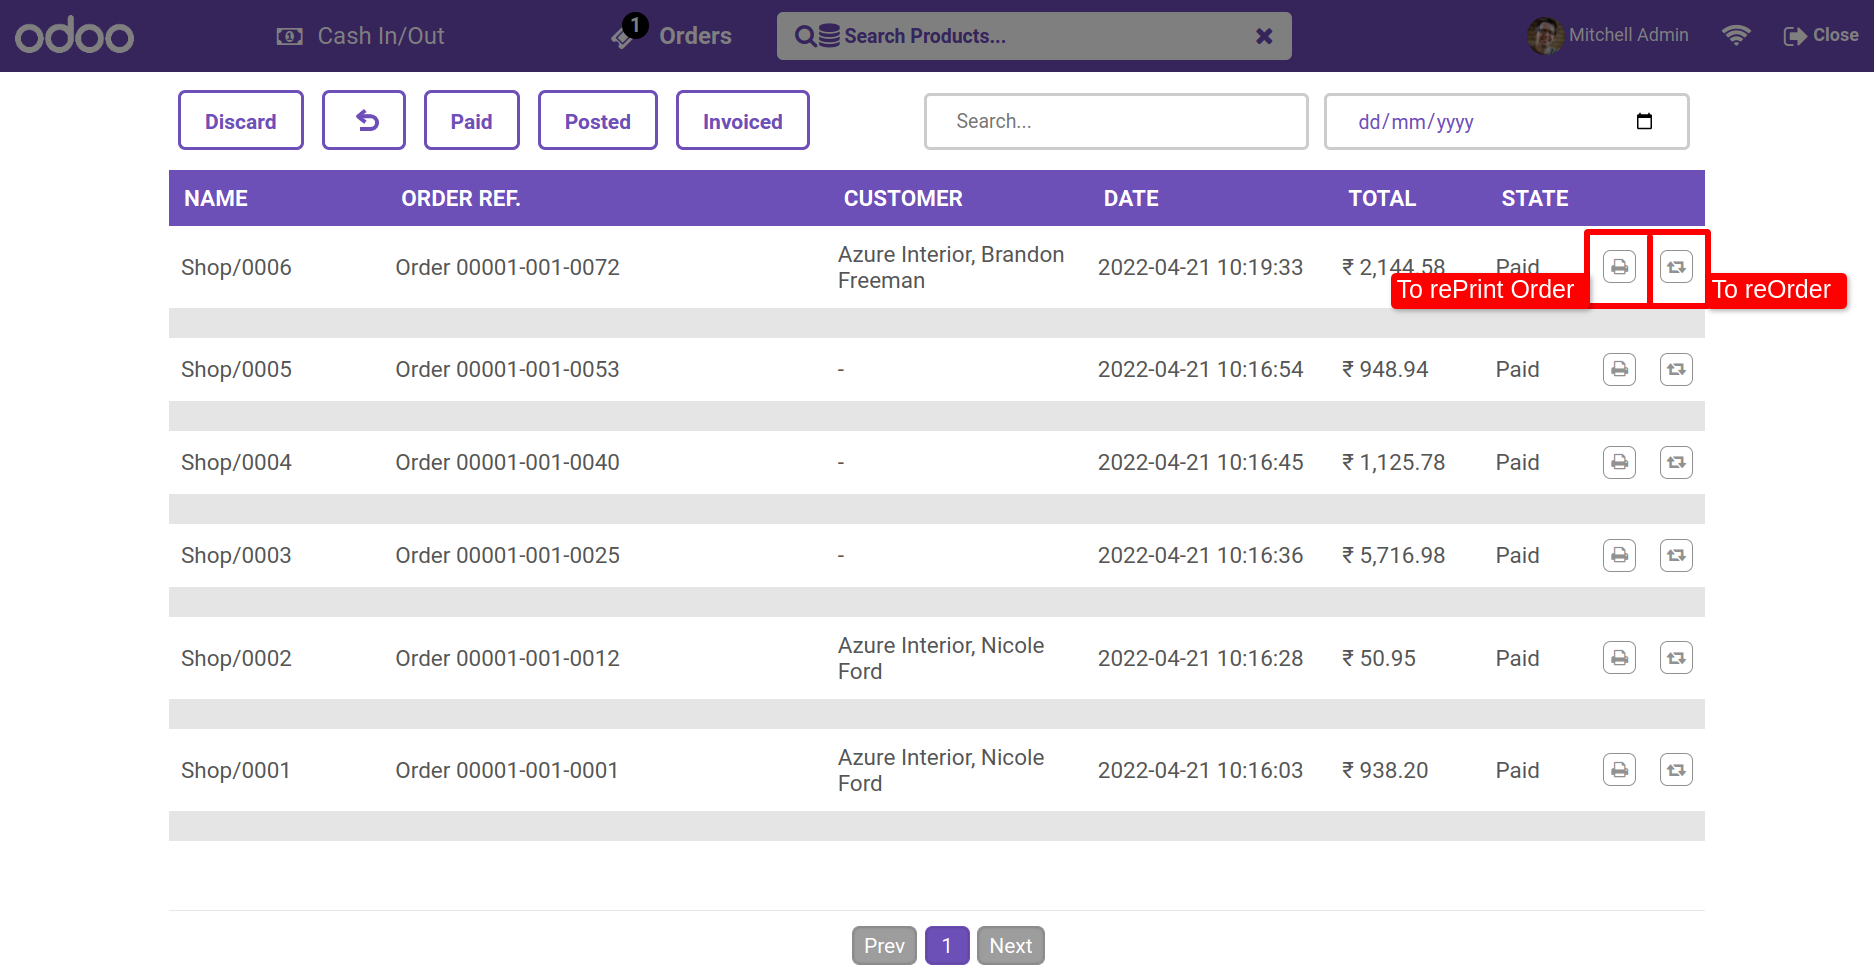
After enabling order list option you can see the order list butting in the pos screen.

Here you can see the order list with search bar wth date. Also you can see 2 buttons for the reprint and
reorder.
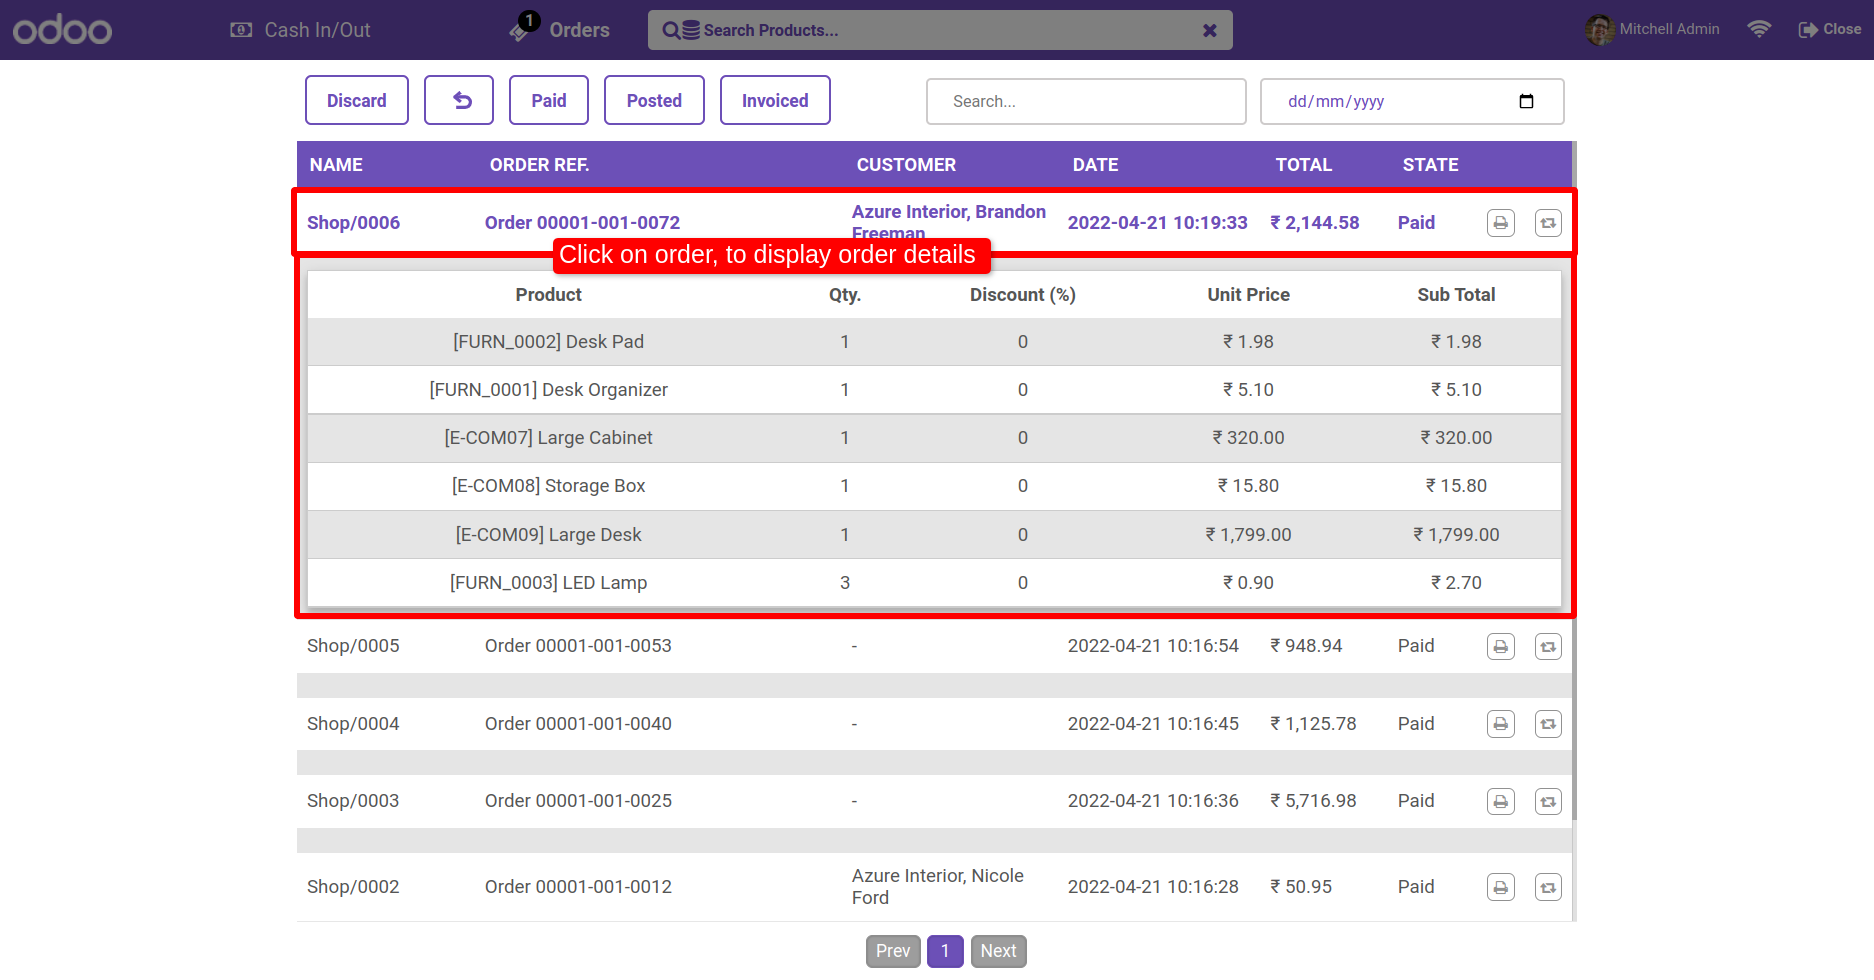
Also you can see the details of the order by clicking on it.
Normally the user has a logo or brand color, so the user can change primary colors, hover color, active menu color using primary color as per his brand color.
Users can also change Secondary color, Secondary hover, Secondary active colors.
Here you have another color option is gradients color. You can also set gradient color for predefine theme 3 only.

You can easily change the color of Topbar(header) background color, hover color and active menu color.
You can customize your body with different options. There are two
options
for body background Image/Color. Also, you can change body font color
and
body font type with 8 different beautiful and clean font families
(Roboto,
Raleway, Poppins, Oxygen, Open Sans, Koho, Ubuntu).
Also, provide
google font family in this Backmate theme. So the user has a large range
of
body font type and set as your choice.

To Set google fonts on Just copy name of any google fonts. In theme setting goto 'Header Body Color' and select font family 'Googel Fonts'. After that on field is visible 'Google Font Family' here paste your font family name and click save. (* Refresh browser 2 3 times if not affect).

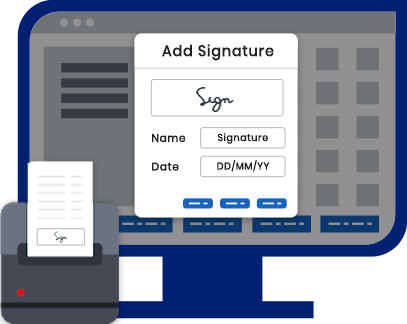
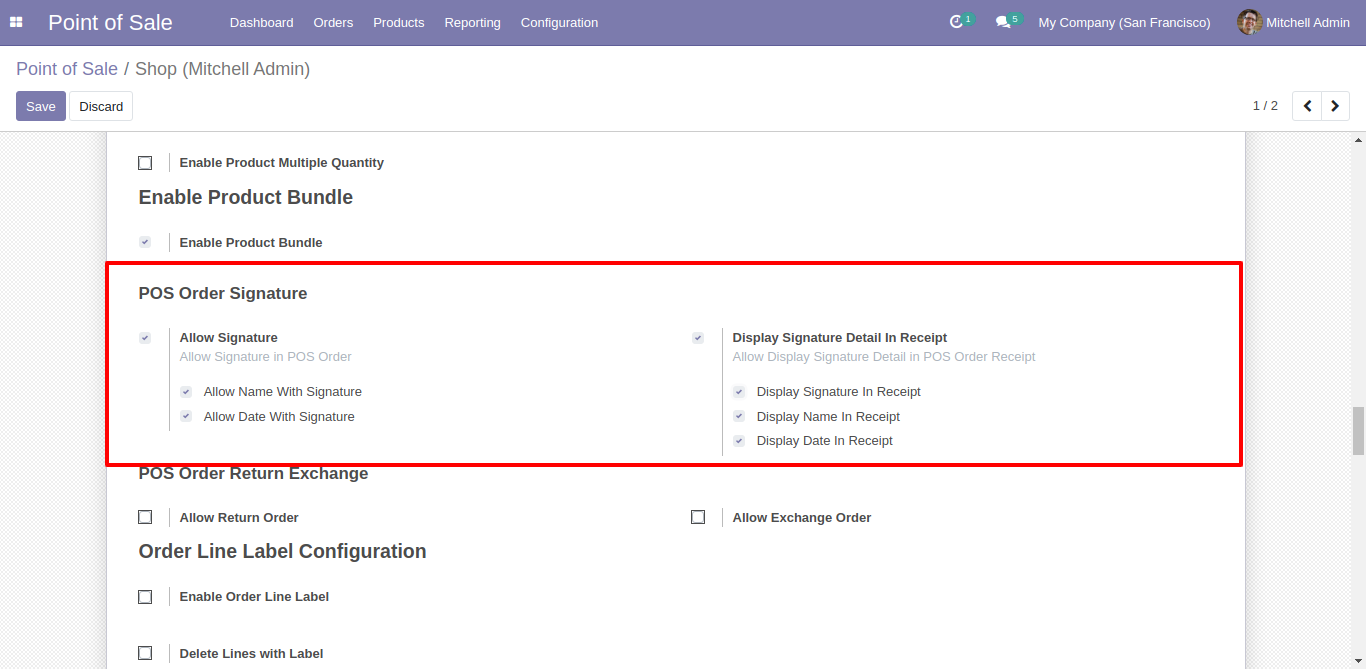
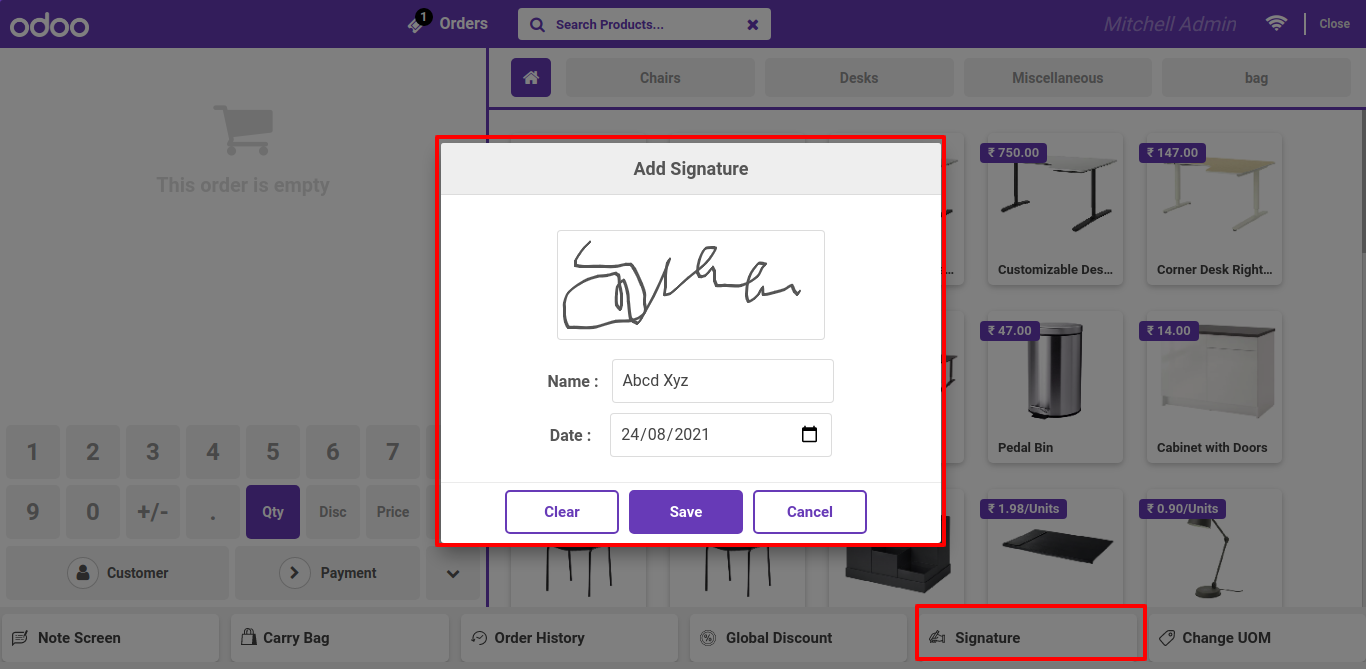
Goto pos setting and enable "Allow POS Signature" also enable appropriate options.
Goto pos screen and click on 'Signature'. After that this wizard will popout, here draw your signature, add name and date and click Save.
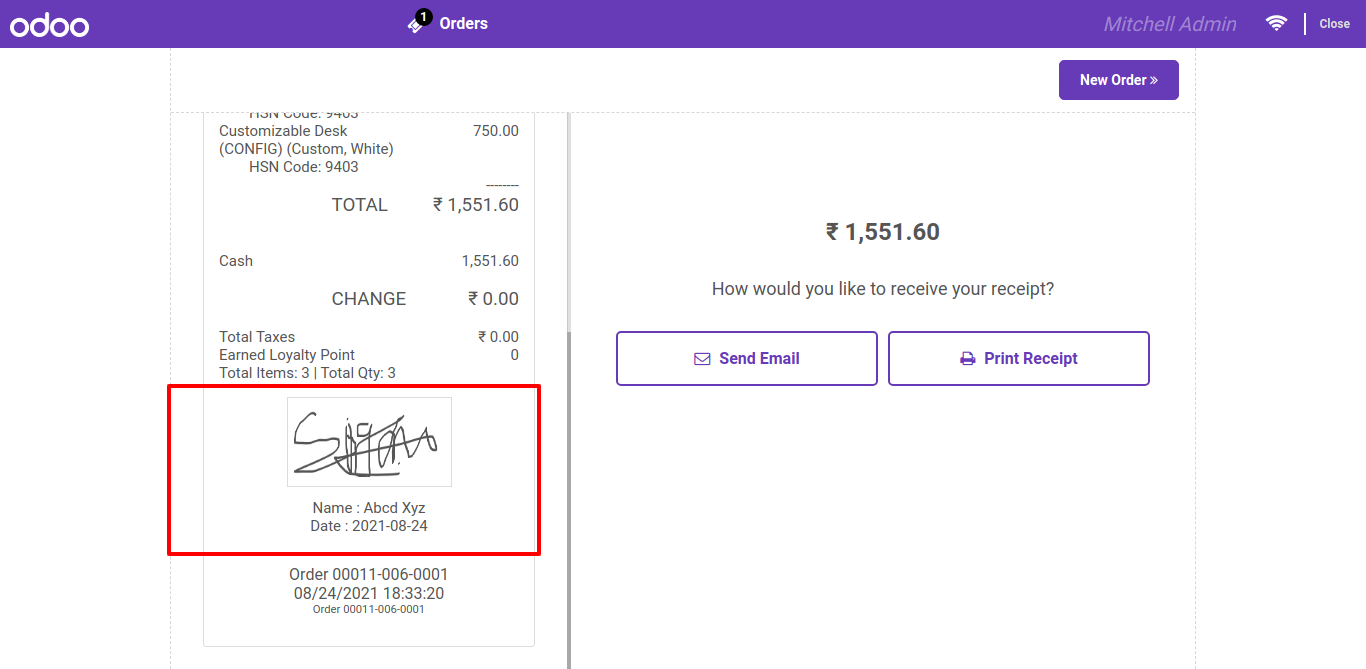
Signature will display on pos receipt with name and date.
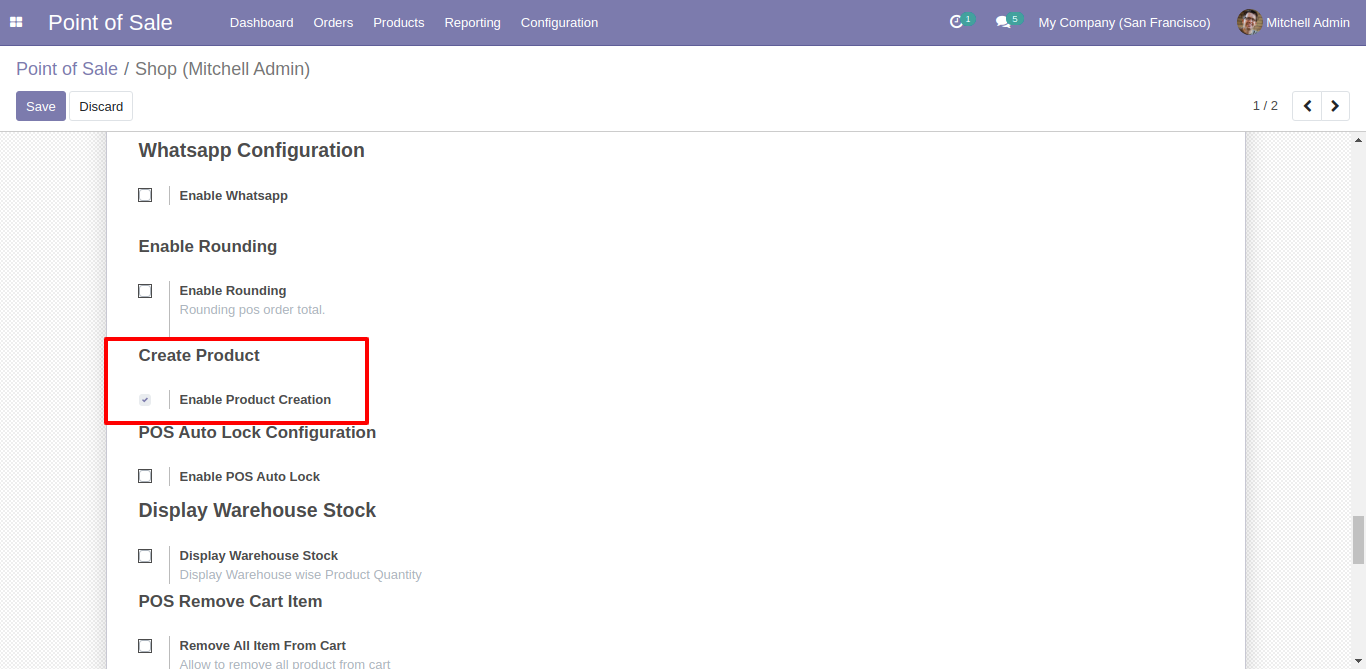
Goto pos setting and enable 'Product creation' feature.
See this animation to how create product from pos screen.
Goto pos setting and enable pos quick receipt.
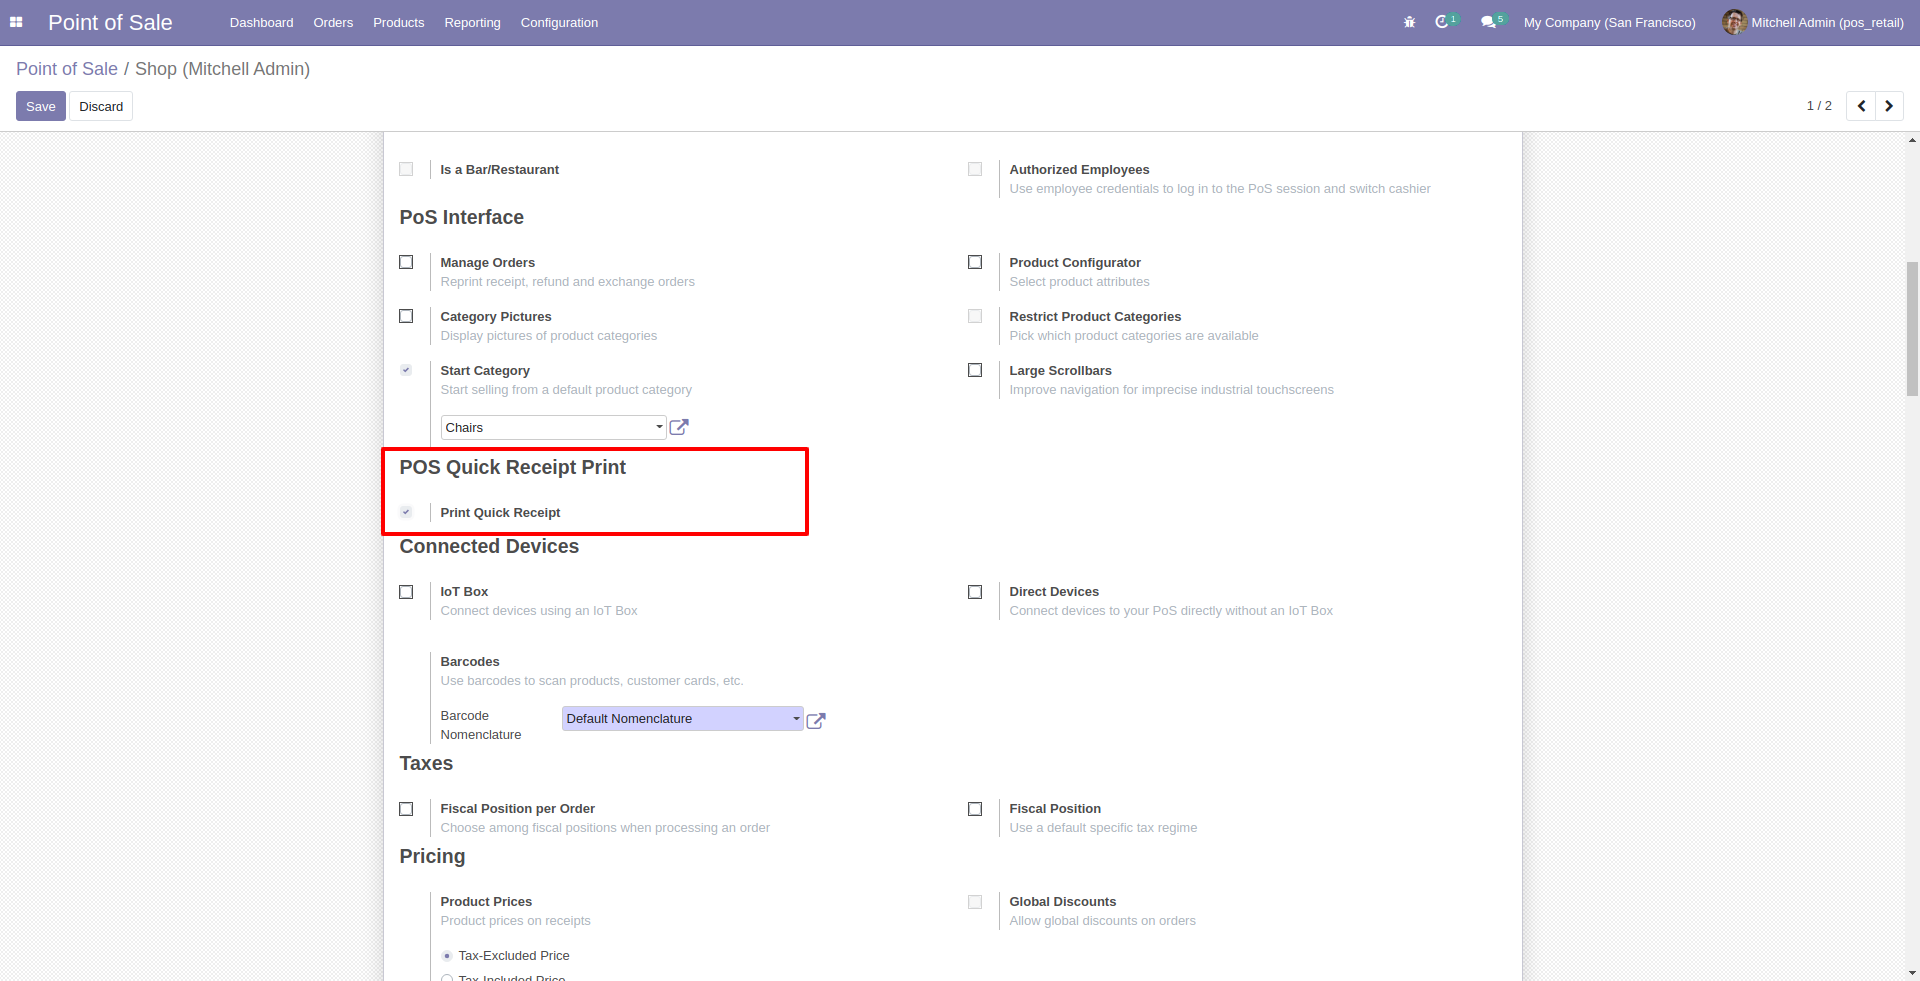
See this animation for how to print quick receipt.
Goto pos setting and enable pos receipt exted feature. here you have several options like print barcode, QR code on receipt.
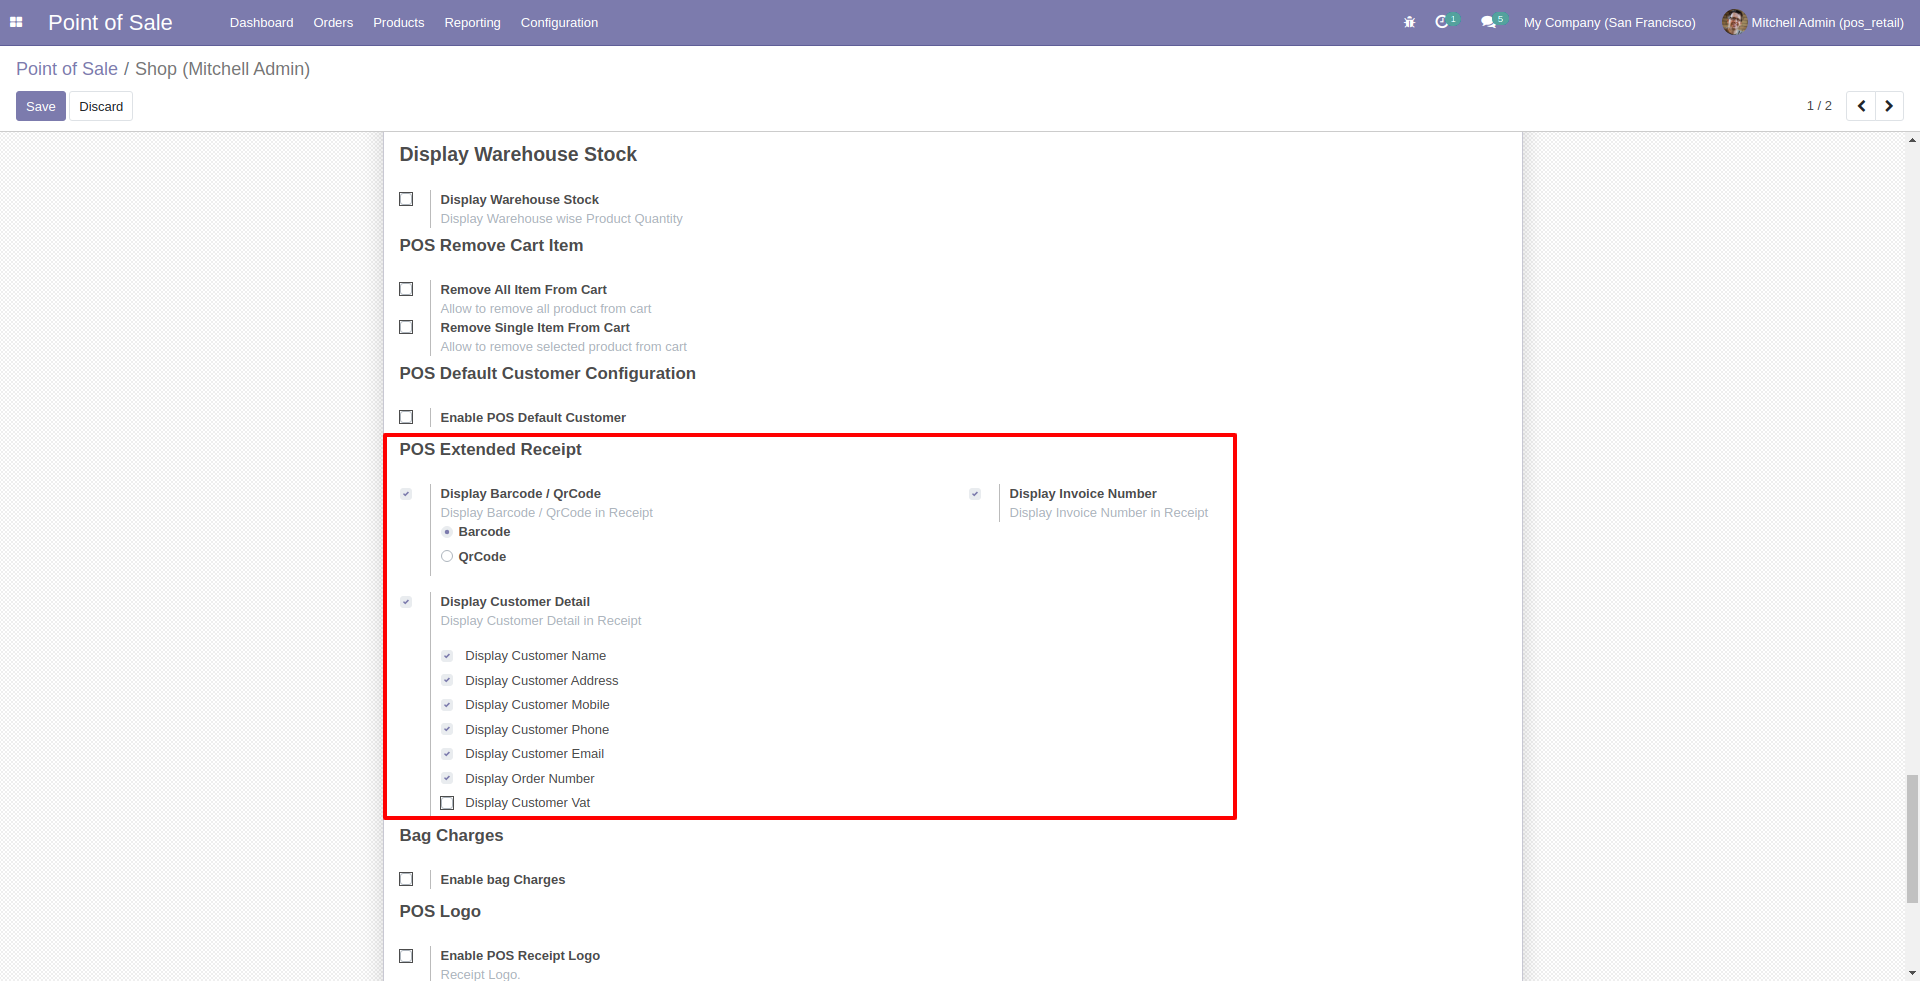
See this animation how to pos receipt extended work.
Goto pos setting and enable 'POS Remove Cart Items'. Here two different options for remove item one by one and another for empty cart.
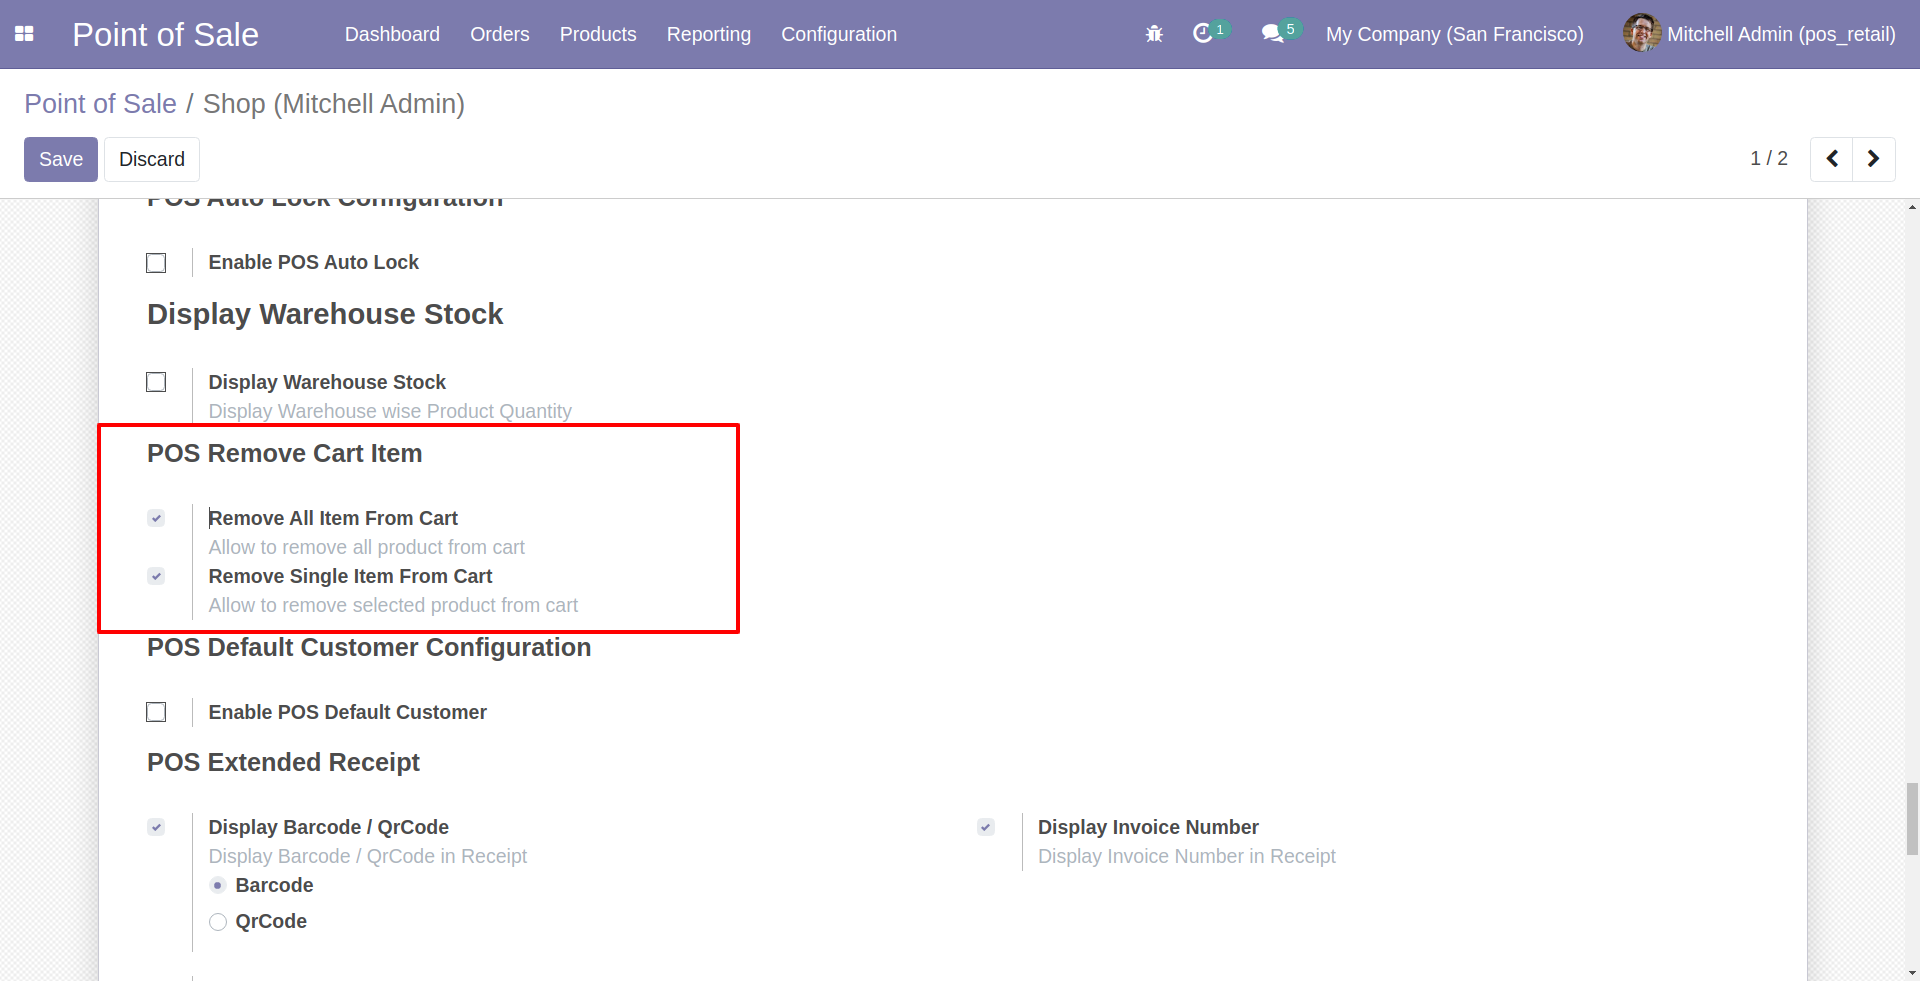
See this animation image to how it works.
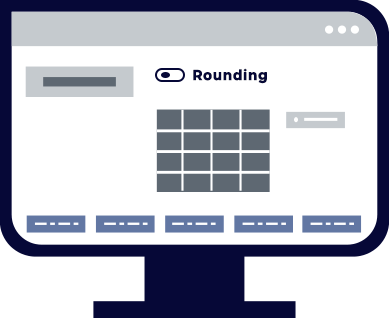
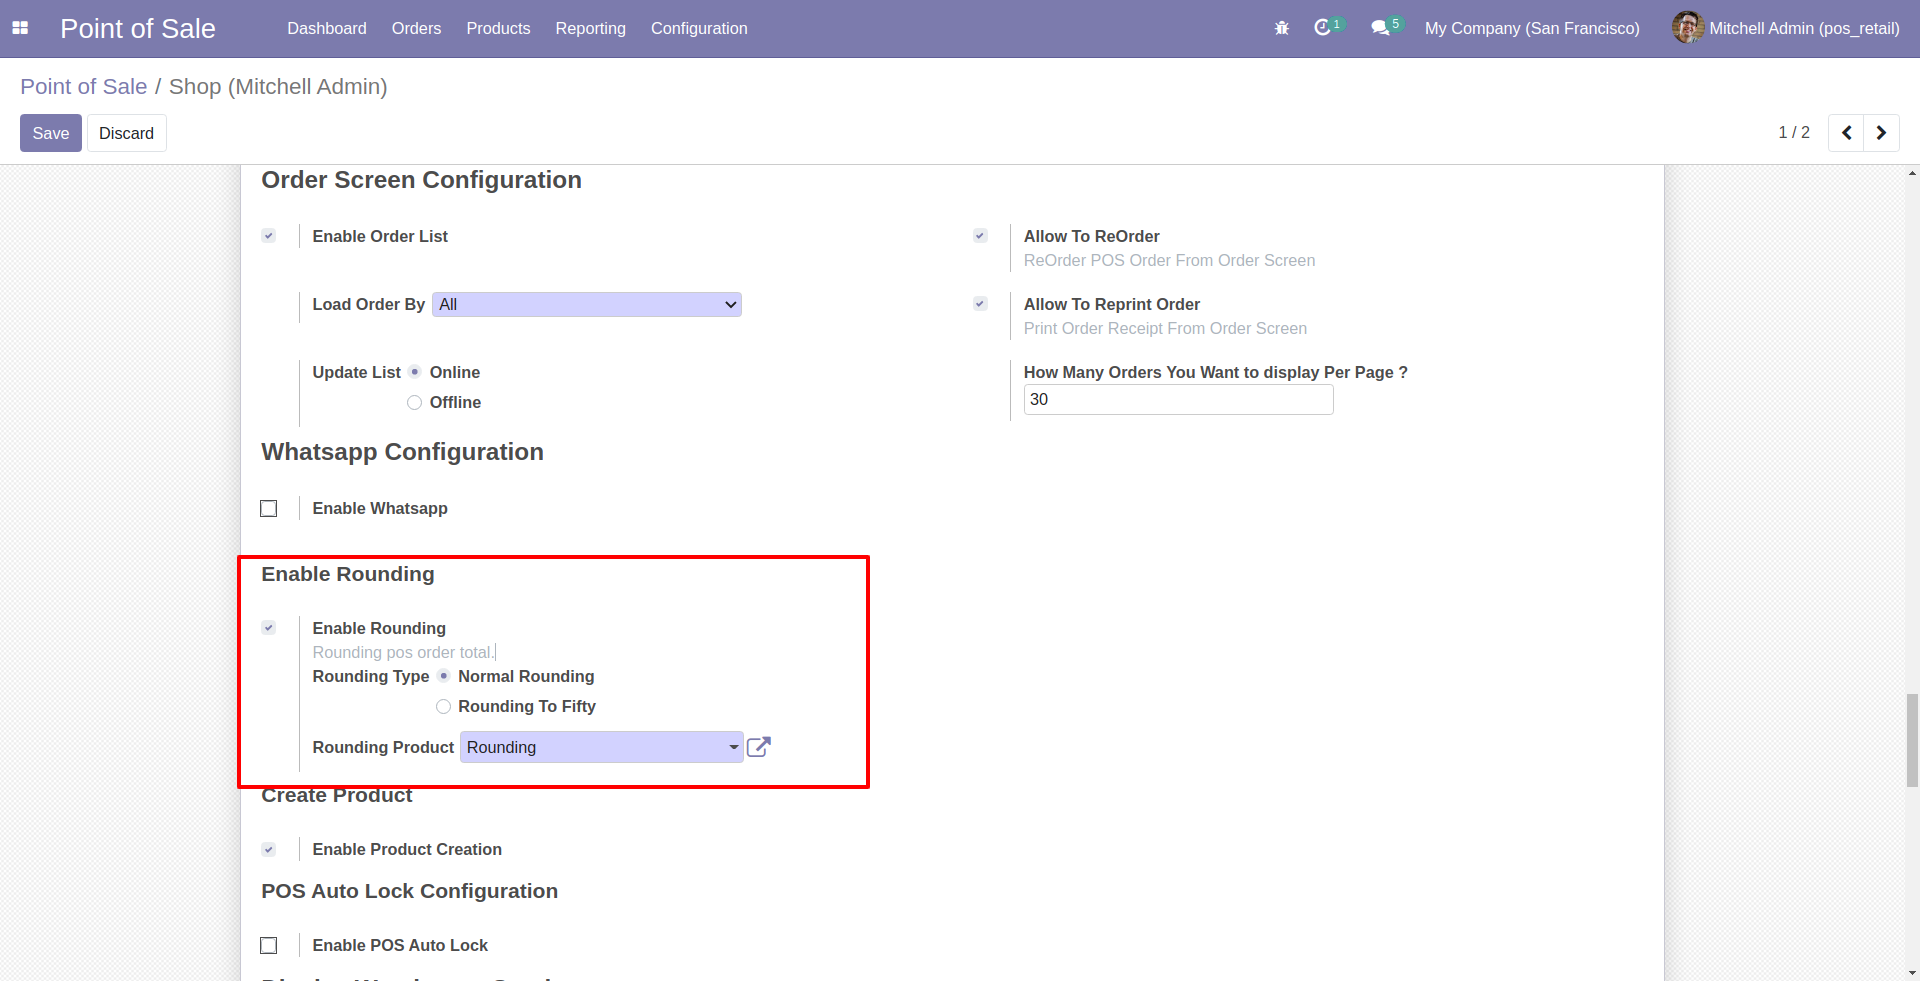
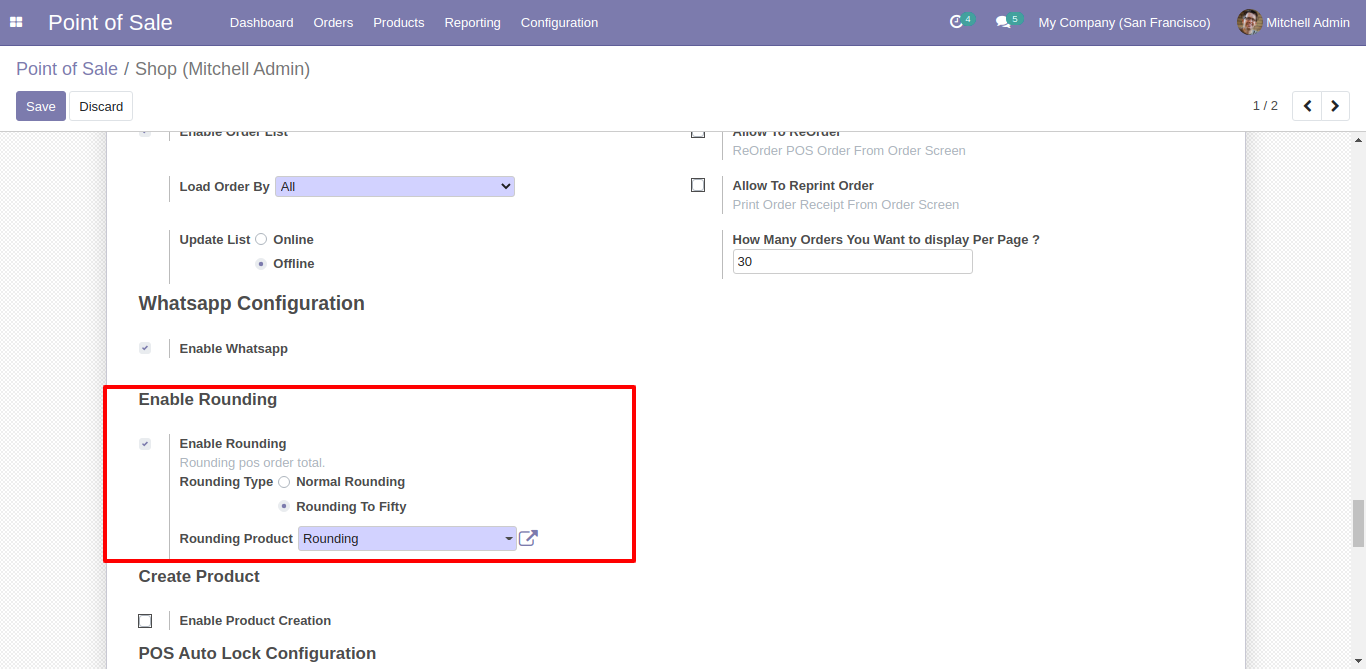
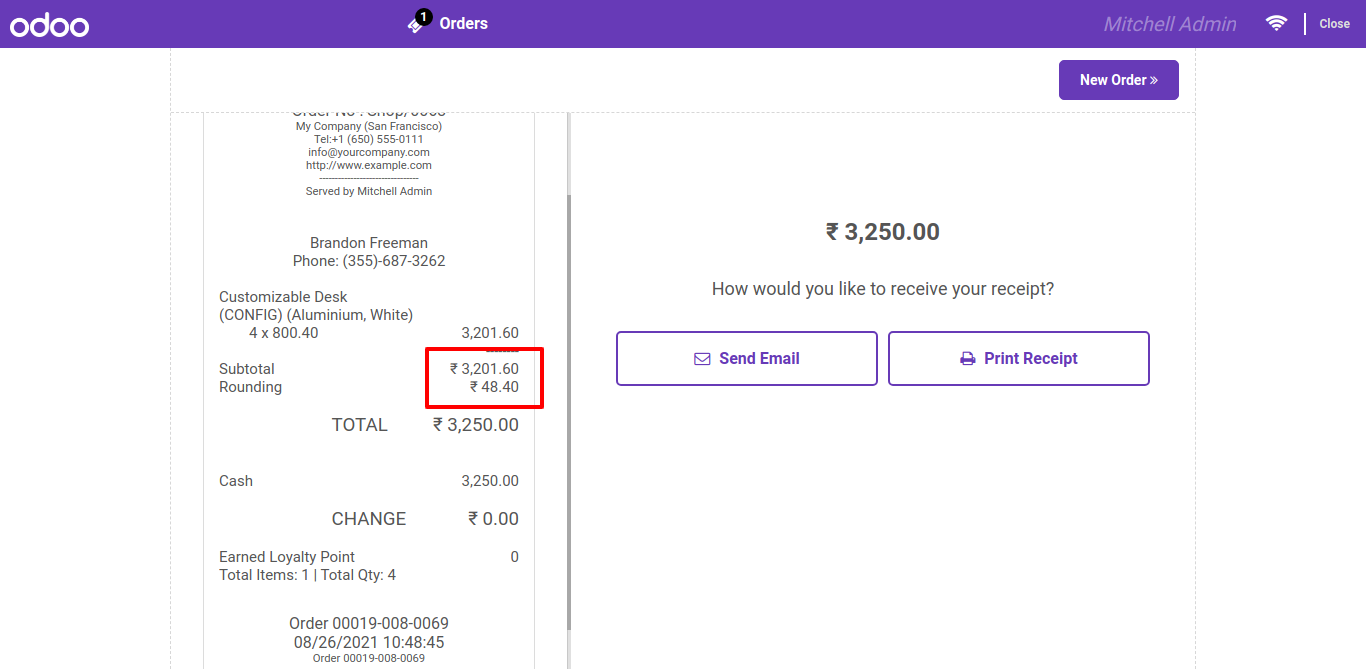
Goto pos setting and enable 'Rounding' features. also there are two different options one for normal rounding and another for Rounding to Fifty.
Normal rounding in pos cart.
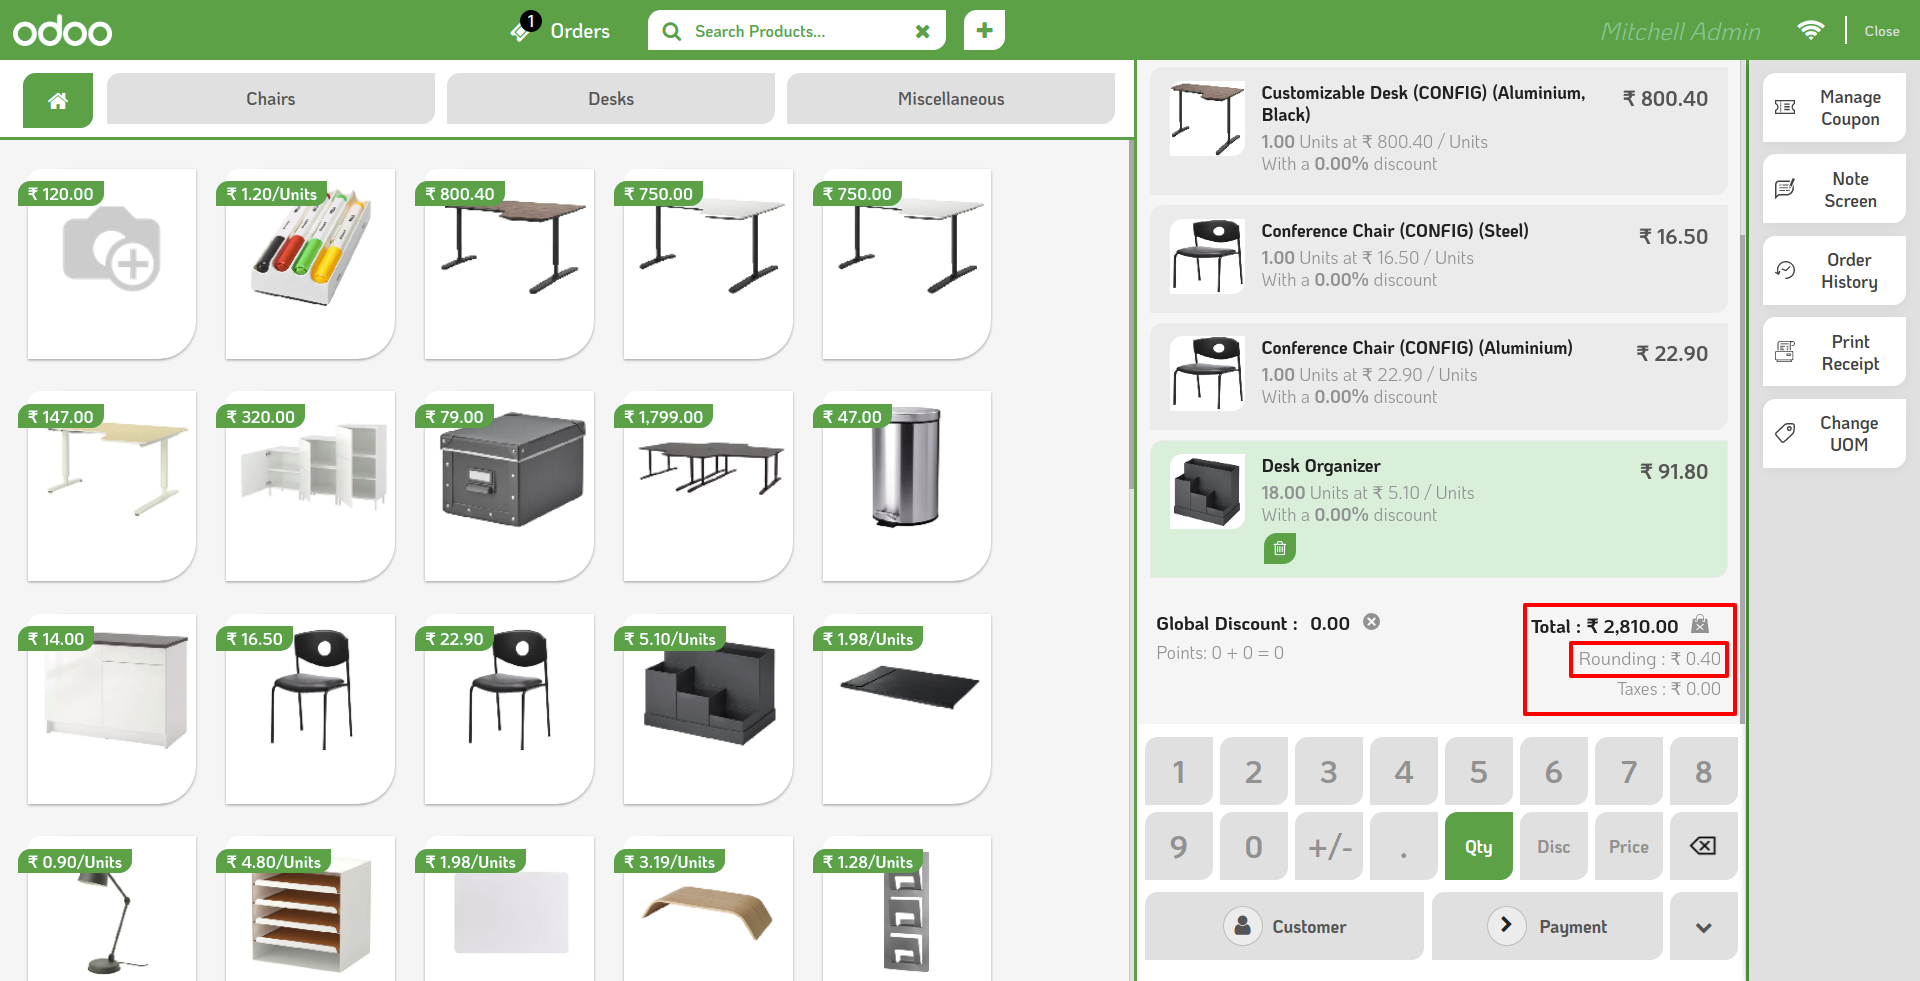
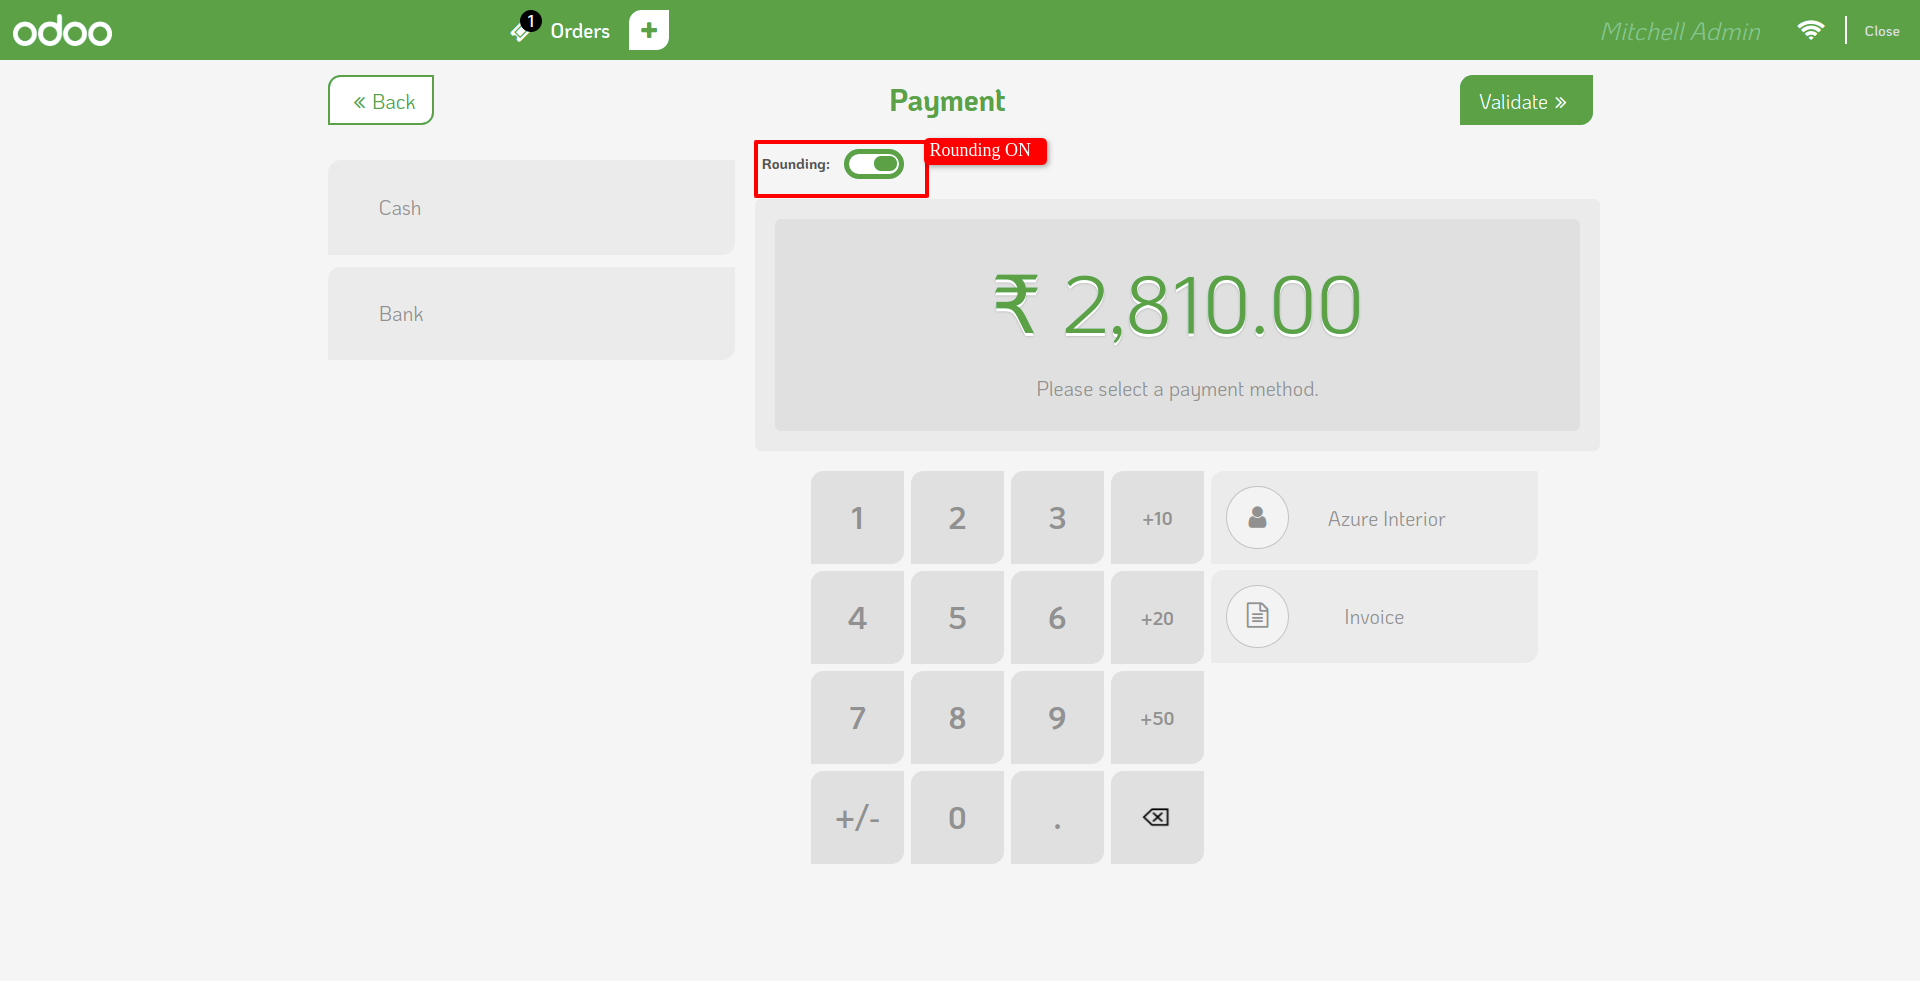
In payment screen you can easy to enable or disable rounding.
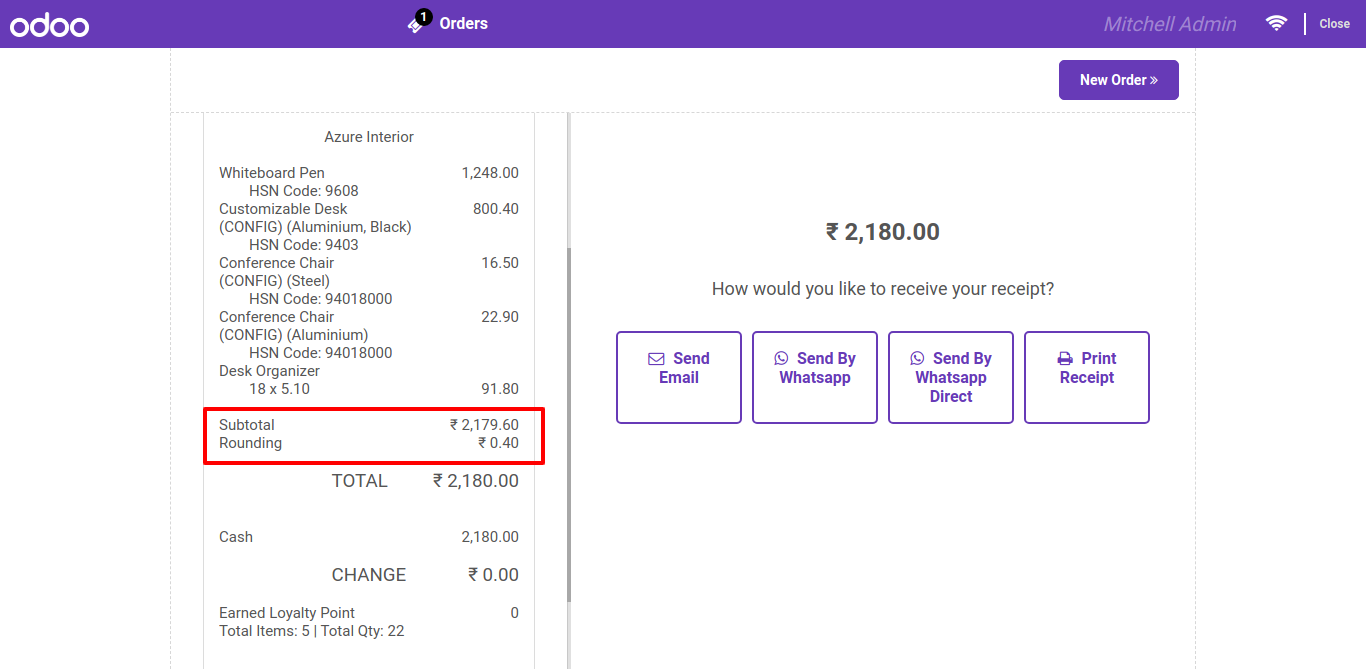
Rounding details on receipt
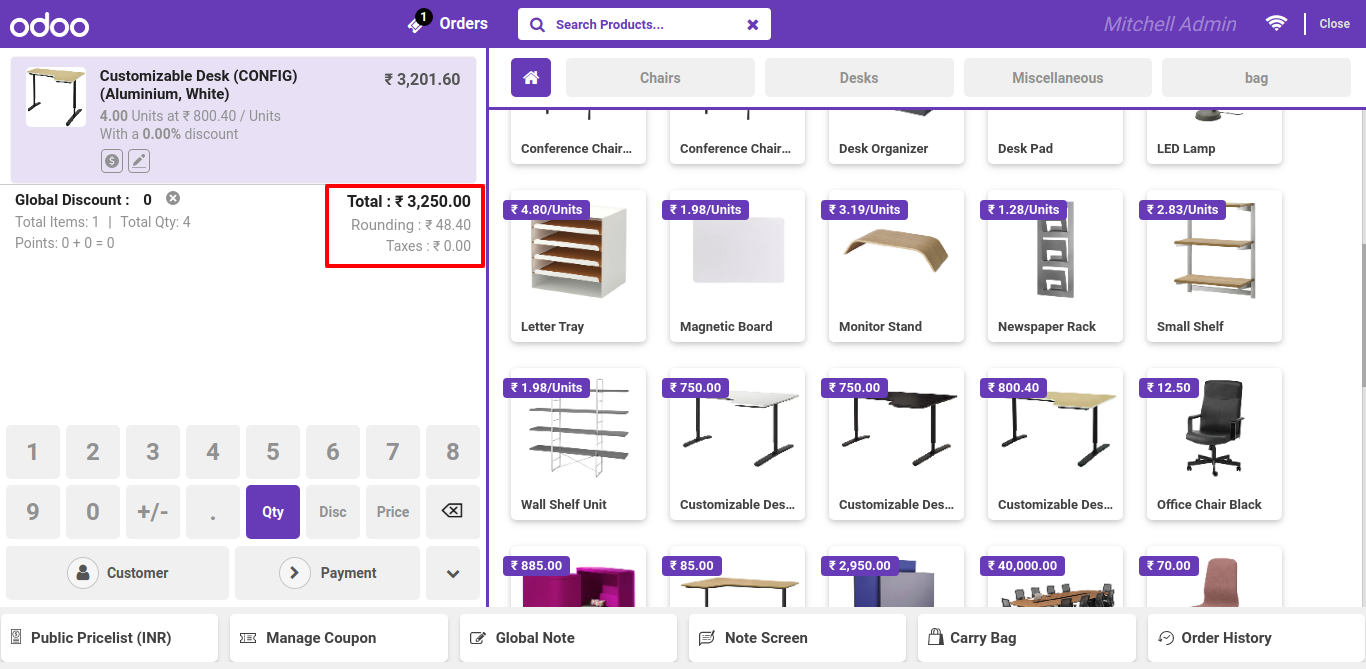
Rounding to Fifty.
Rounding to Fifty on pos screen.
Rounding to Fifty on pos receipts.
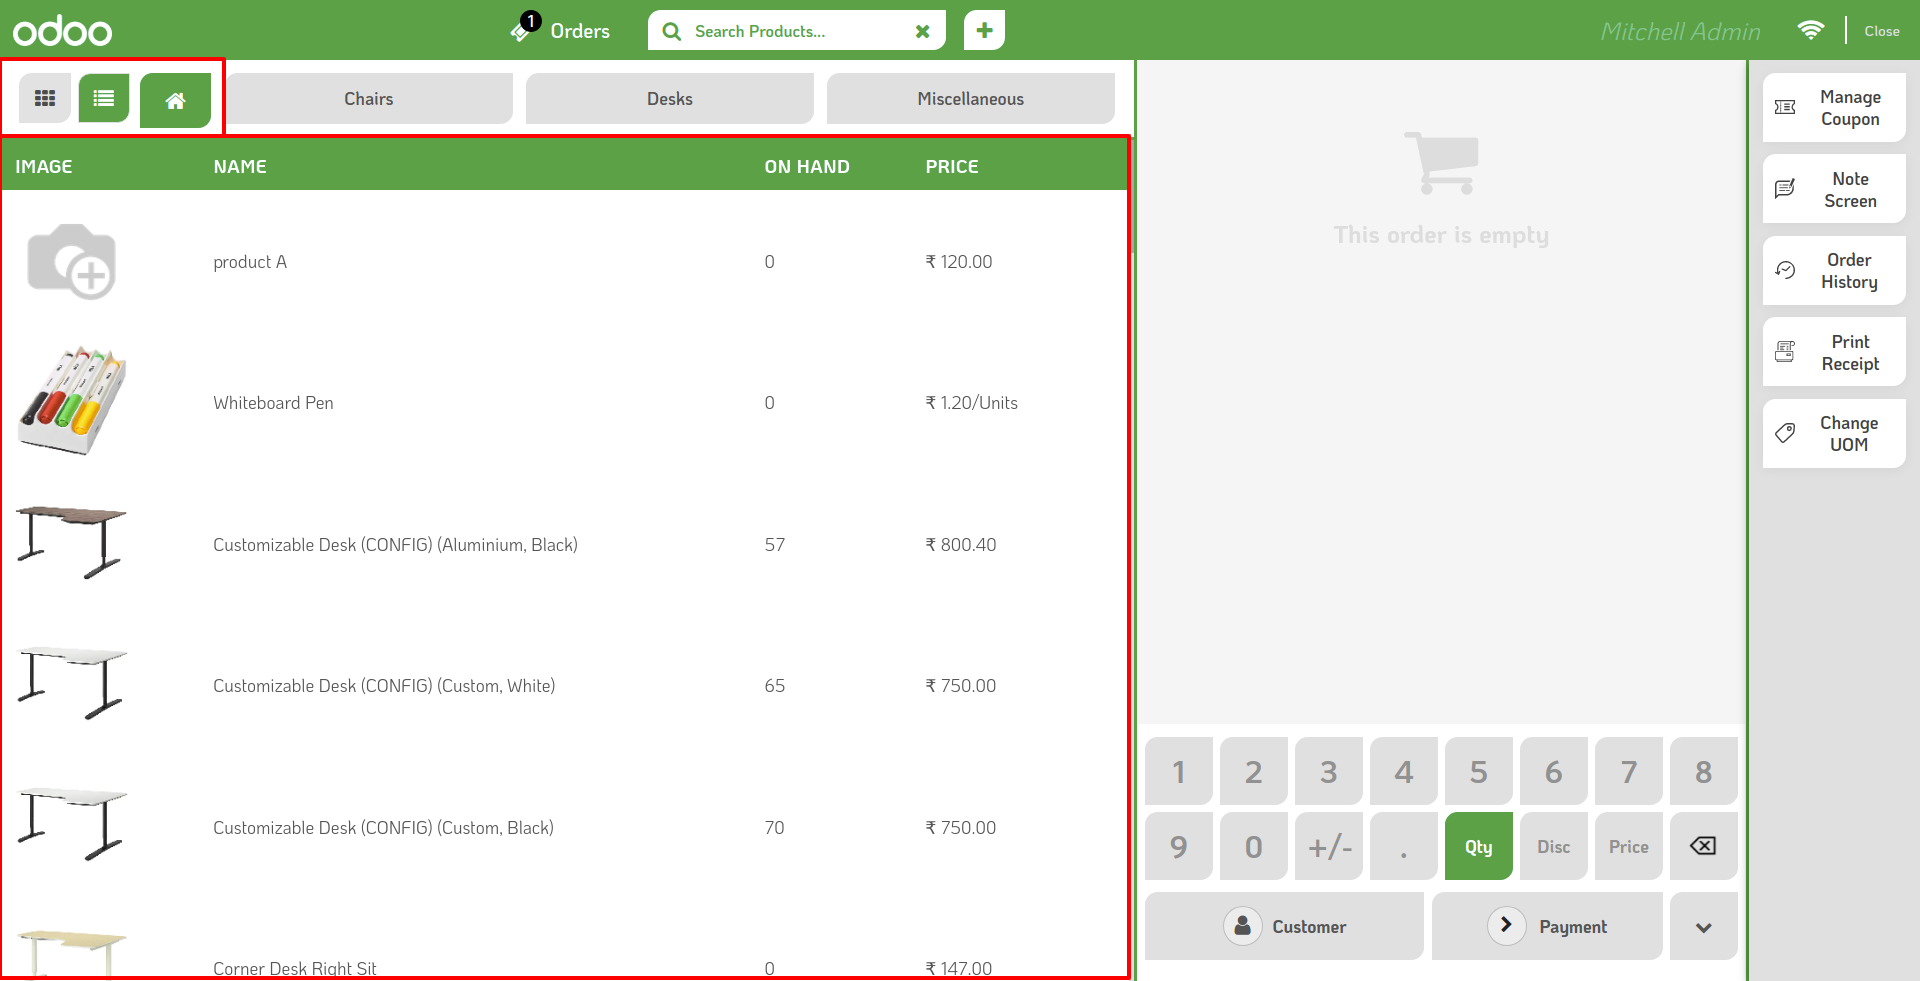
Goto pos setting and enable pos switch view feature. there are several options to display product in list or grid view, with lots of products details as well.

How it looks on pos screen. also you can change product view list to grid.
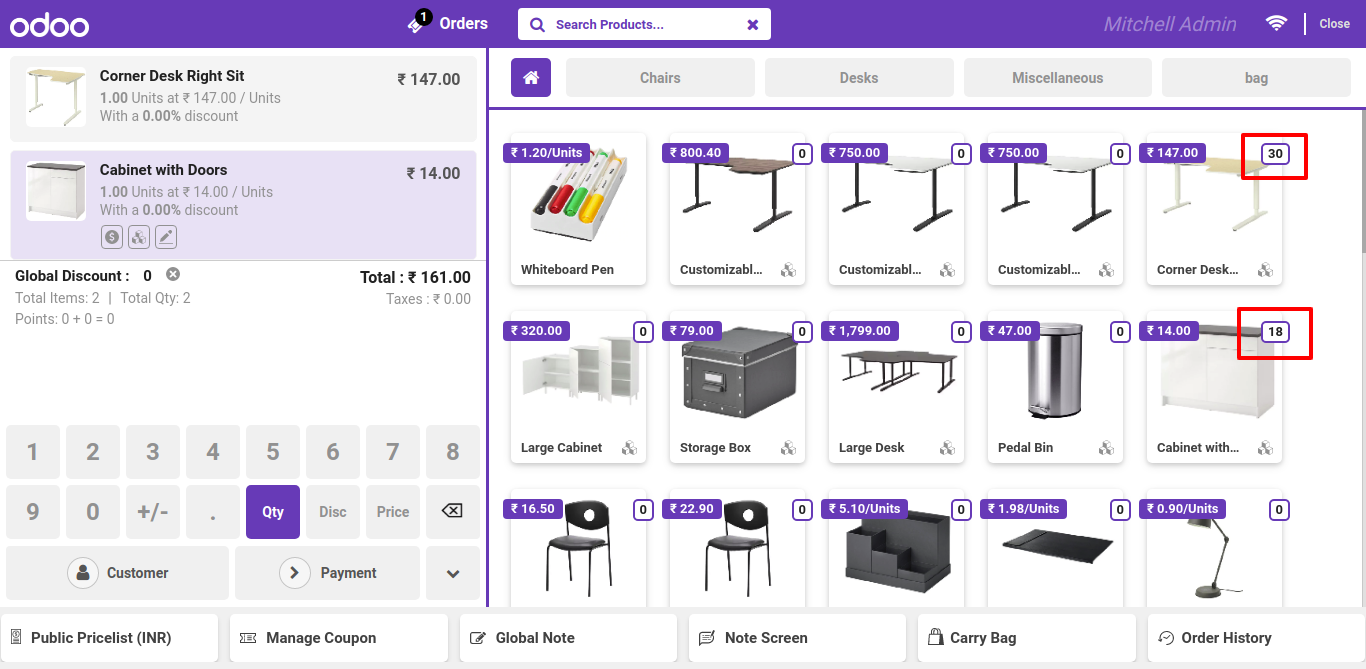
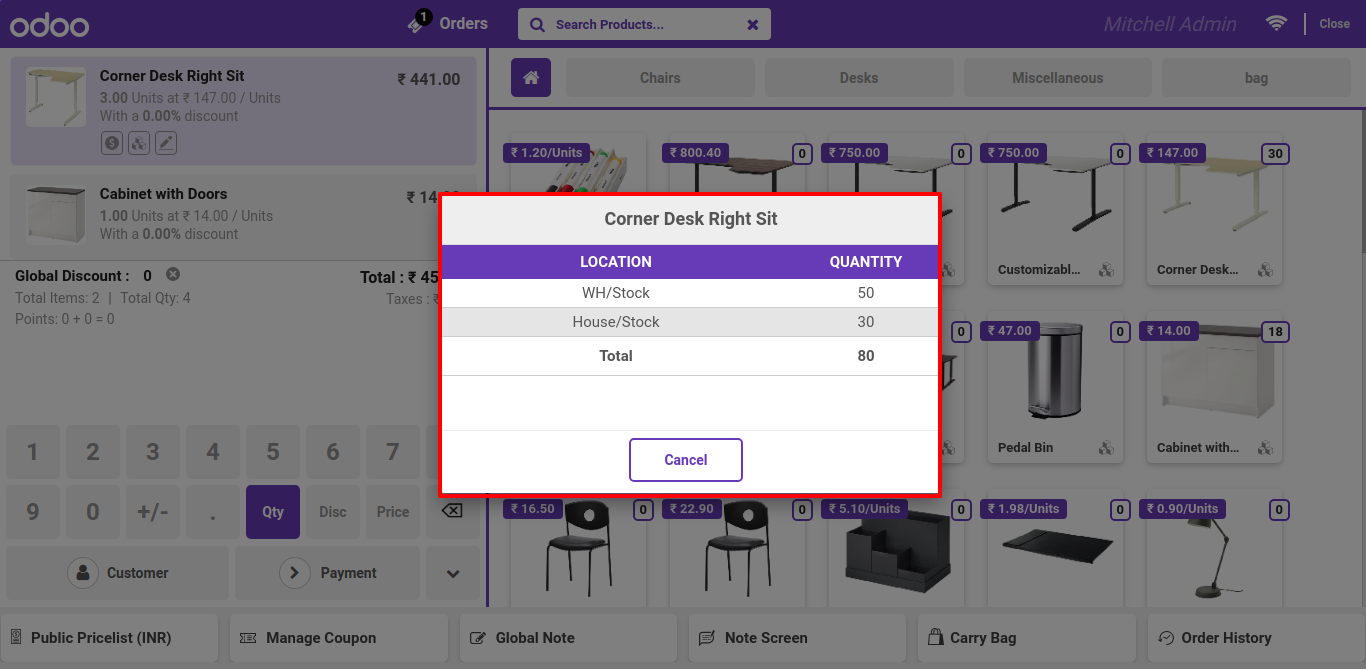
Goto pos setting and enable Display Warehouse Stock. Here we have several options to display warehouse stock, location stock or set limit to stop selling after minimum stock qty accured

Here on pos screen stock details display on product image. Or click on stock icon on product.
After click on stock icon you can see the details.
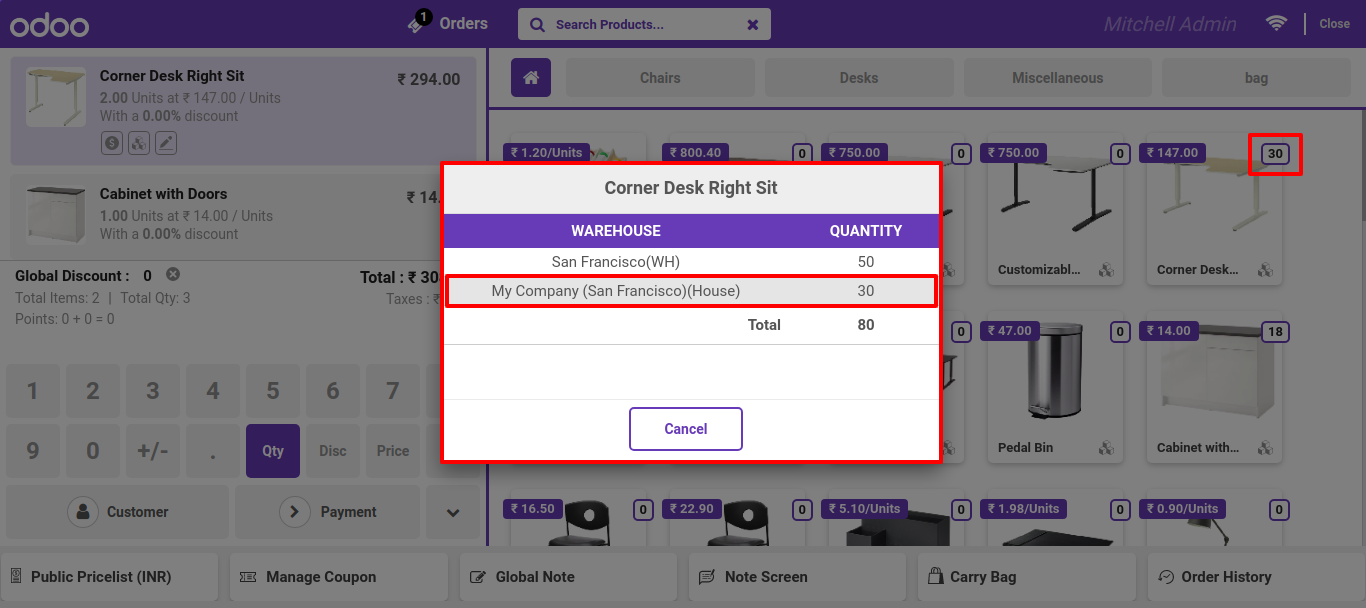
Location wise Stock details.
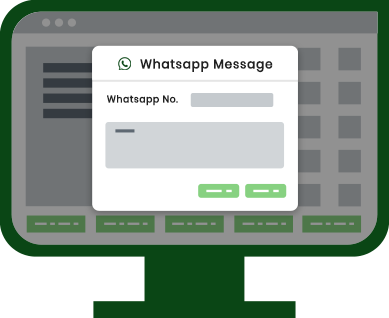
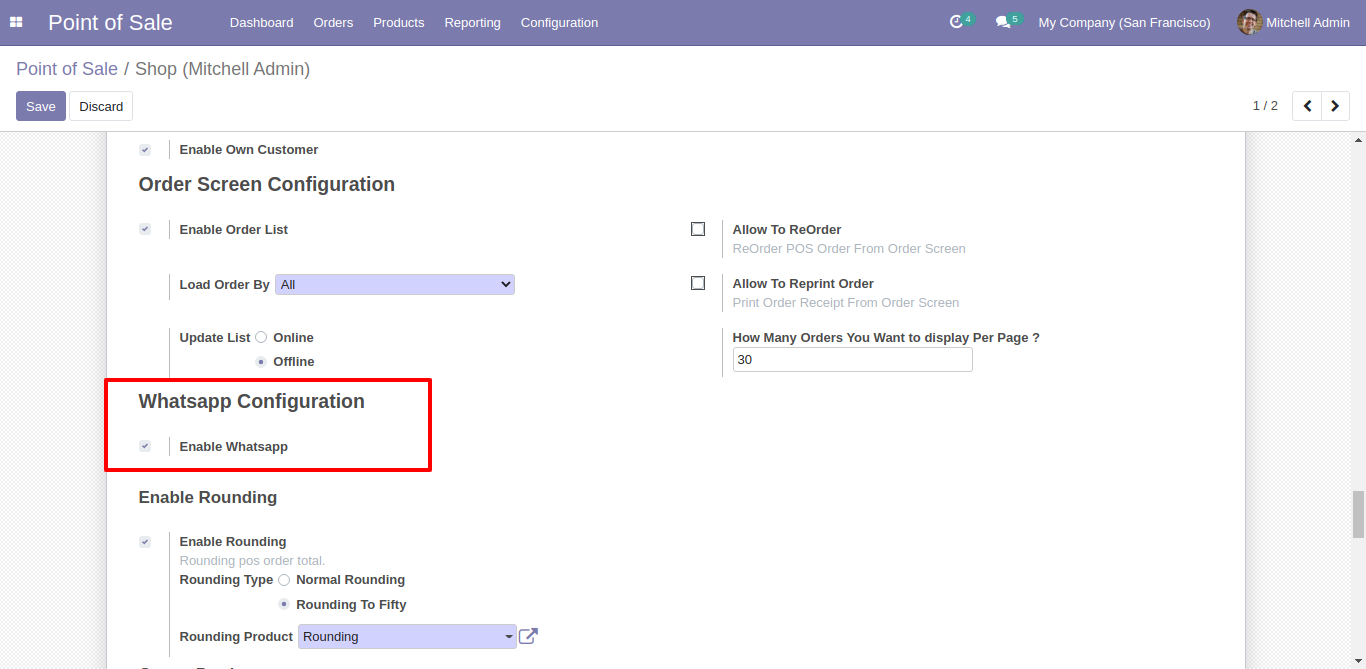
Goto pos setting and enable Whatsapp Features.
Just Add customer mobile number in customer details.
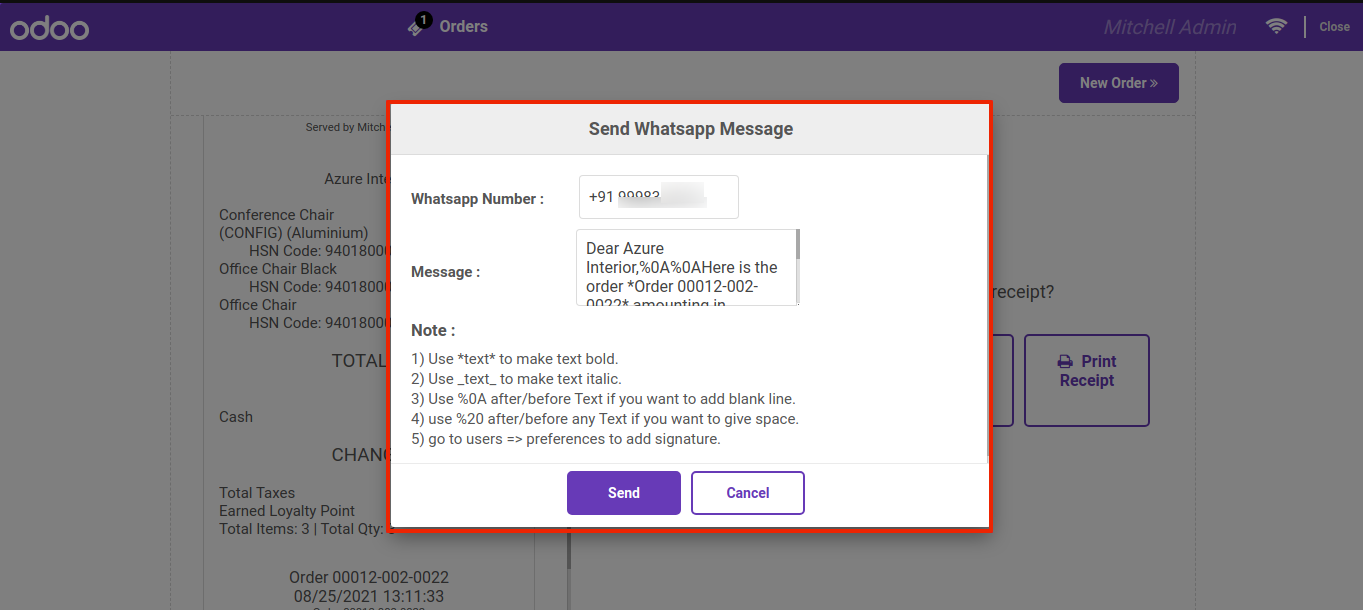
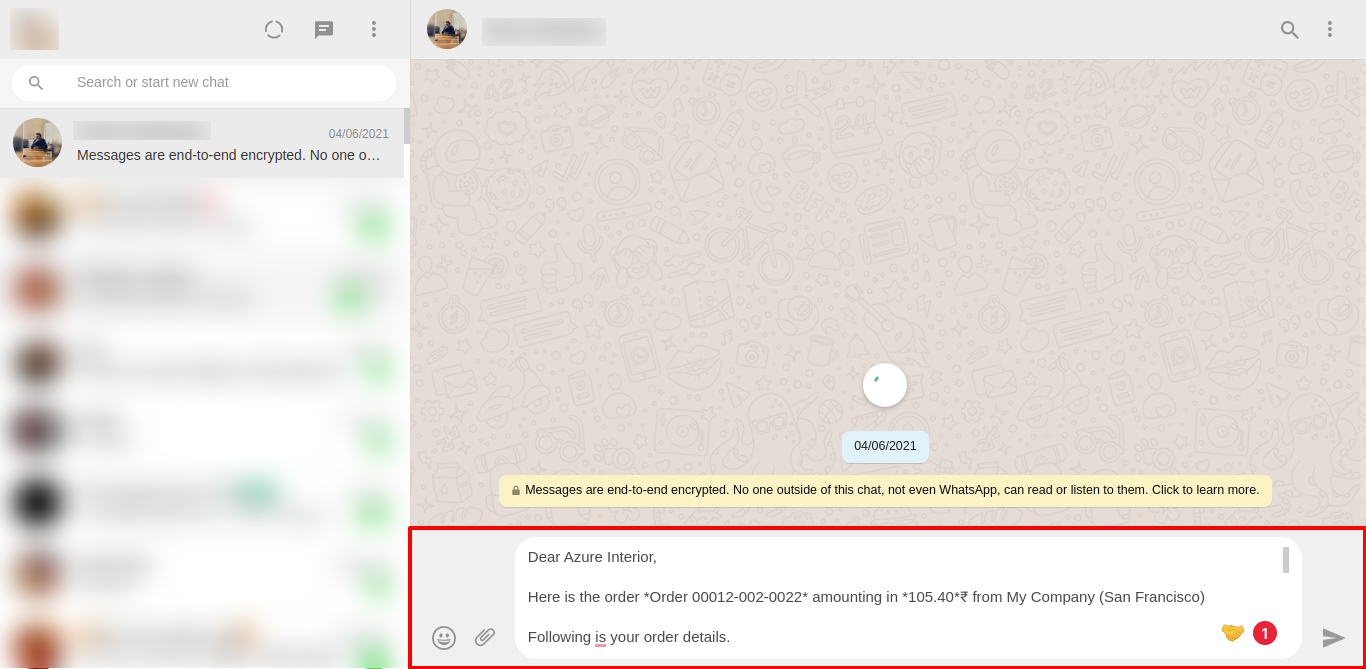
Make order and create receipt, here you have two option to send on whatsapp. 1. Customise message and then send, 2. Send direct (Without message customise).

After click on 'Send By Whatsapp', here you can edit your message.
After if you are not logged on whatsapp web so it display this wizard. (Just Scan this code with your whatsapp).
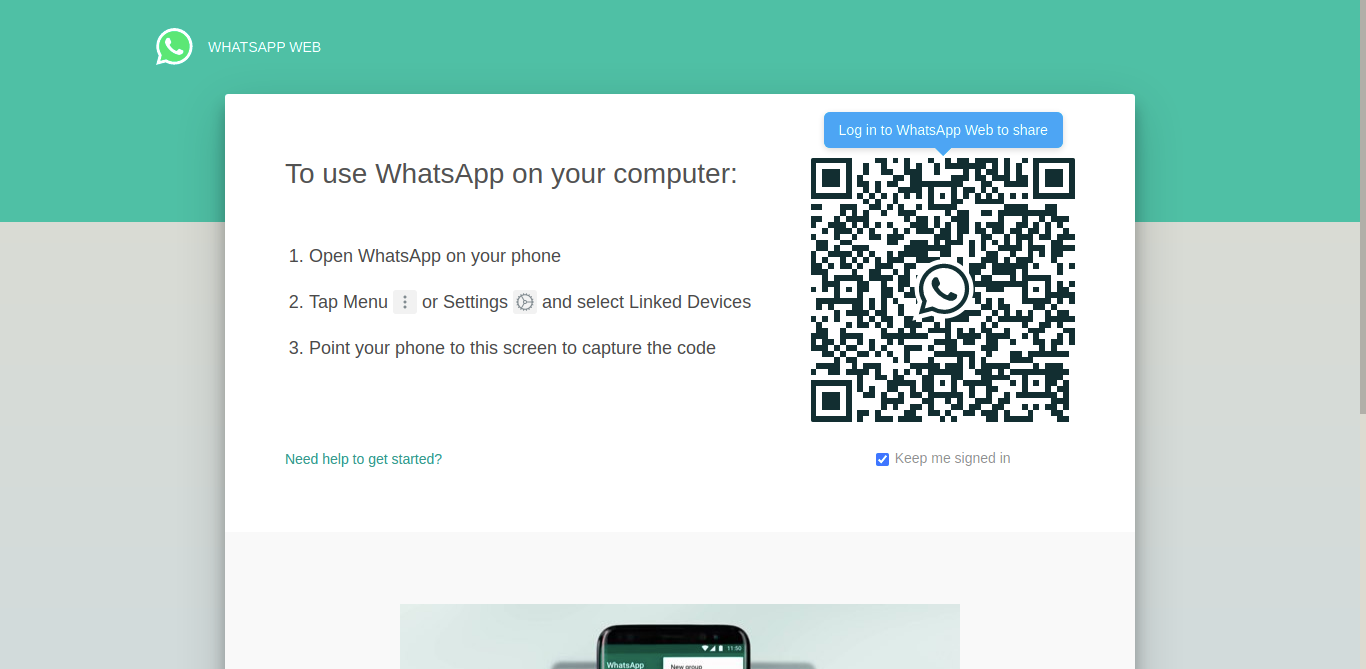
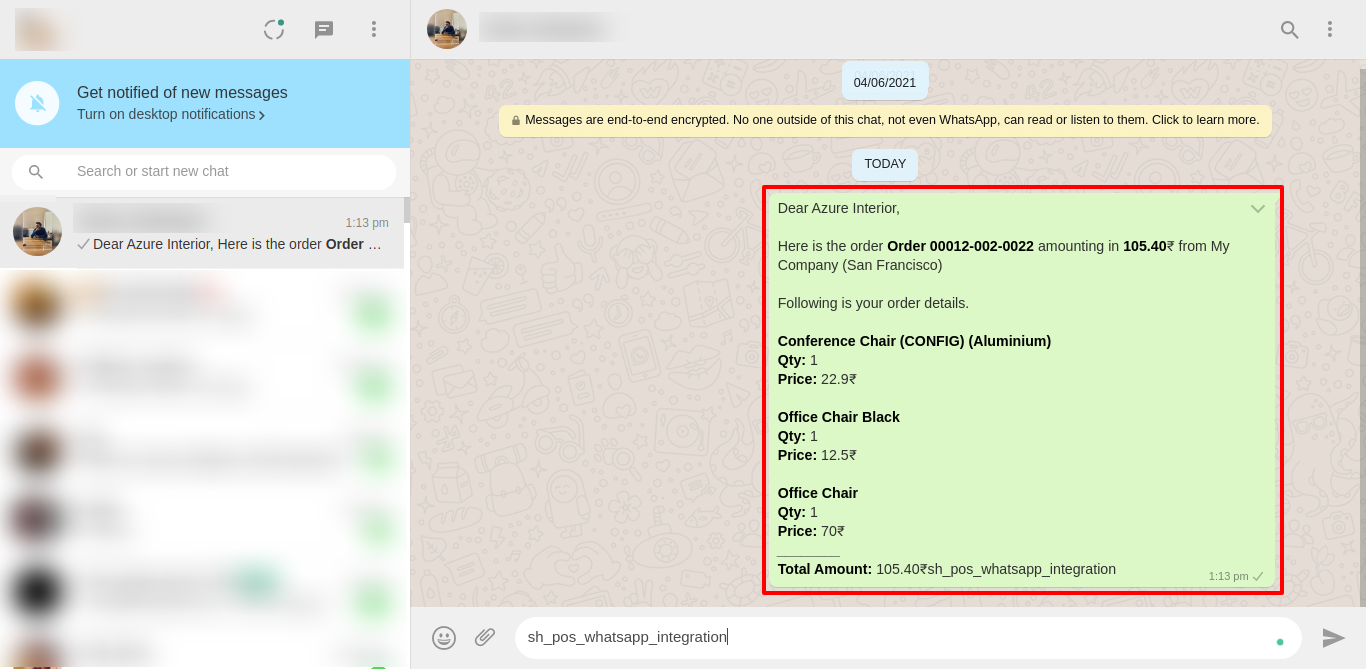
After that you will redirect to that customer chat screen.
Message Sent
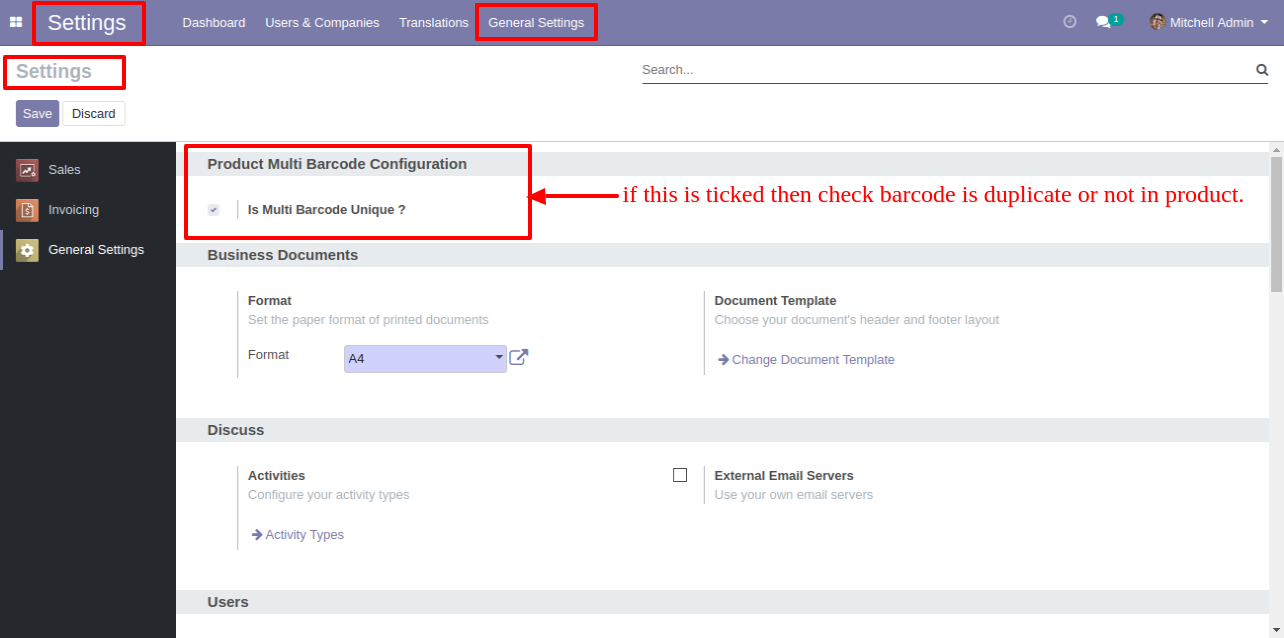
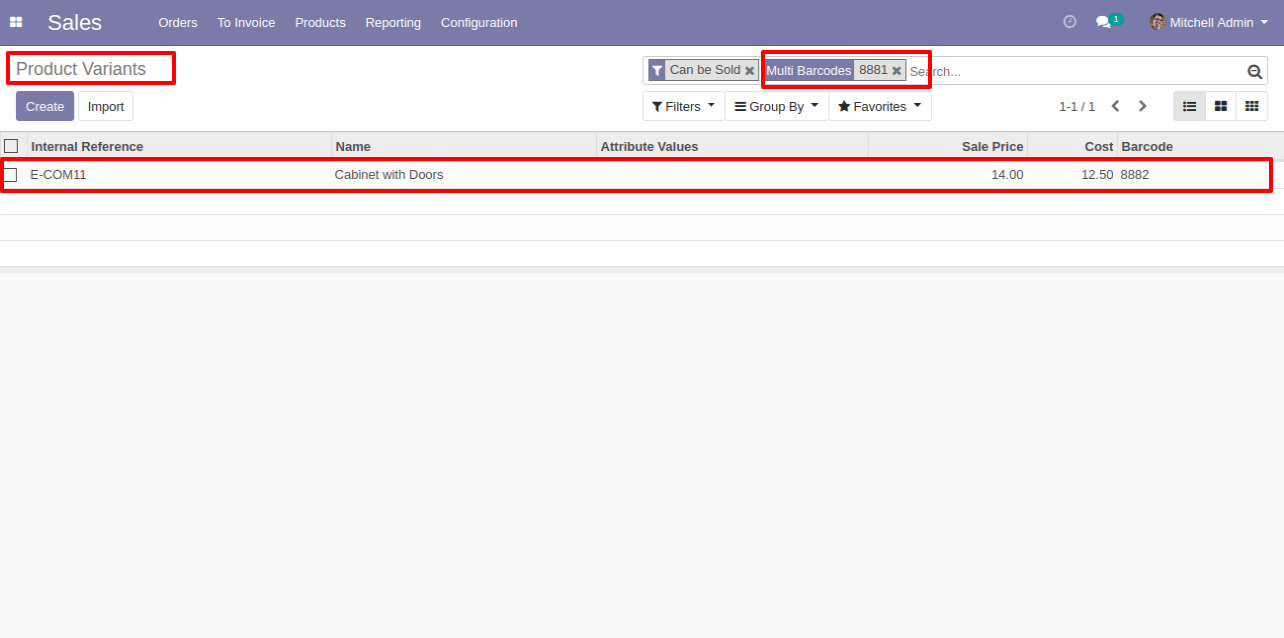
Goto general setting and enable product multi barcode feature.
In Product you can see the tab 'Barcode'. Here add your multiple barcodes.
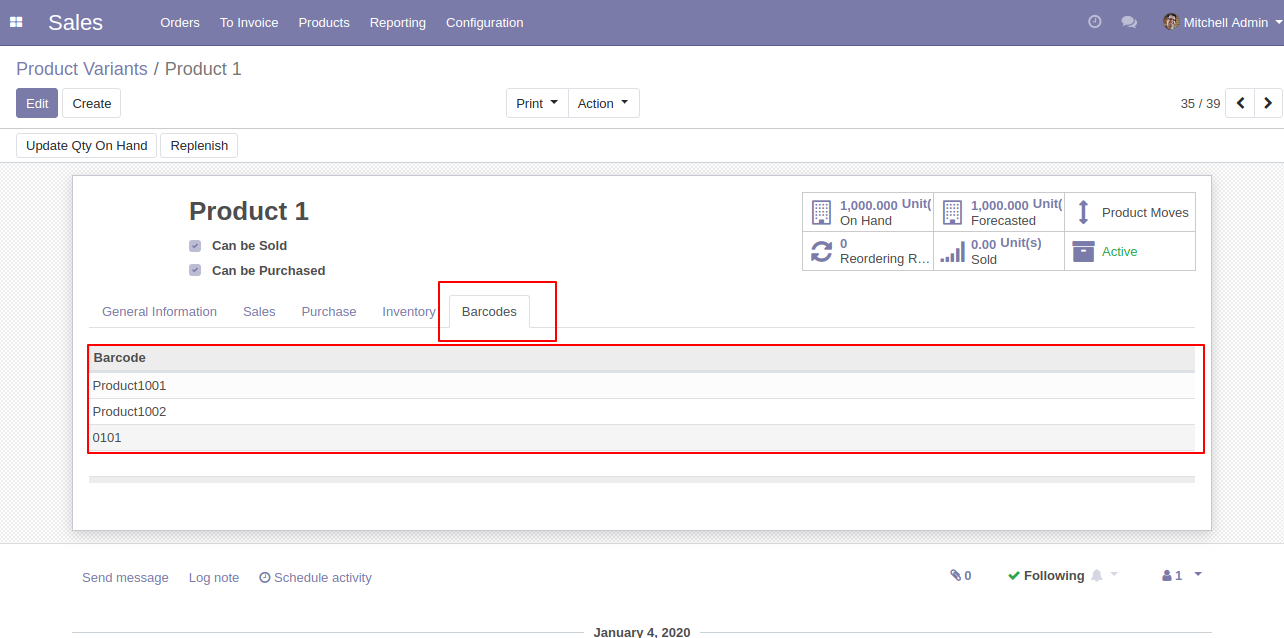
Also you can search product using multi barcodes.
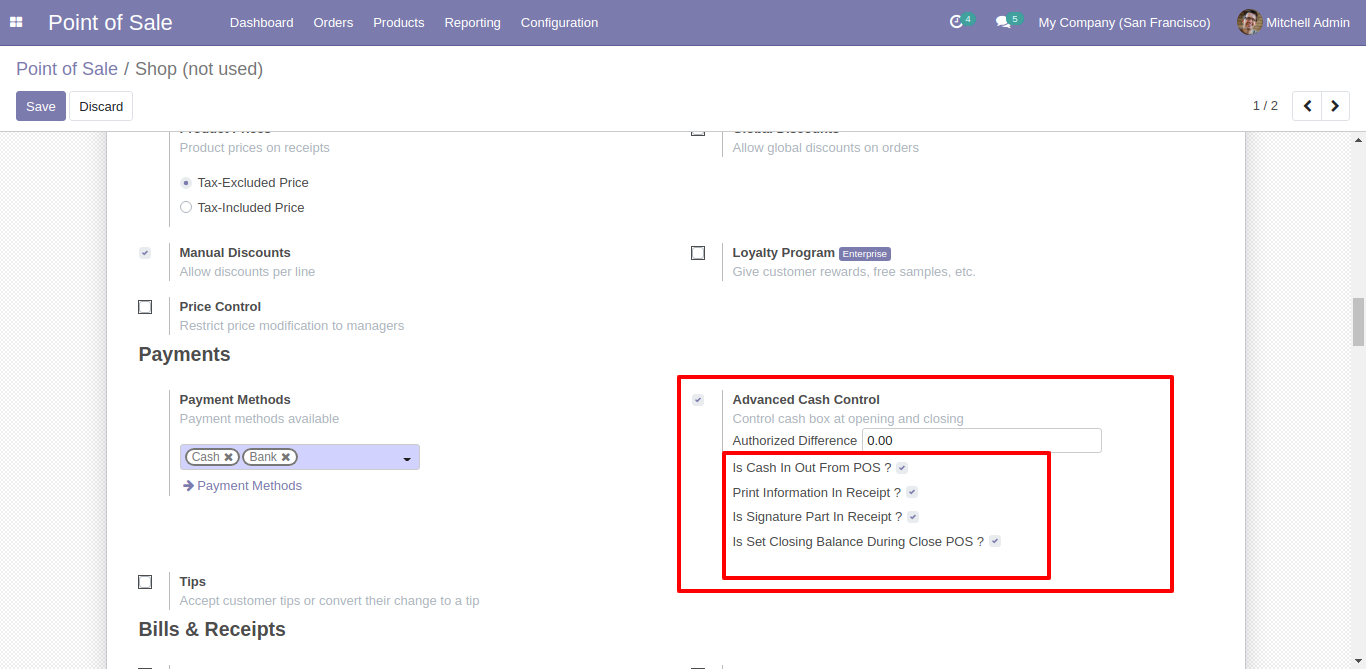
Goto pos setting and enable advance cash control and one more 'is cash in out from pos'. After that it will display some more options print, signature etc...
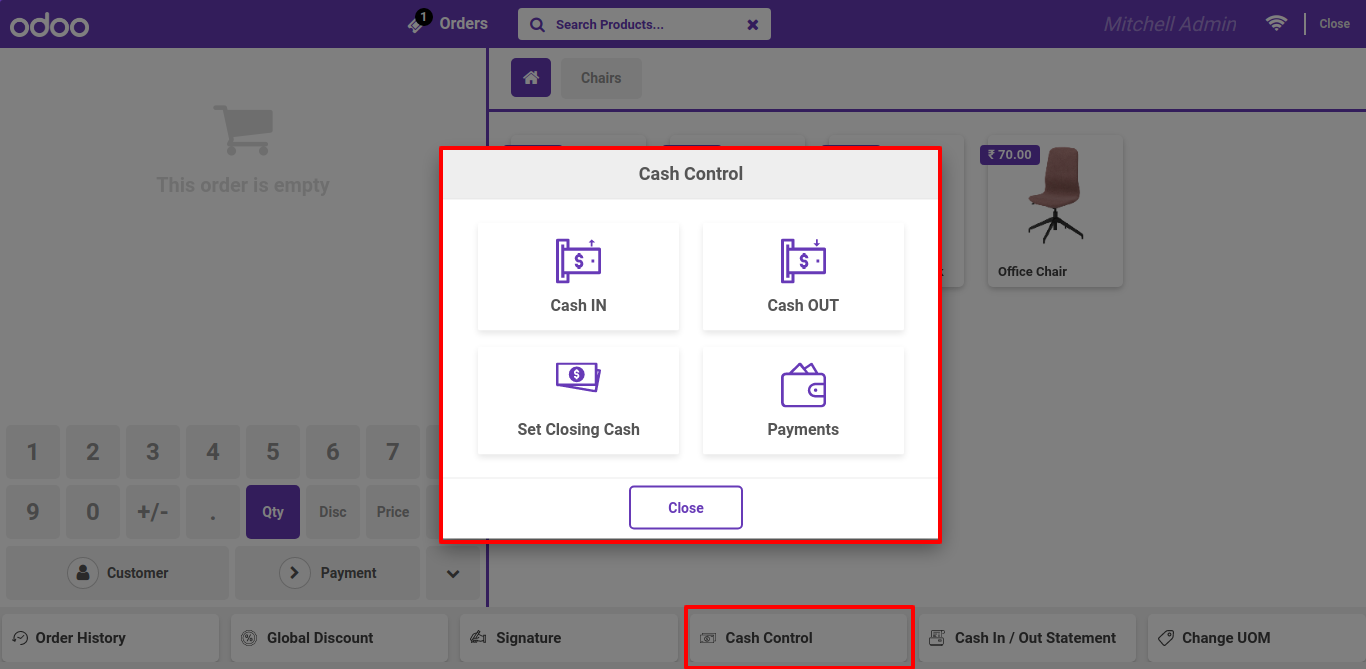
Now click on 'Cash Control' on pos screen. After that it will display this window, here we have 4 options as shown in below image.
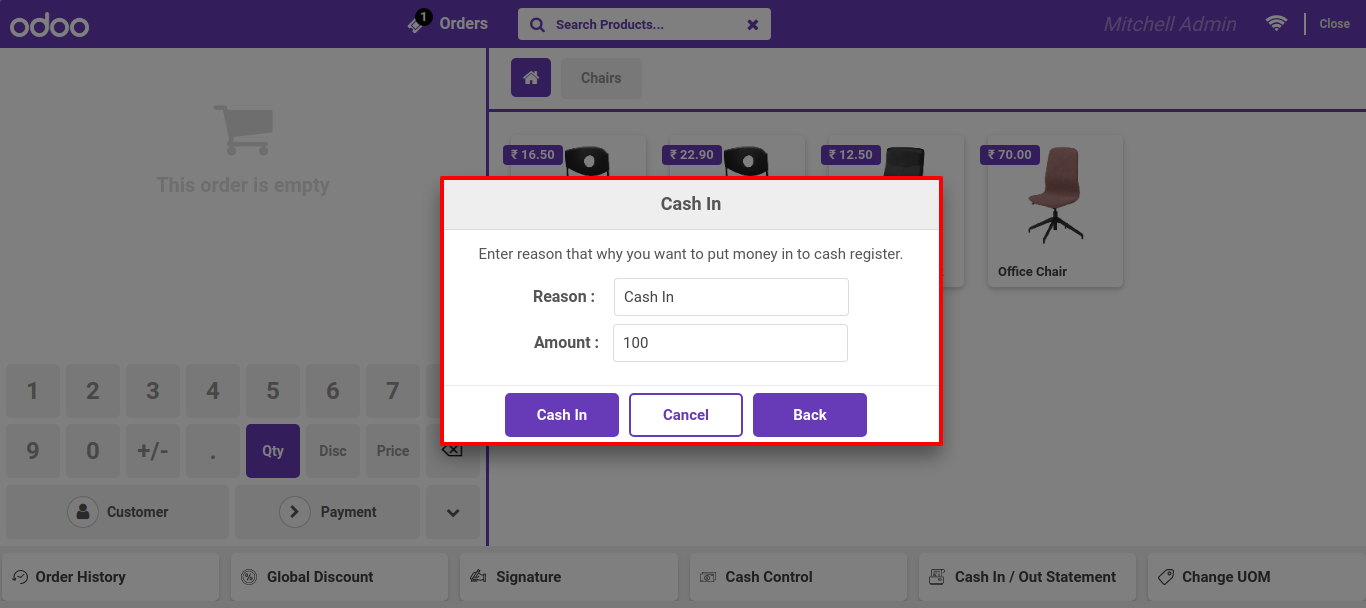
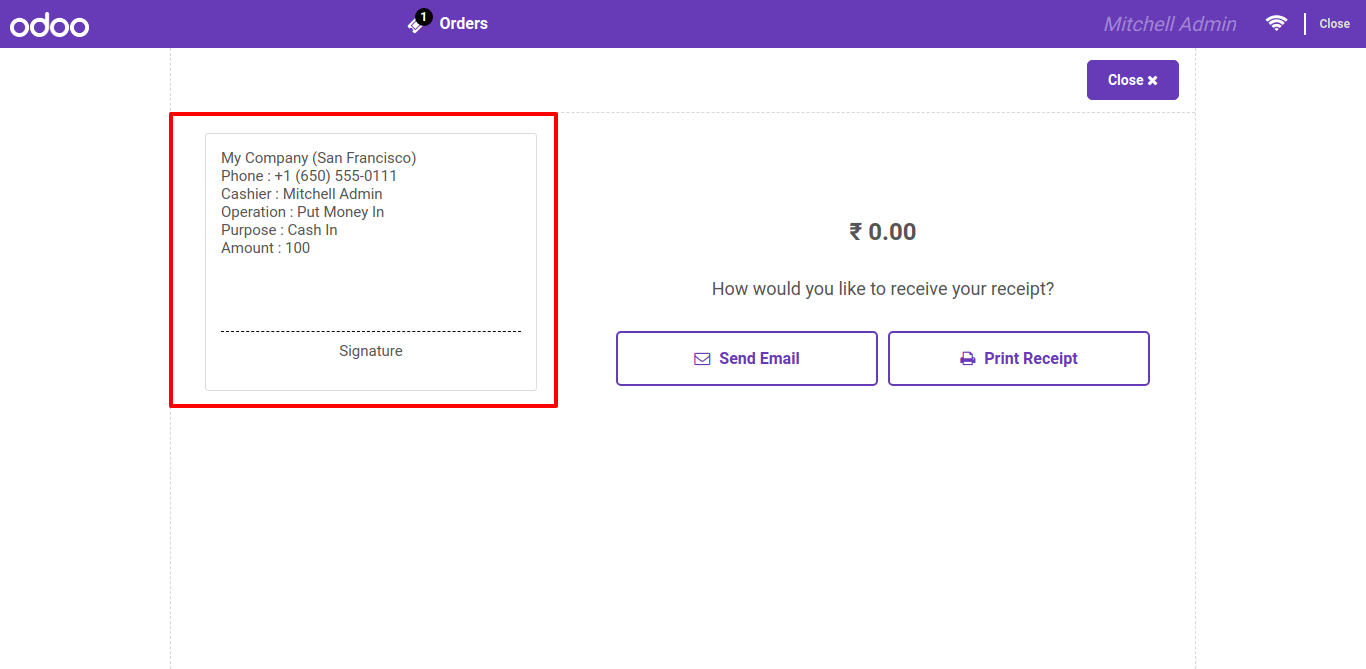
After click on cash in, here you can add detail of cash in.
After click on cash in, download cash in receipt and there is place for manual sign.
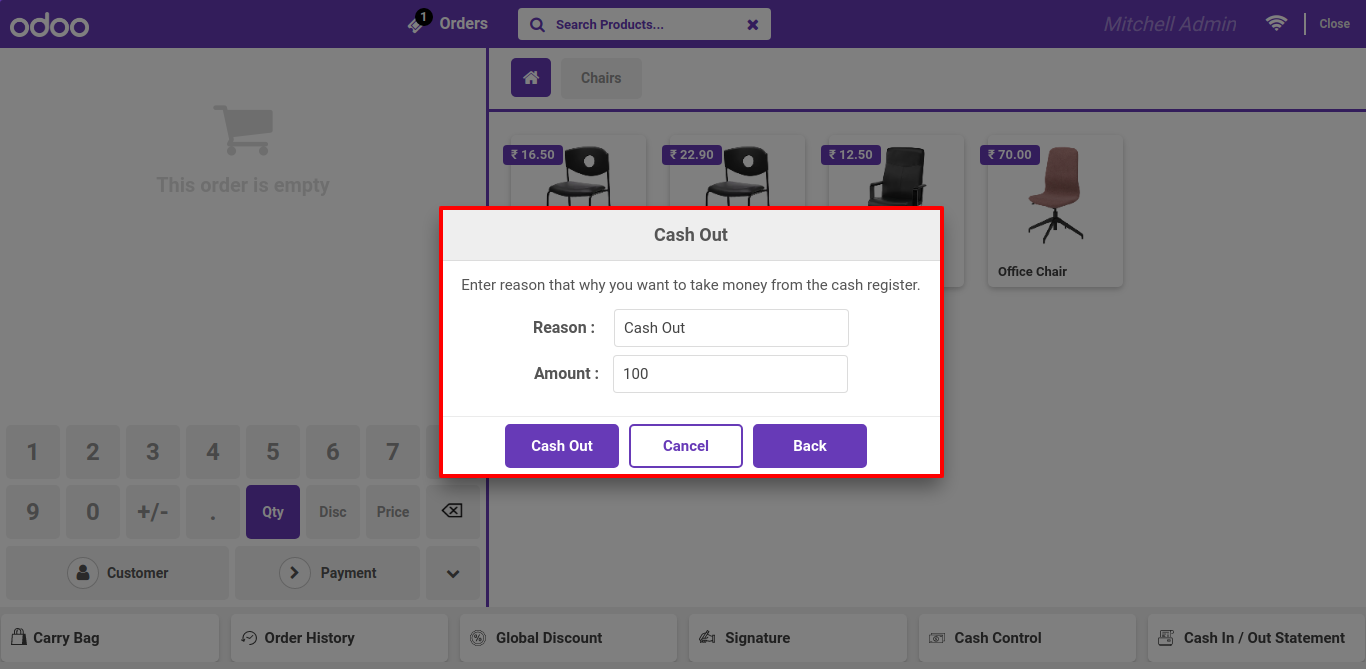
After click on cash out, here you can add detail of cash out.
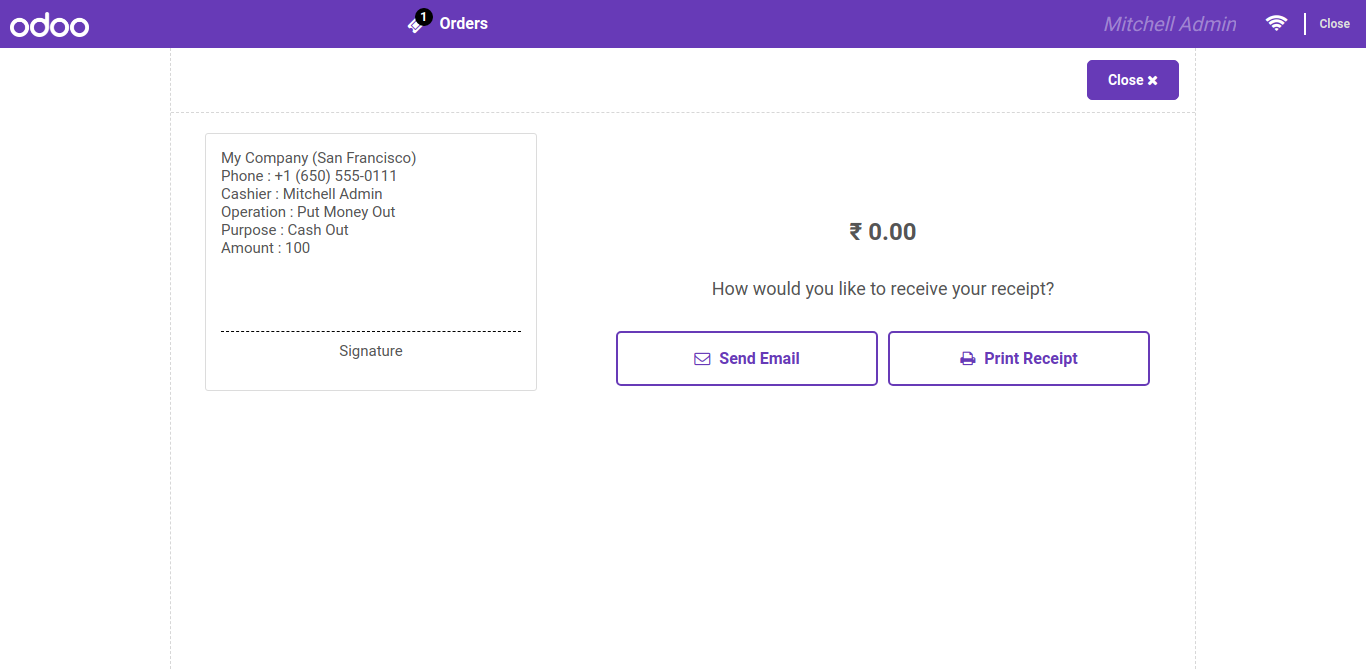
After click on cash out, download cash out receipt and there is place for manual sign.
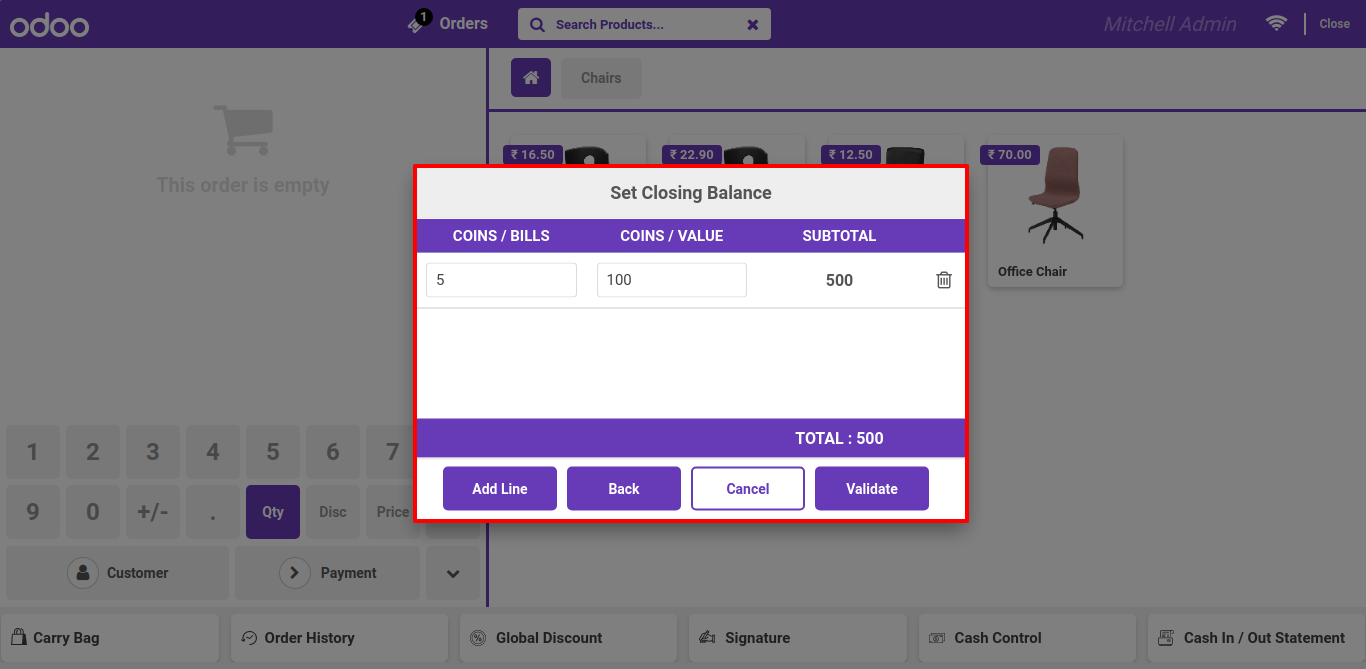
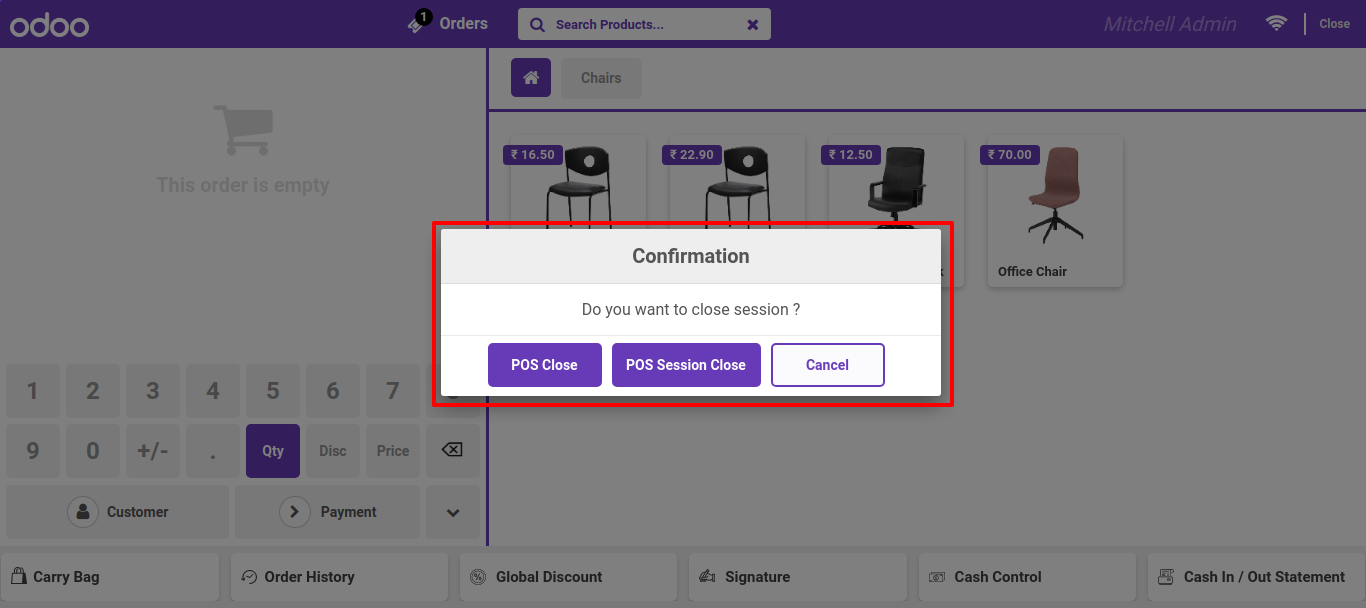
After click on set closing button, here you can set your closing balance.
After set closing balance, you have two option 1. close session or just 2. clos pos screen.
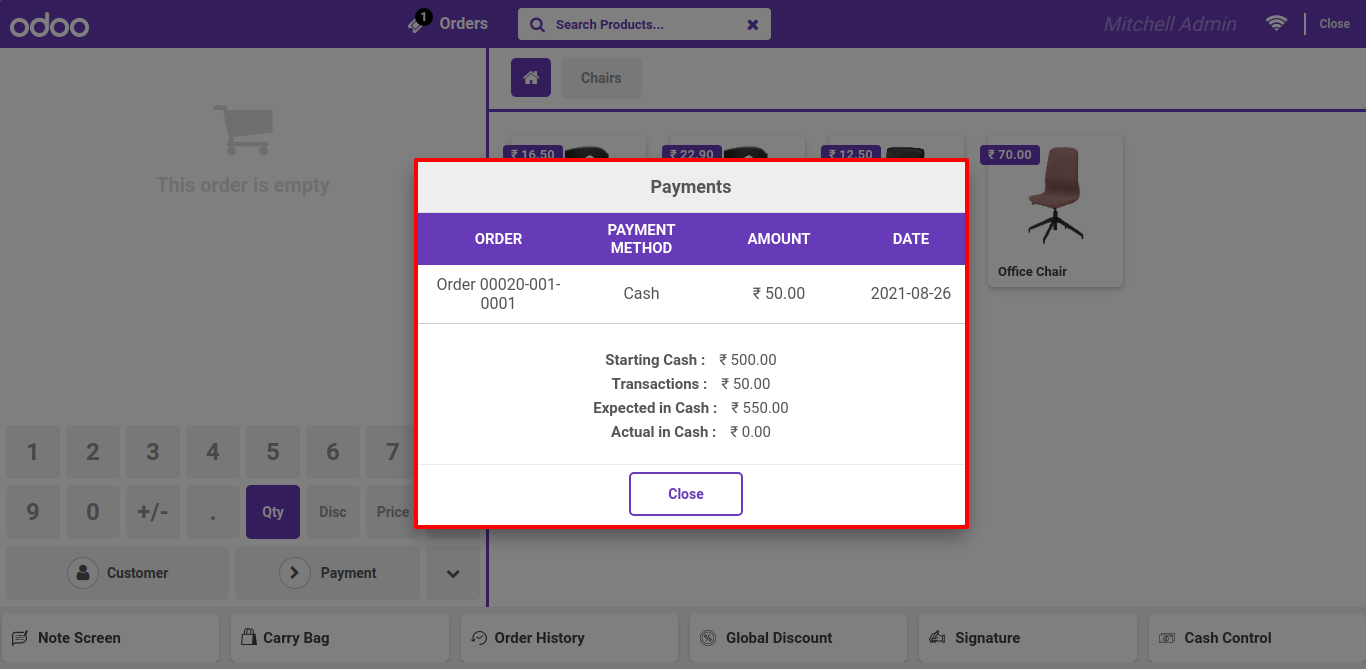
After click on Payment, here you can see detail of cash payments.
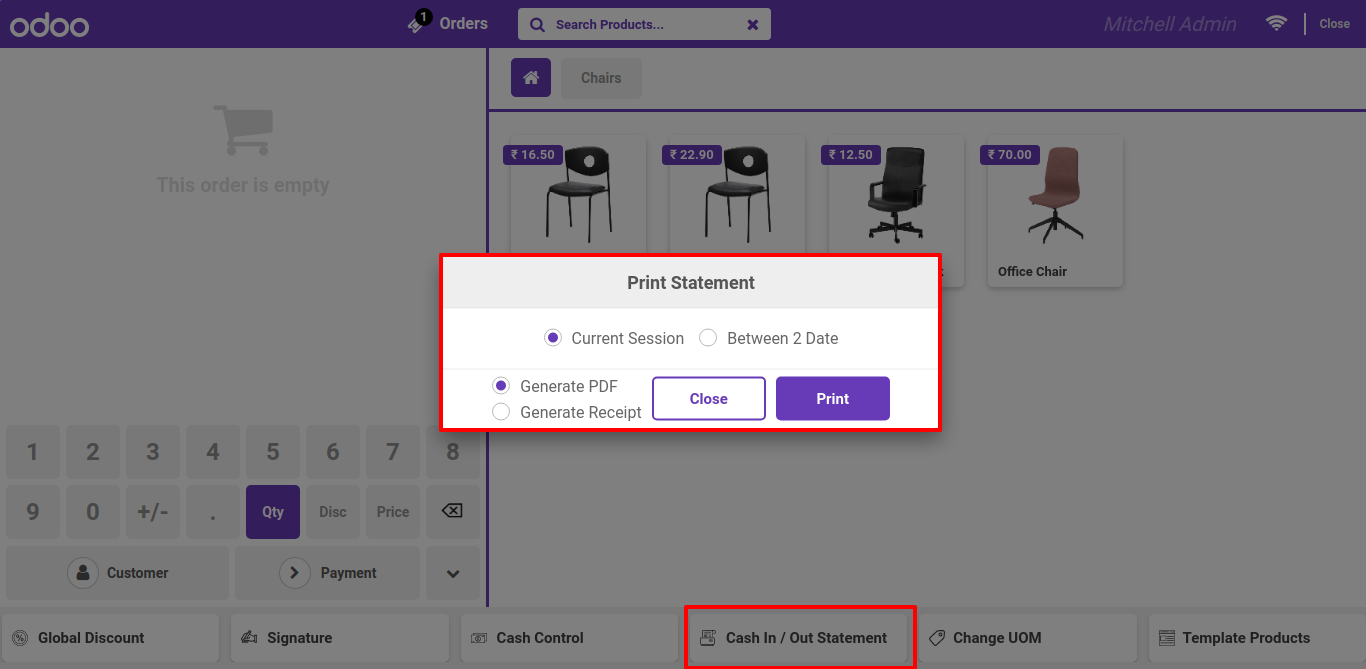
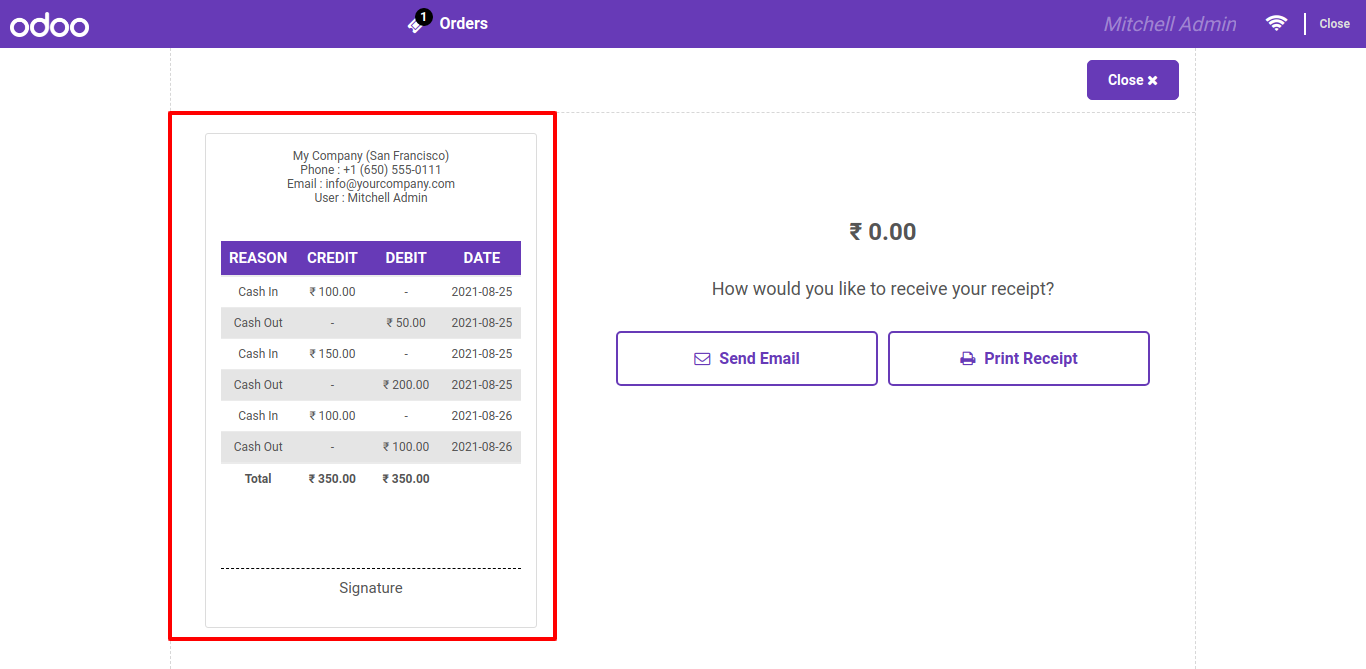
For print report of cash in and out, just click on 'Cash In / Cash Out Statements'. here you have two option for print current session or between two days with pdf or just receipt.
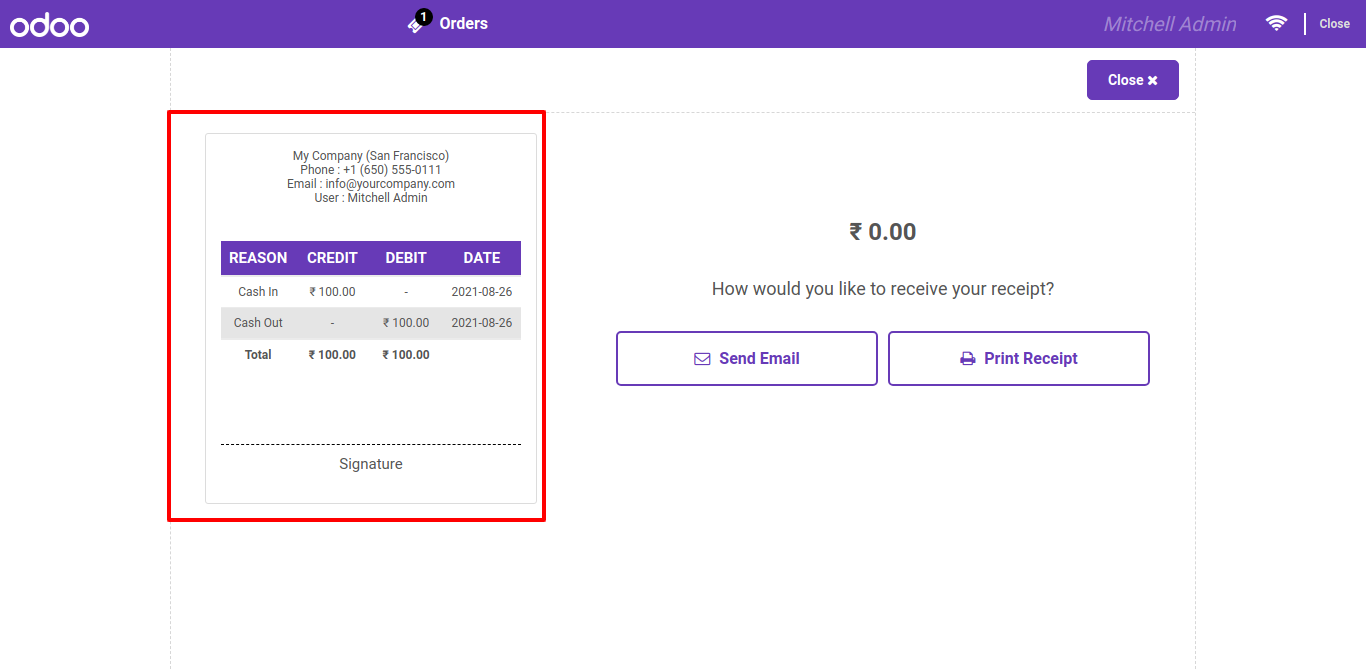
After select current session and print receipt.
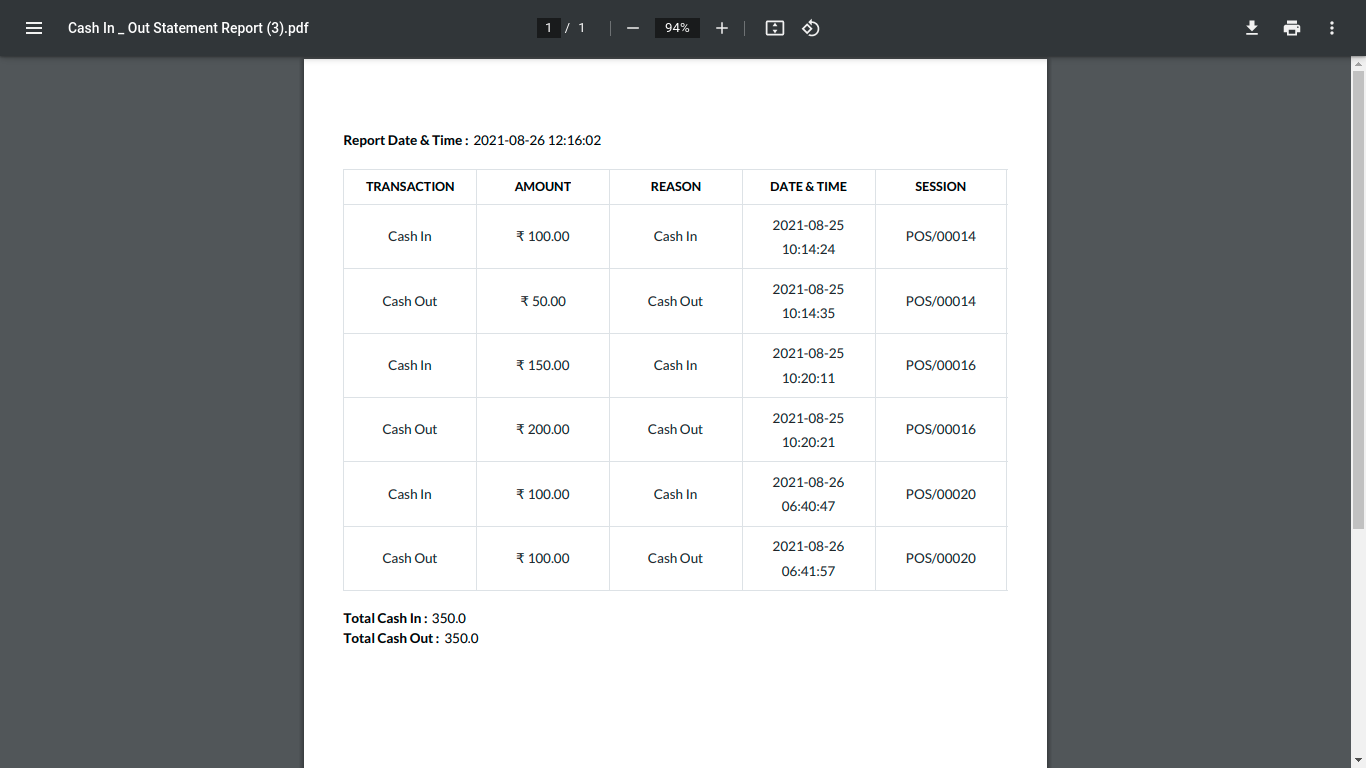
Print receipt for bwtween two days.
PDF reprot for between two days.
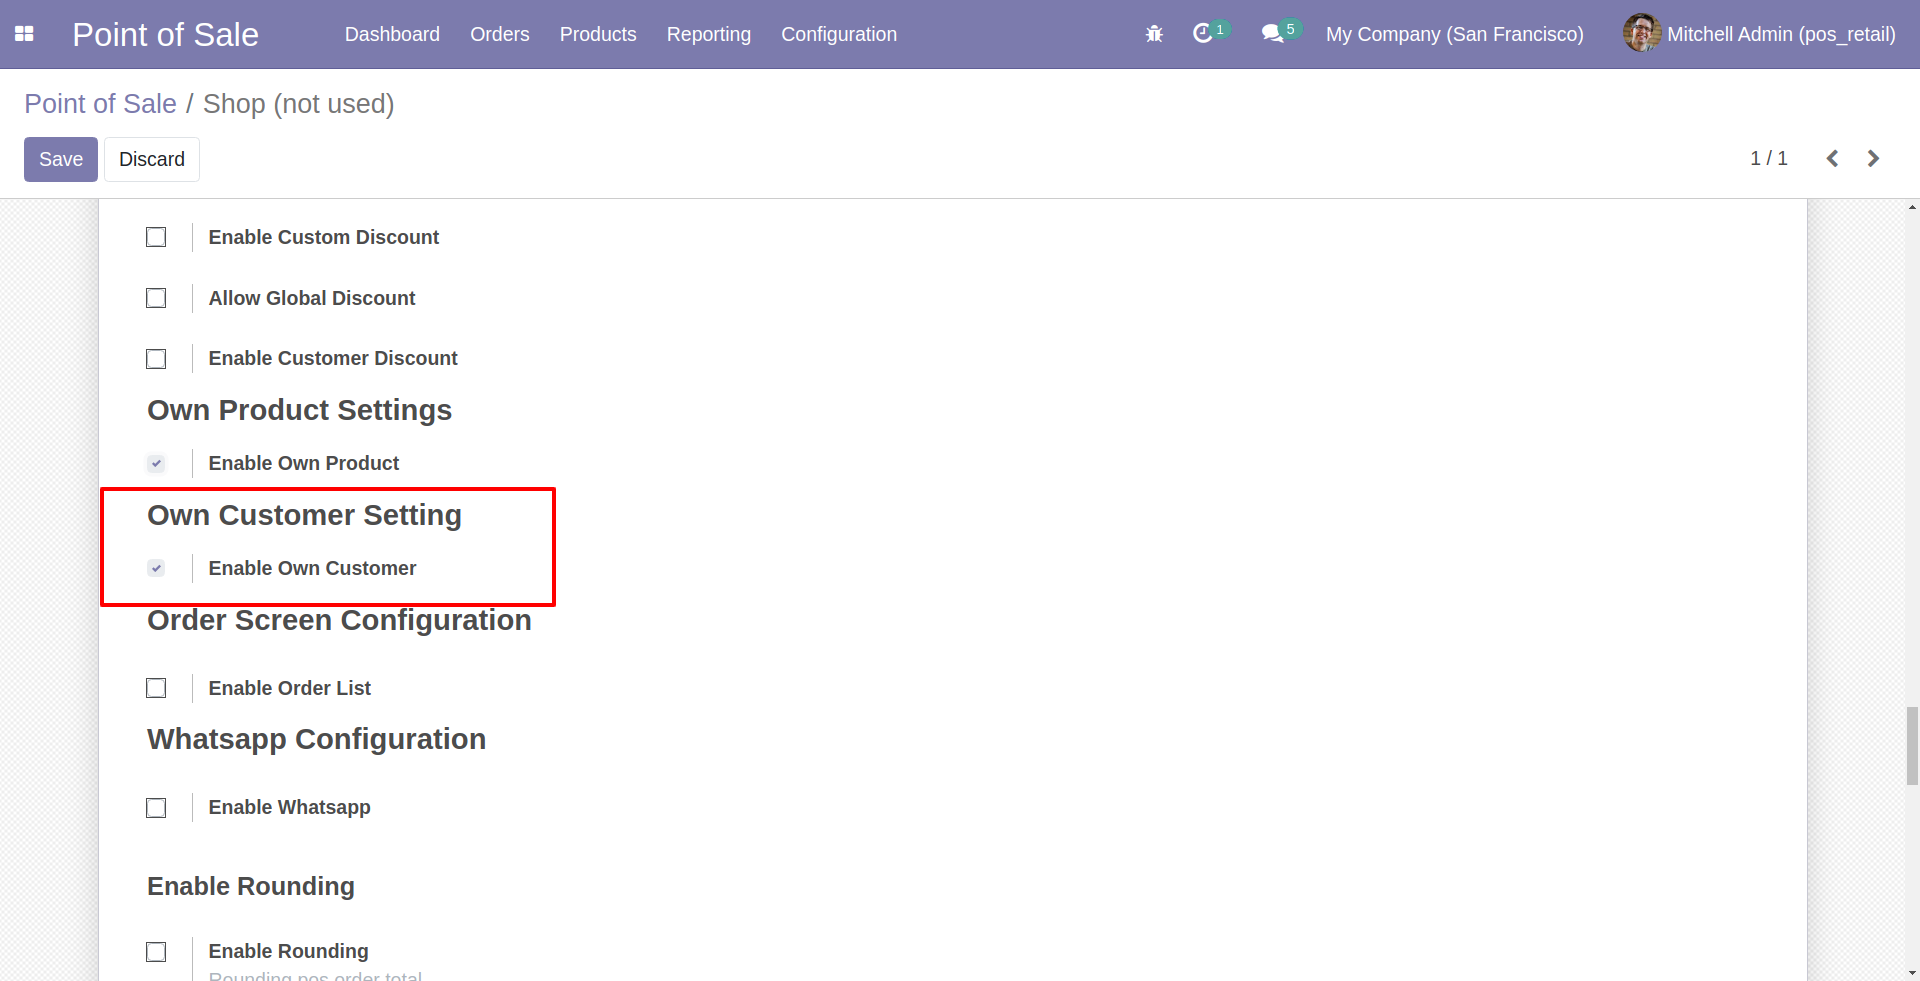
Goto pos setting and enable own customer feature.
Now goto customer detail view and set 'Allocated Sales Person'.
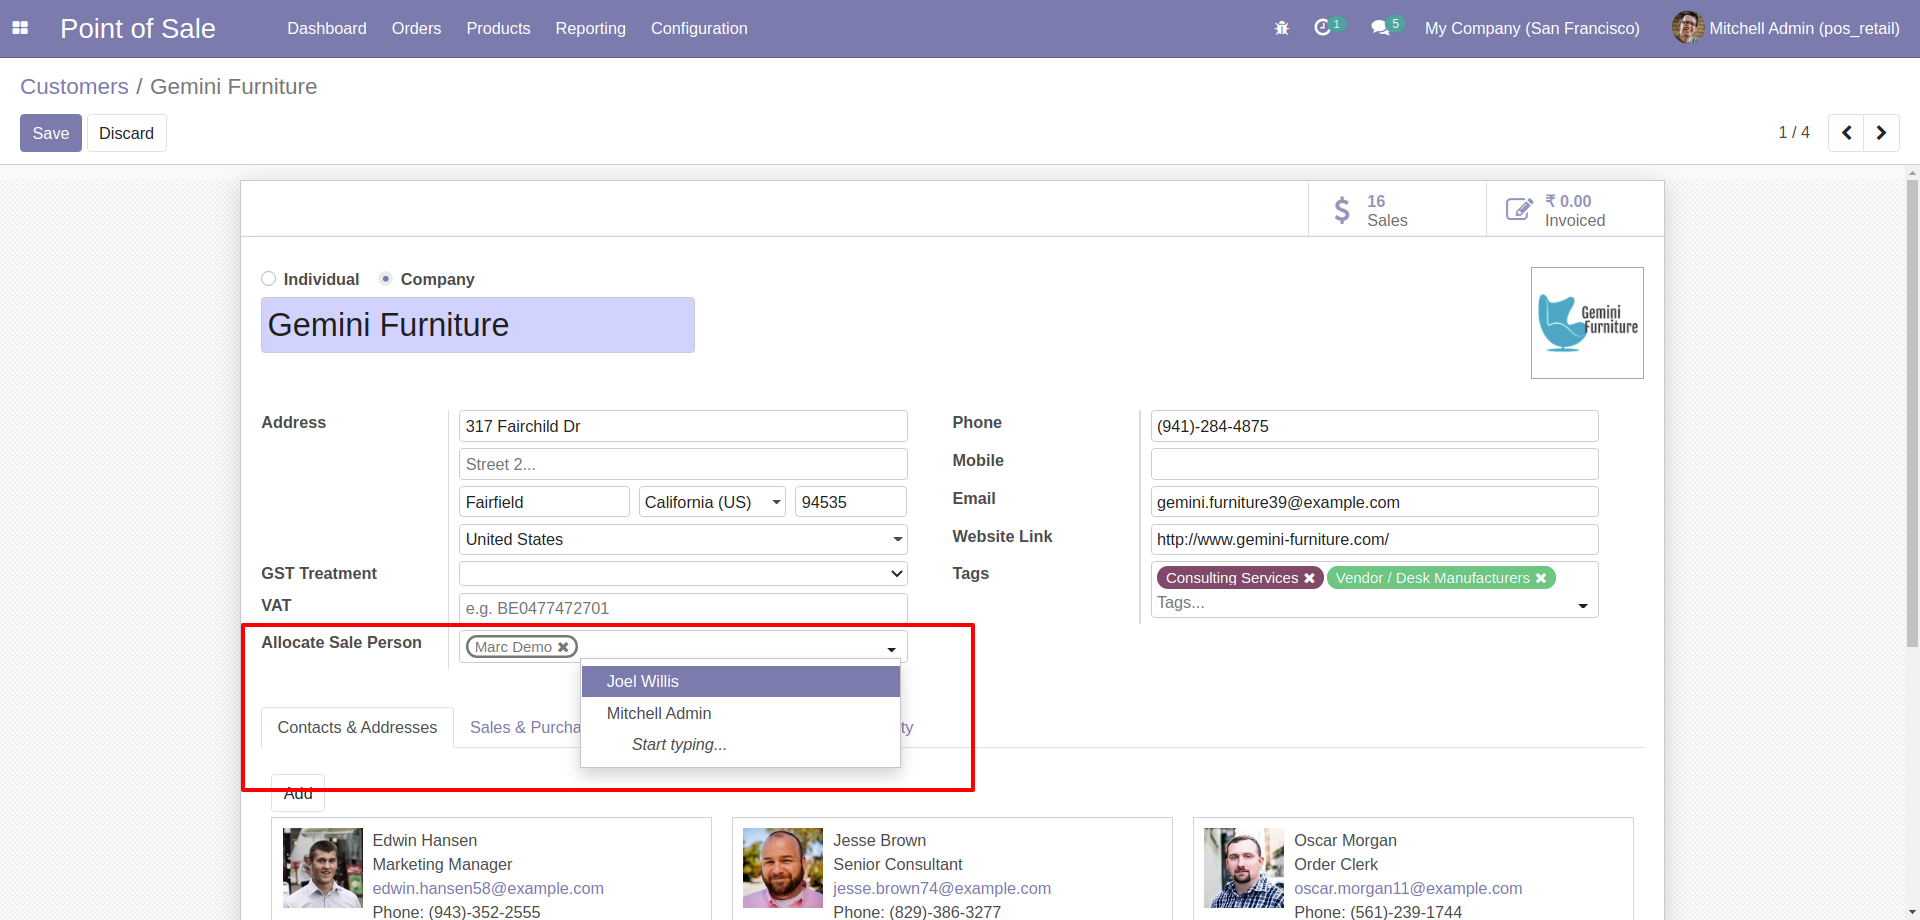
That salesperson can see those customer only.
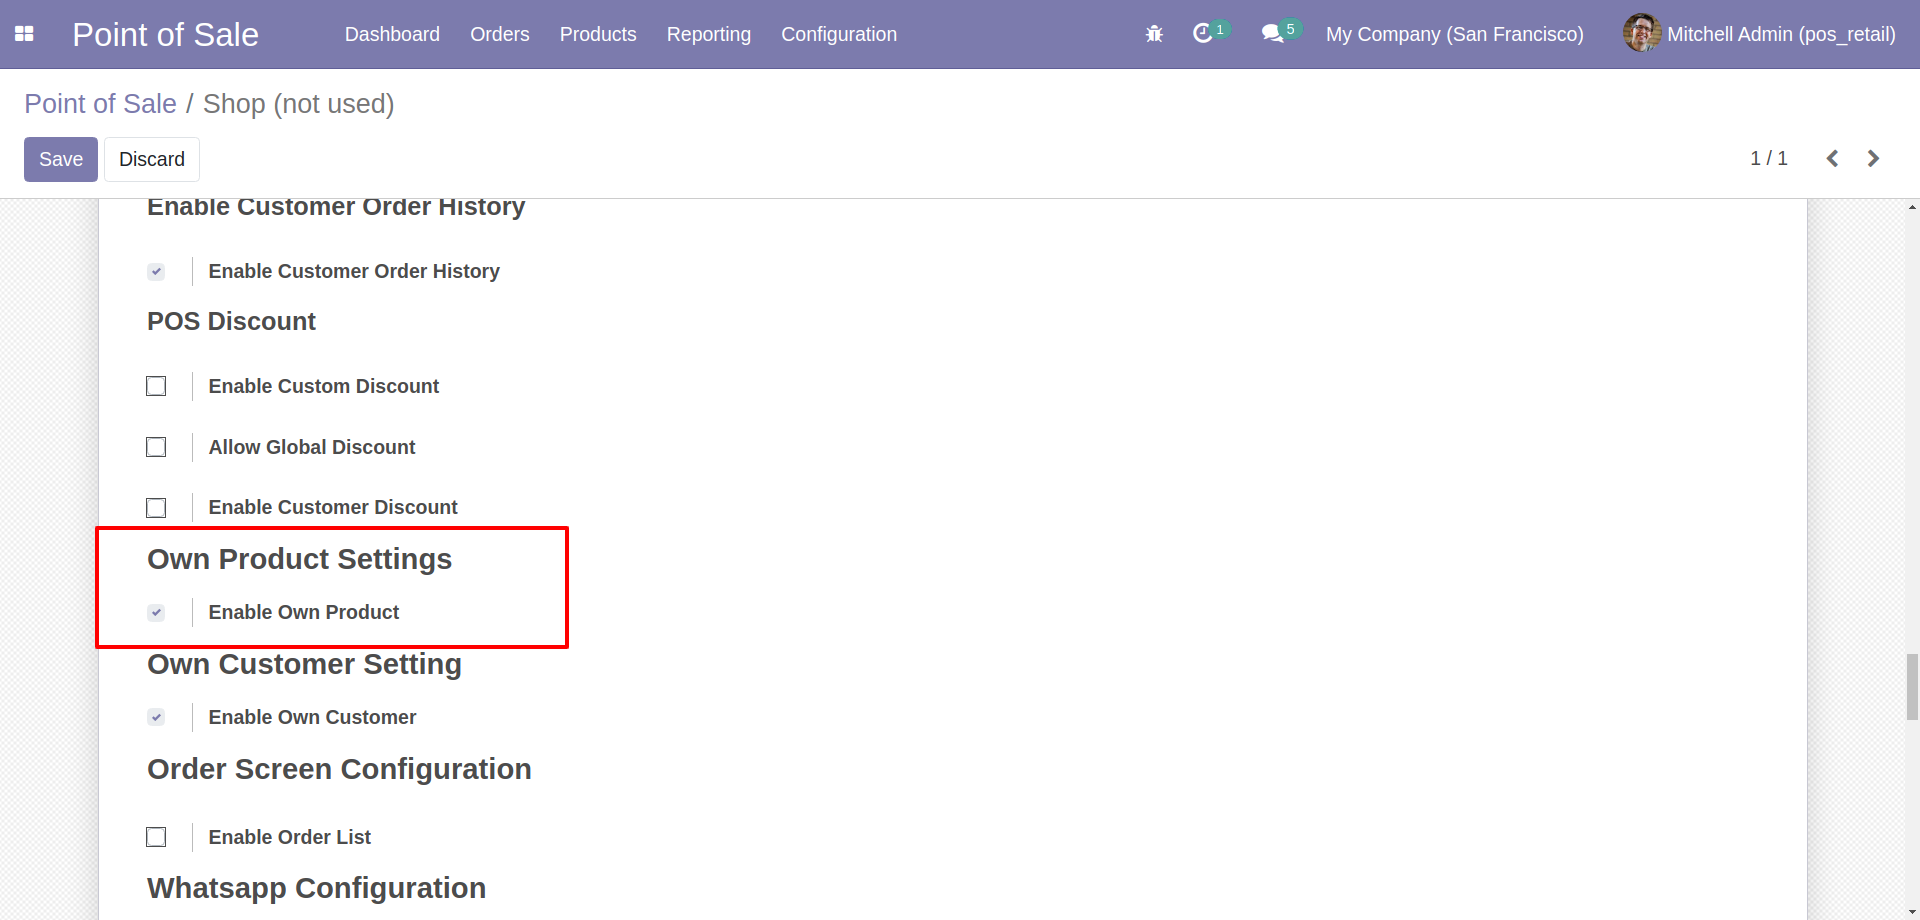
Goto pos setting and enable own products feature.
Now goto product detail view and set 'Allocated Sales Person'.
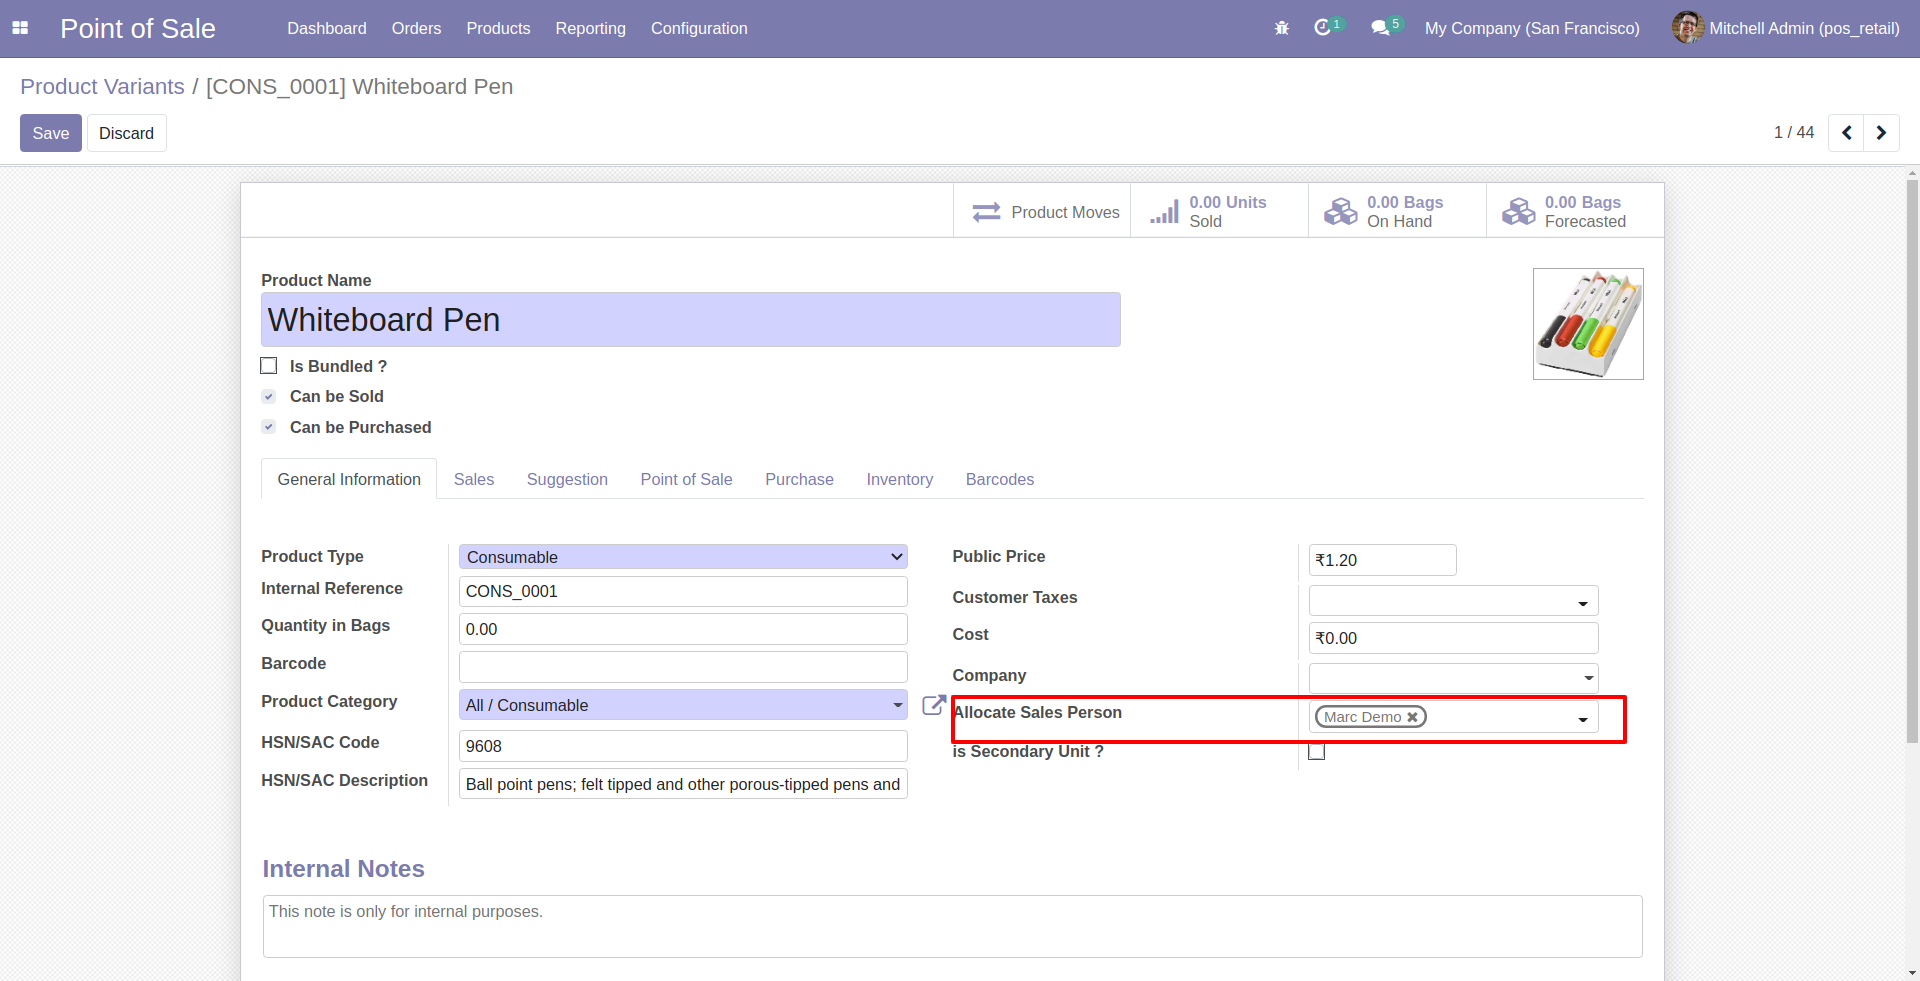
Now goto product detail view and set 'Allocated Sales Person'.
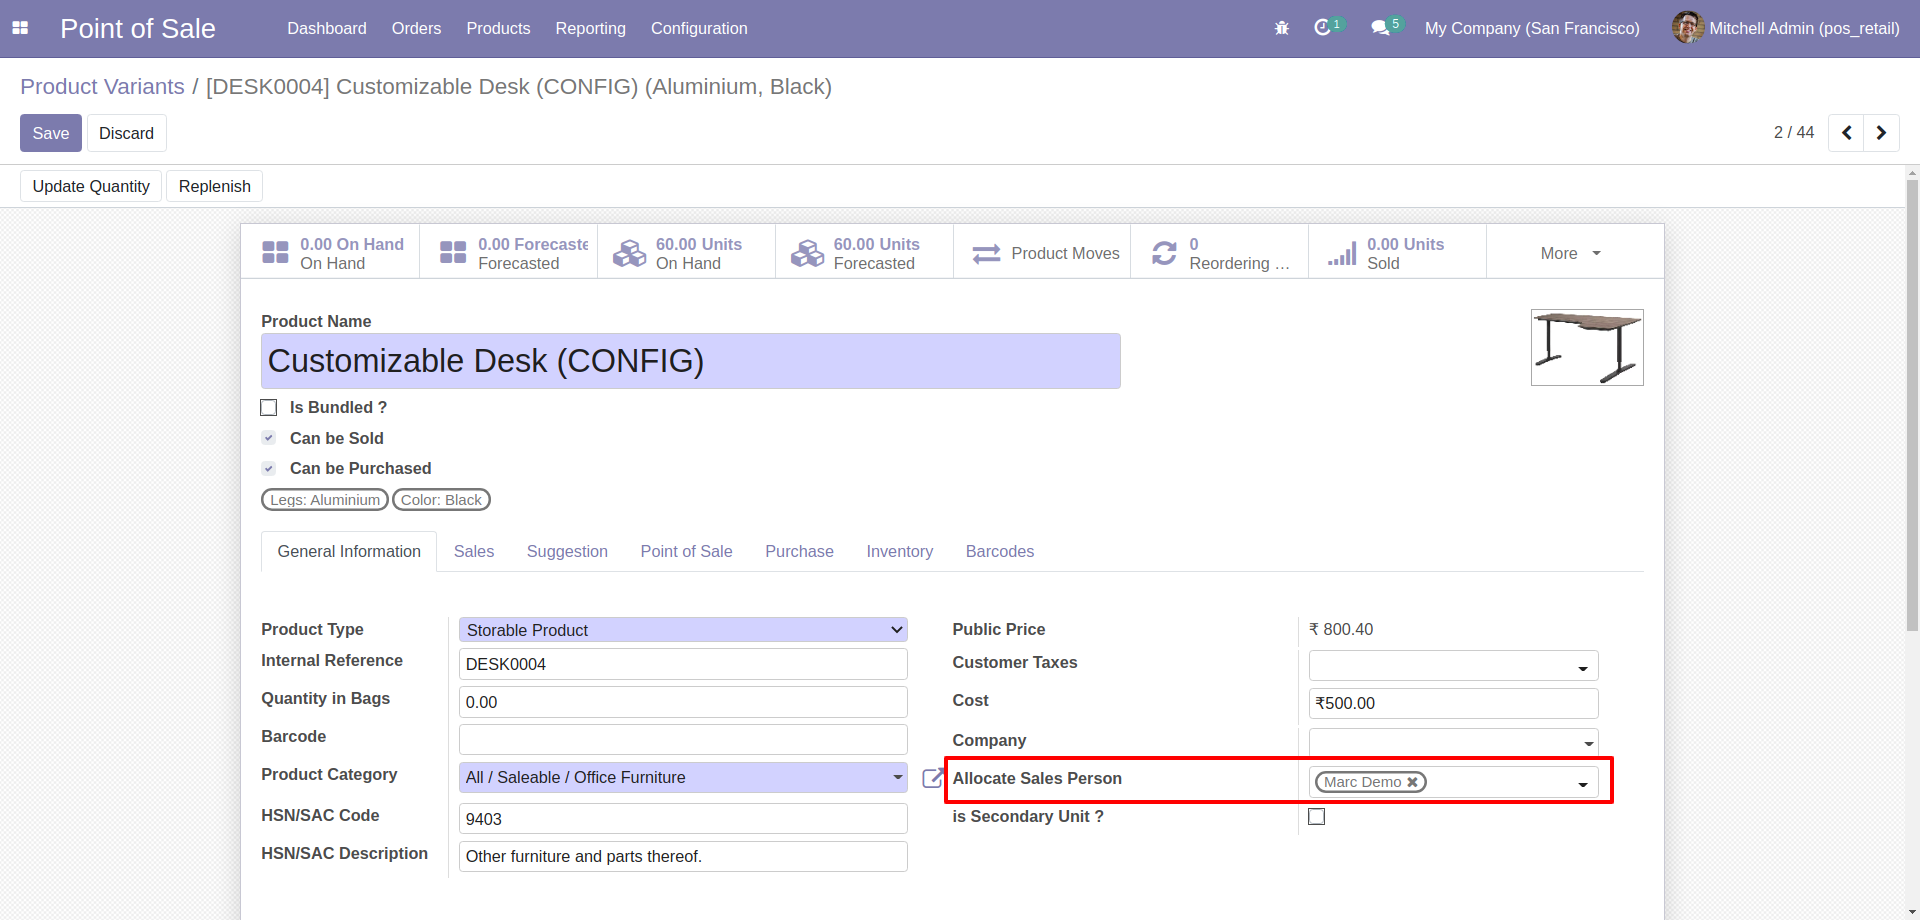
That salesperson can see those products only.
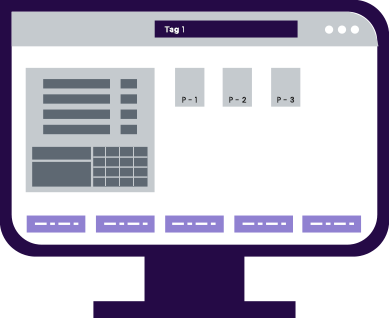
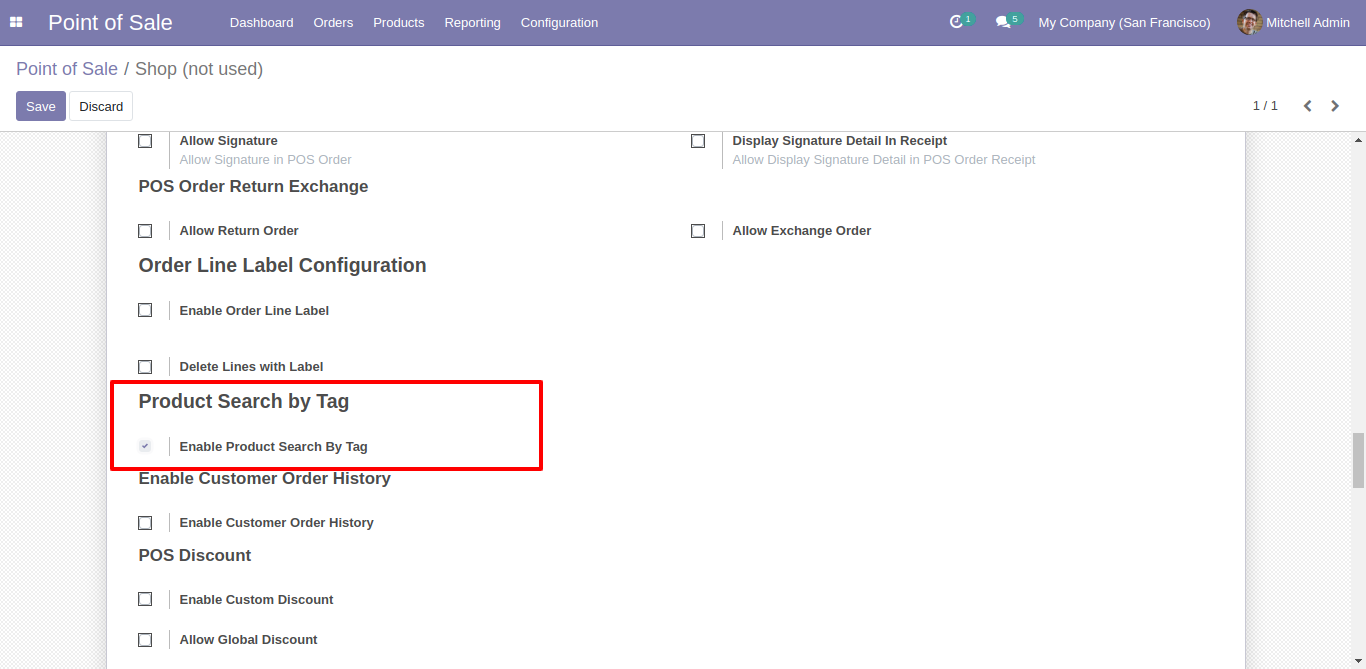
Goto pos setting and enable 'Product Search by Tags' feature.
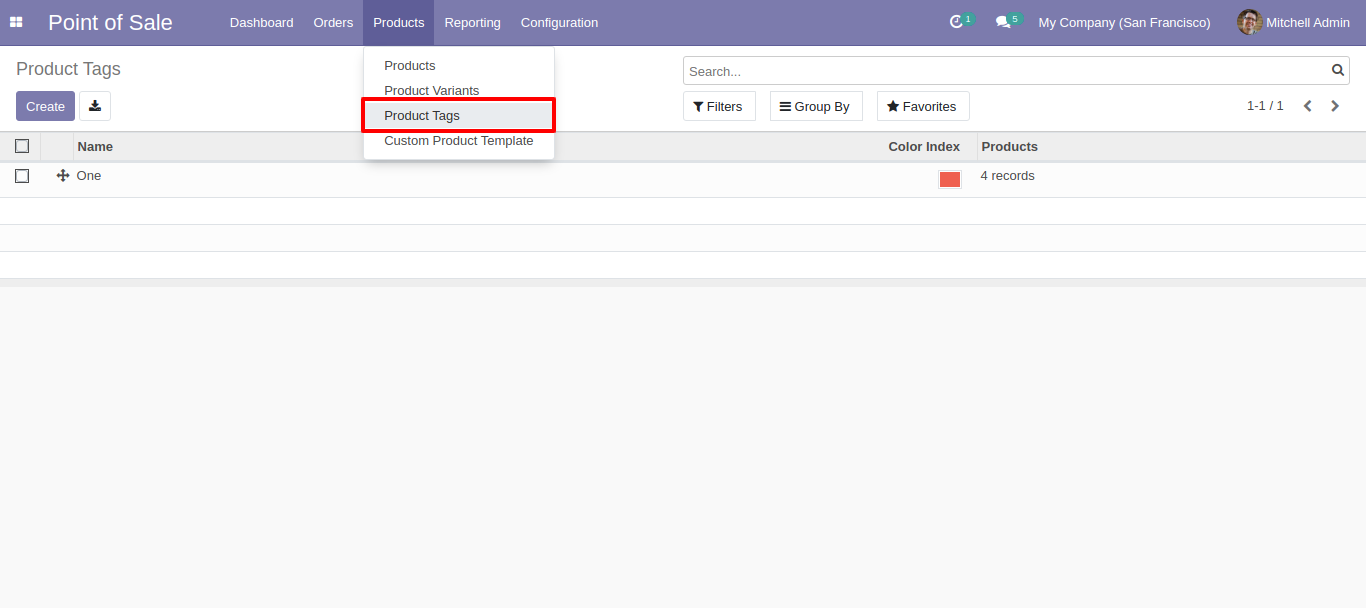
Product Tag Menu and list view.
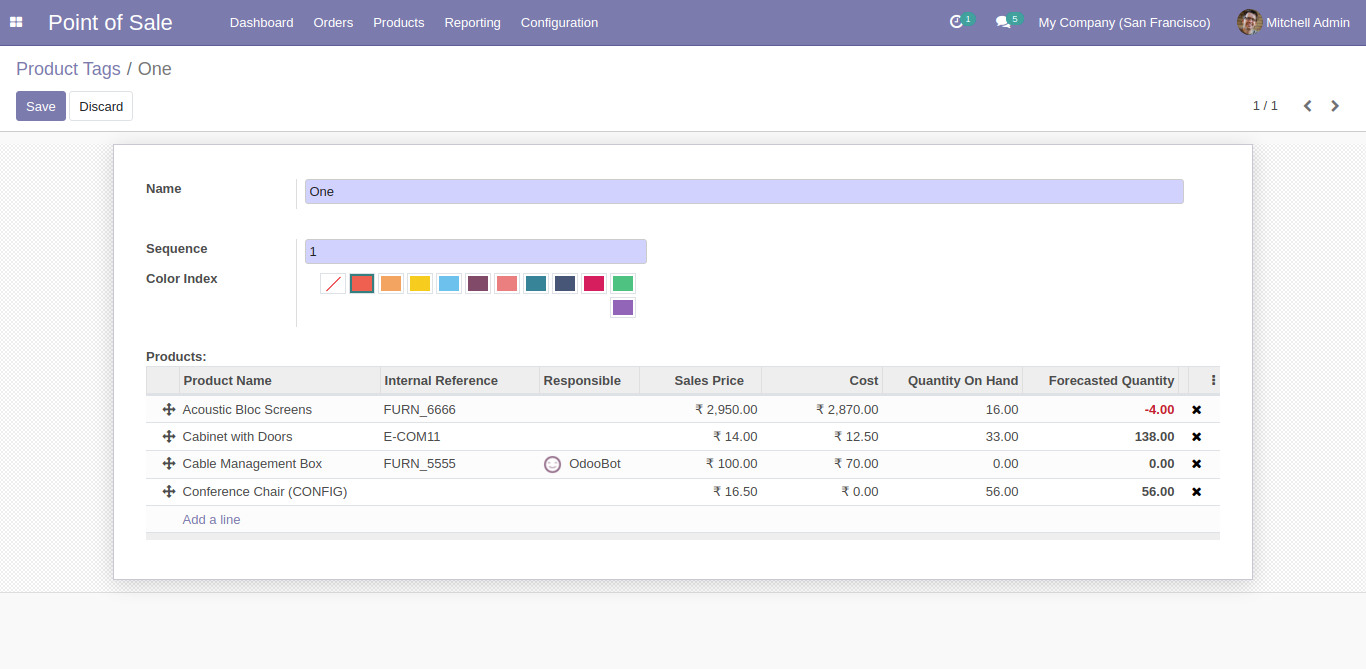
Product tags form view, just create tag and select appropriate products. Also set color for that tags.
Tags visible in kanban view.
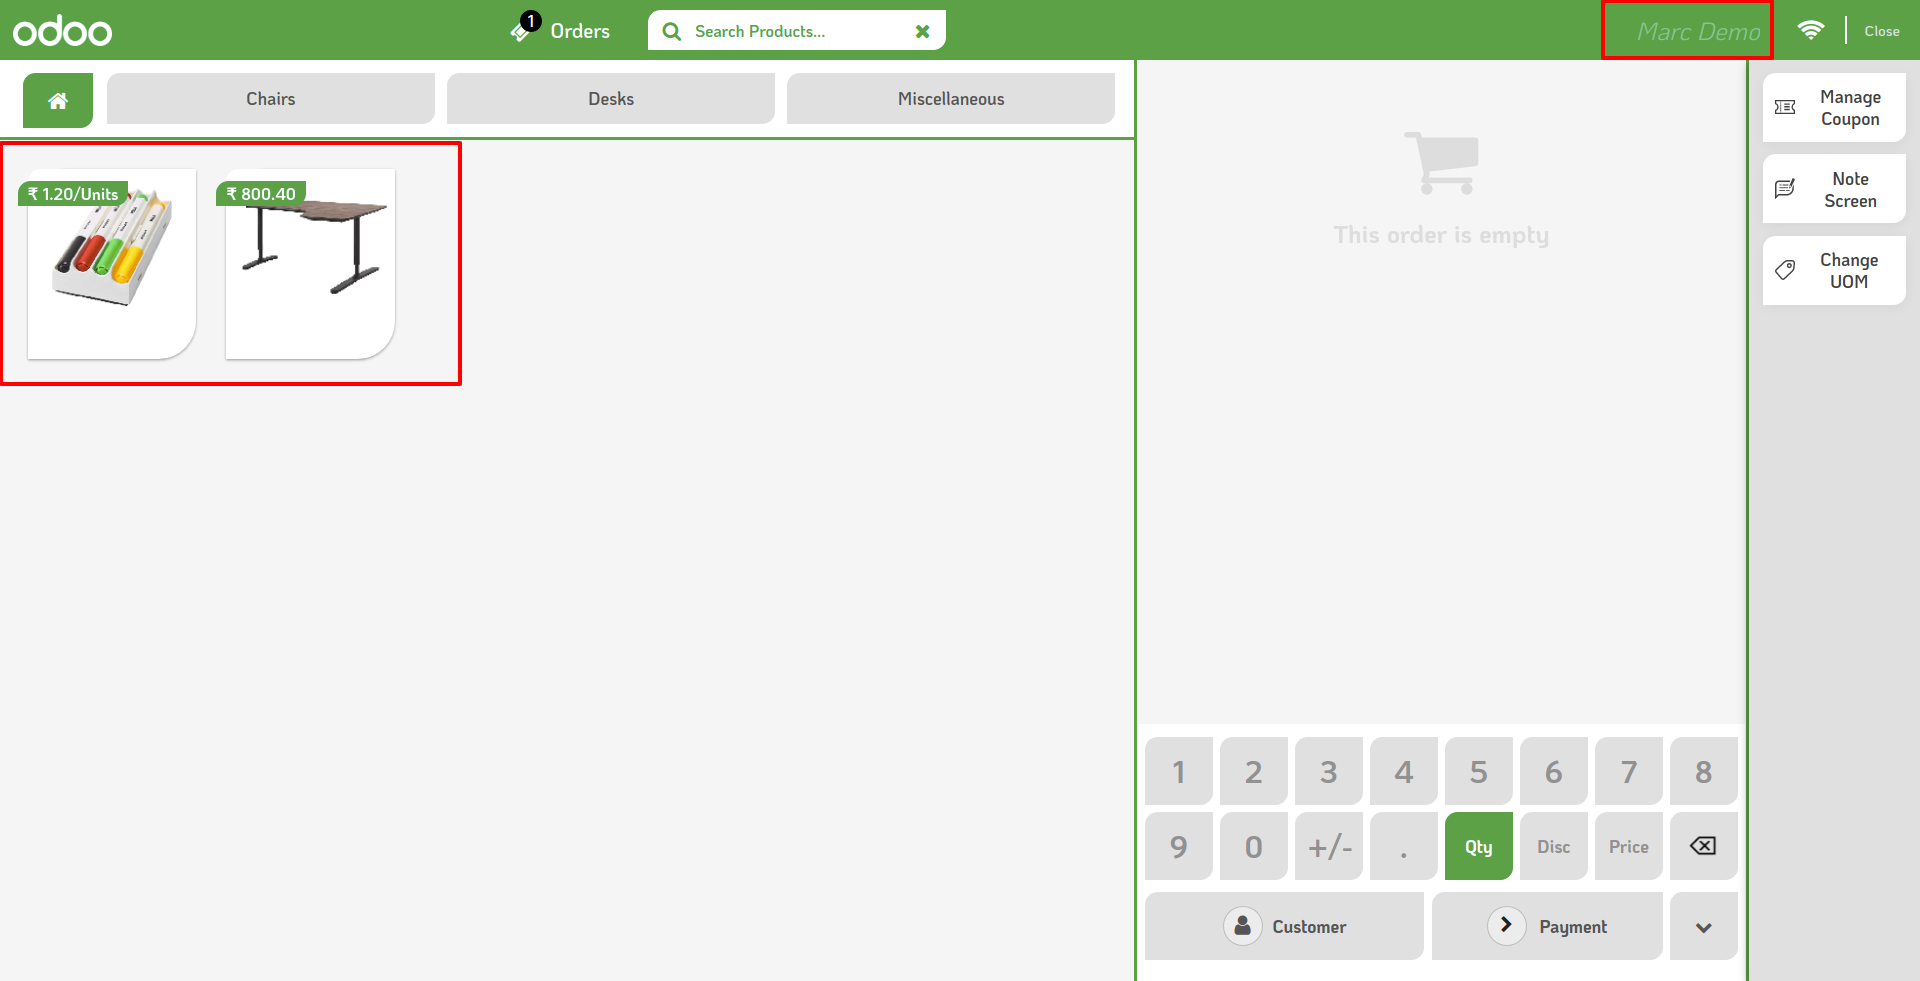
Goto pos screen and search product using tags.

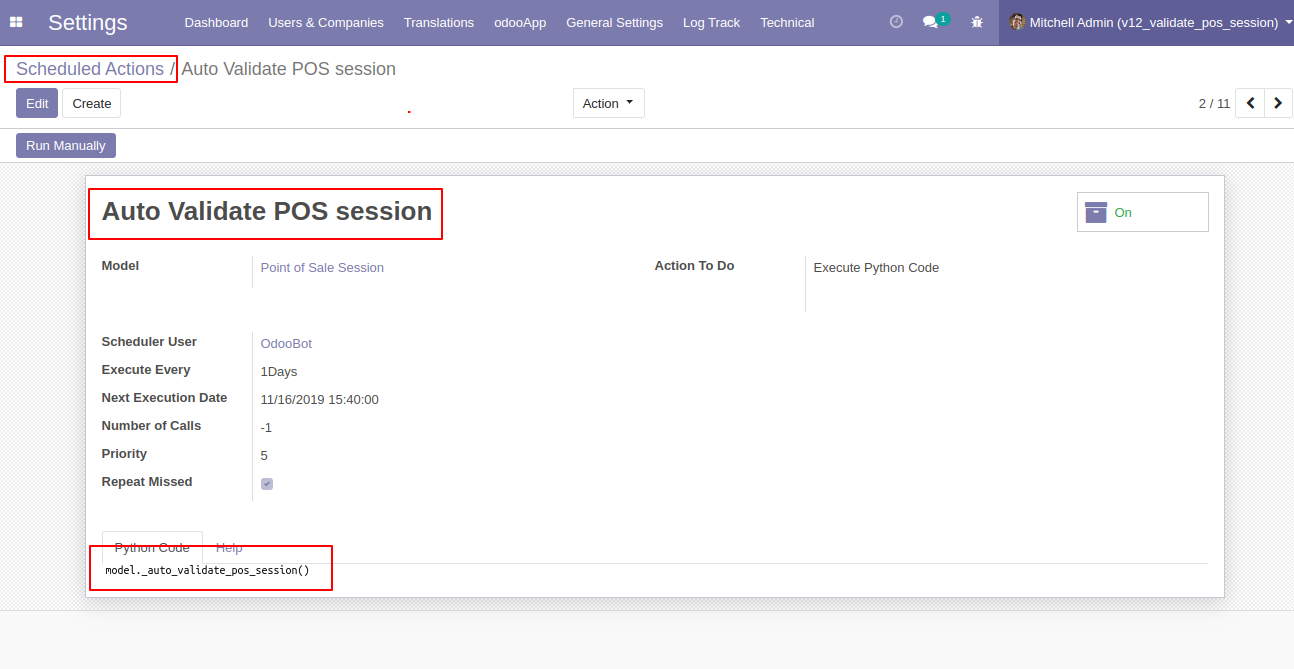
Goto general setting ---> Technical ---> Schedule Action ---> Auto Validate POS. Just set time for auto validate.
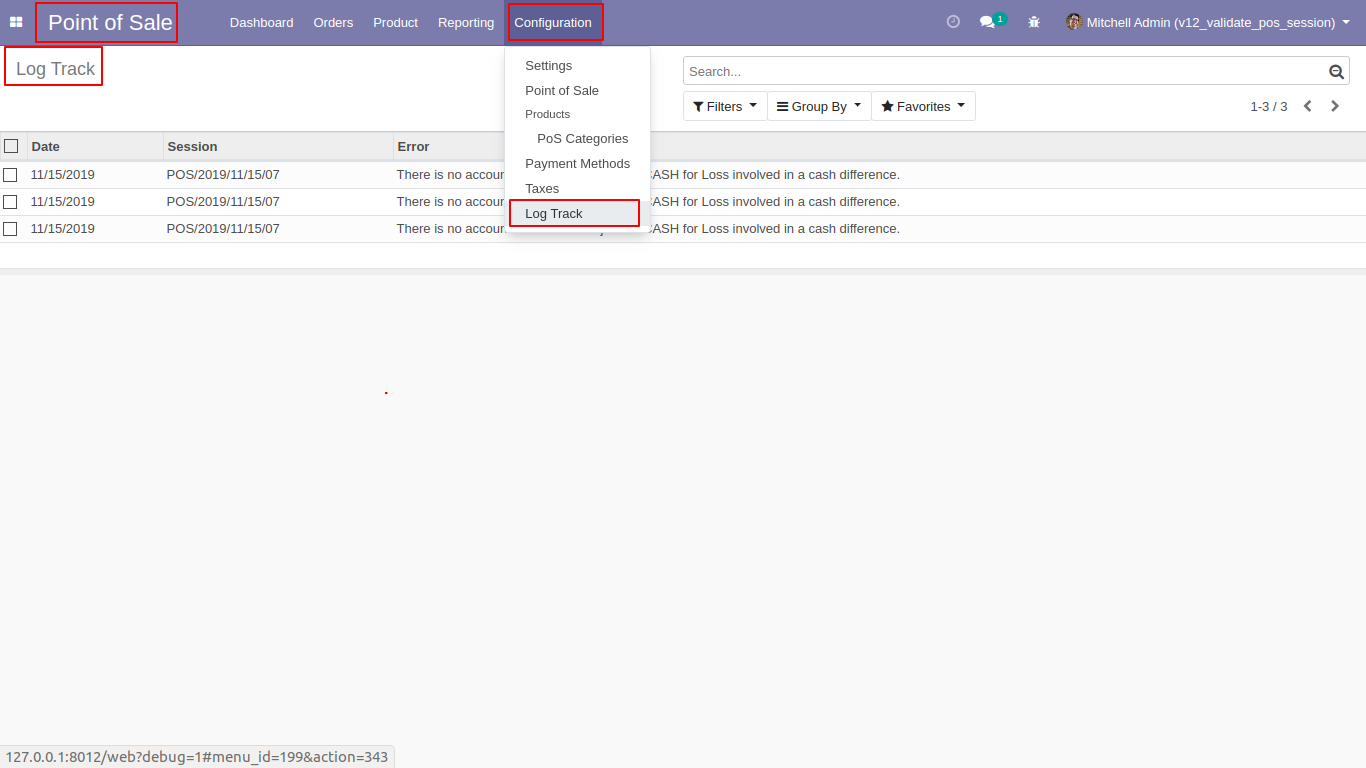
Log tracker.
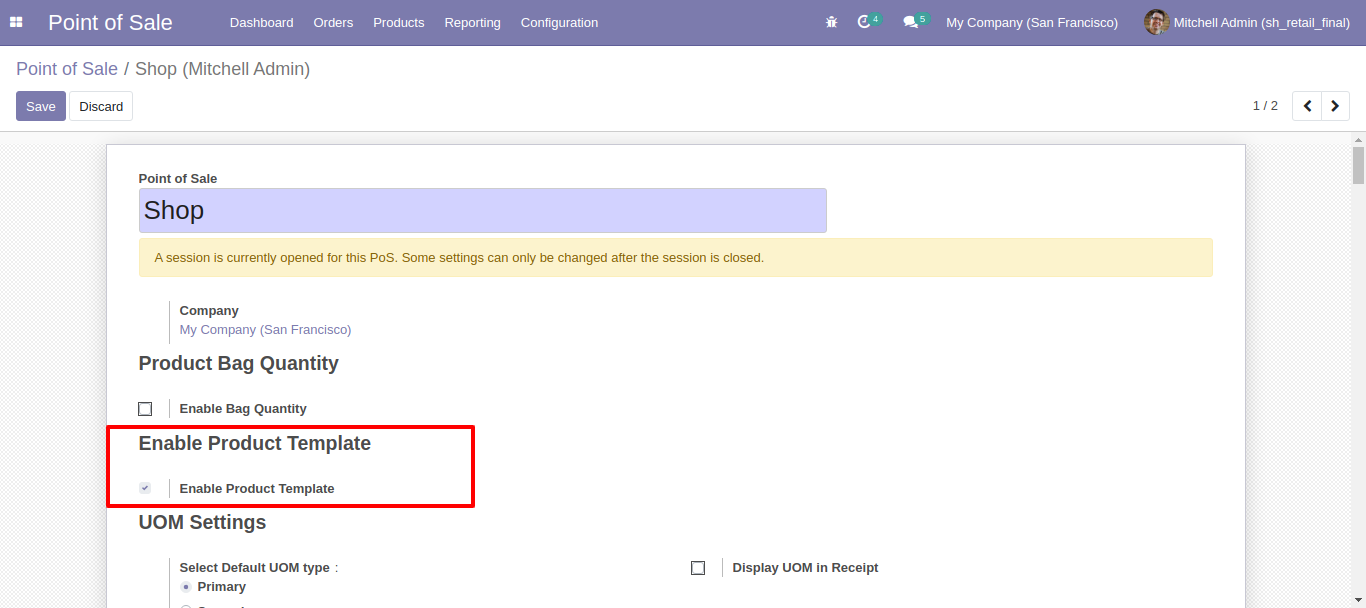
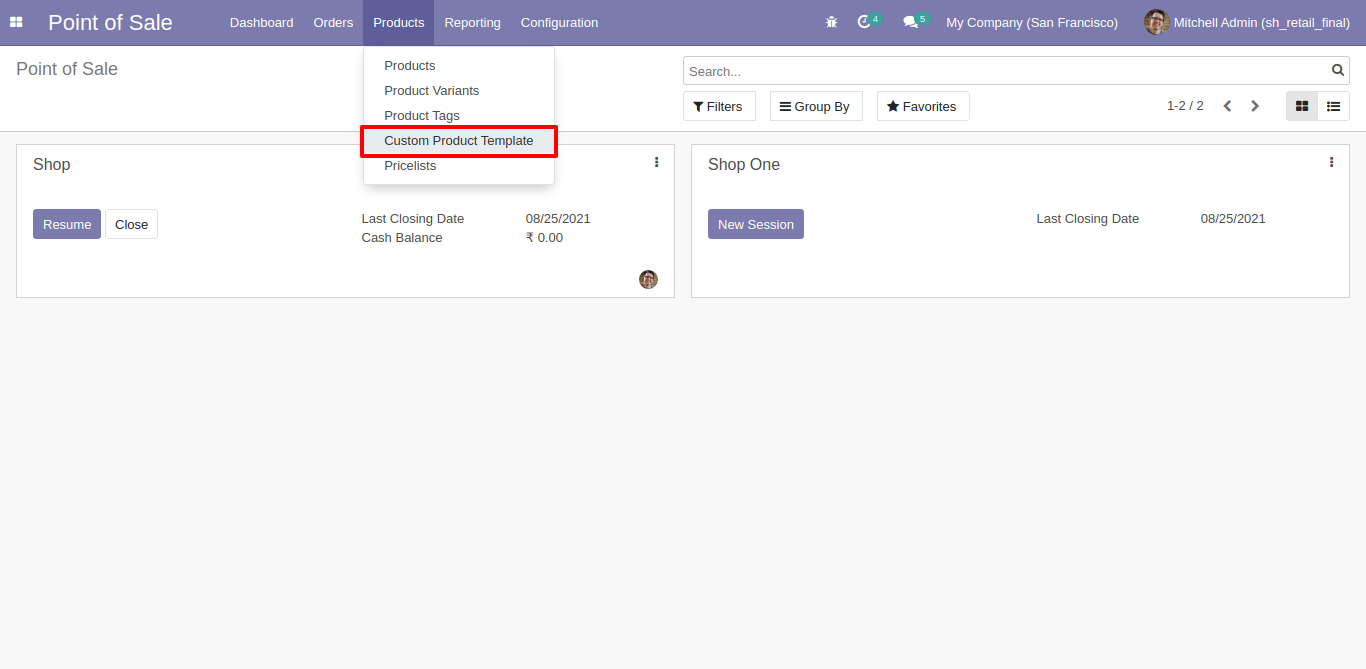
Goto pos setting ---> enable product template feature
Custom product Template menu.
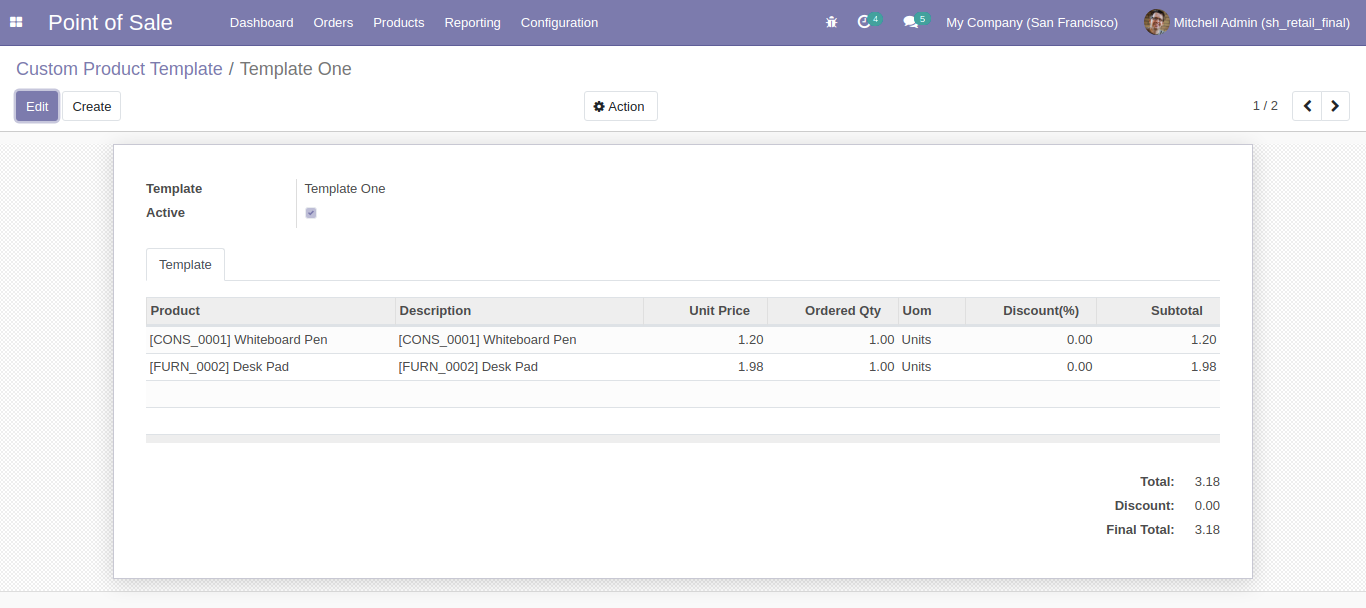
Product Template Form View.
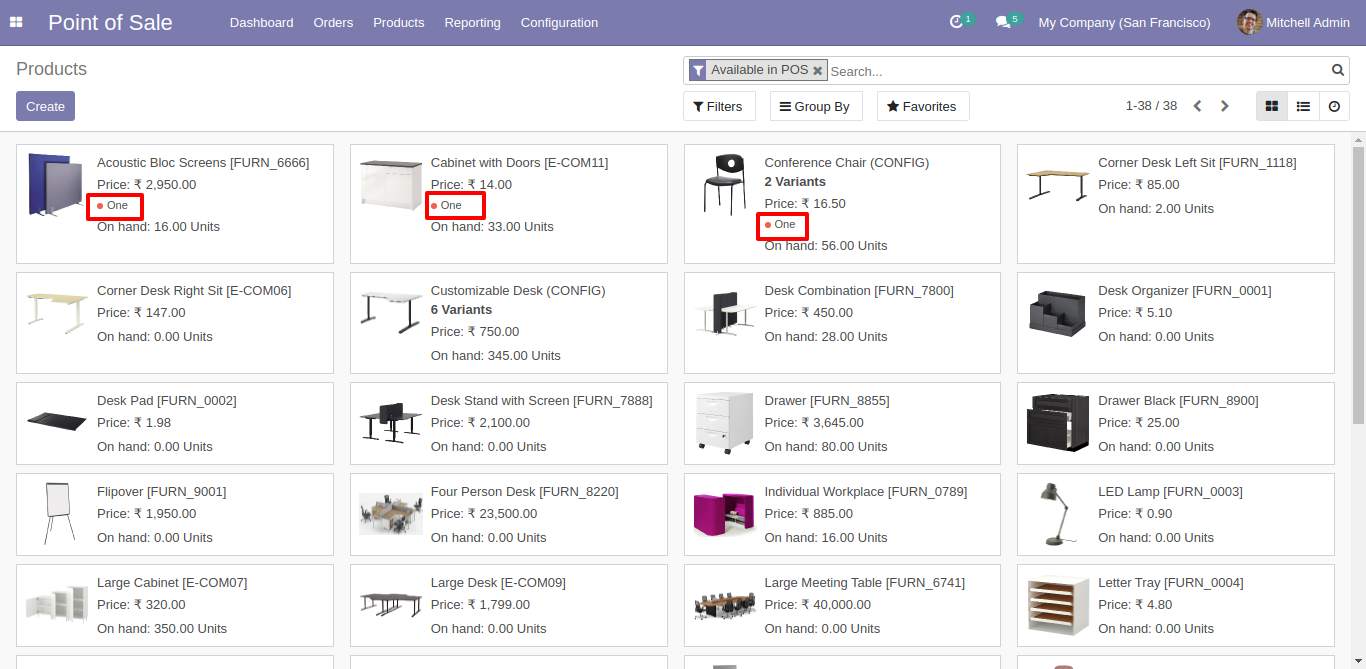
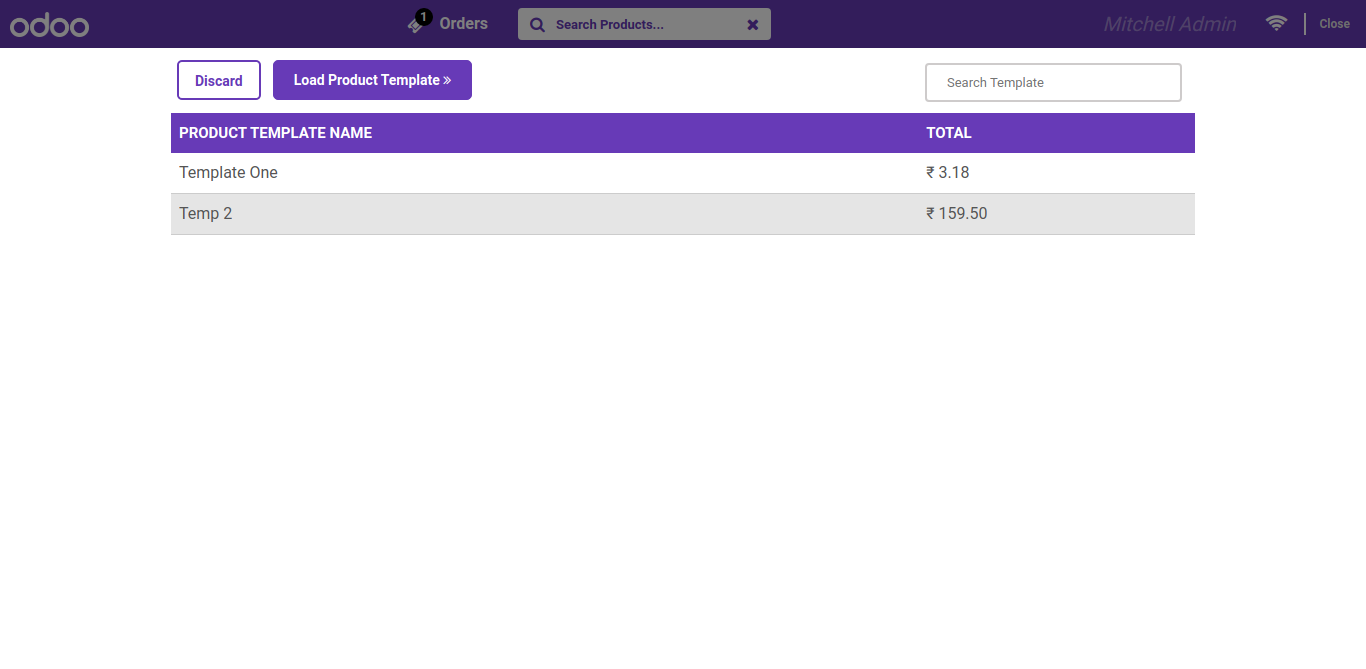
Goto pos screen and click on 'Product Template' button.

Here you can see the list of product templates and select and add to pos cart.
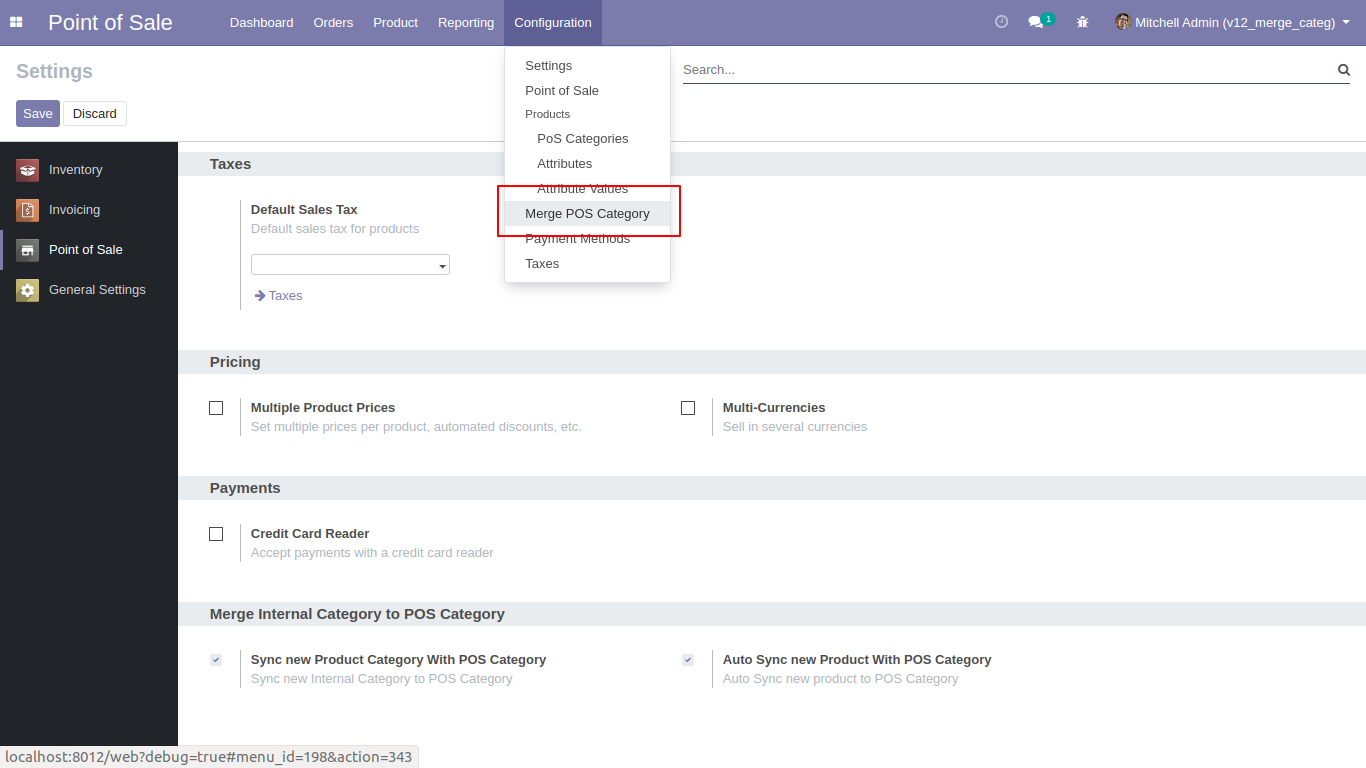
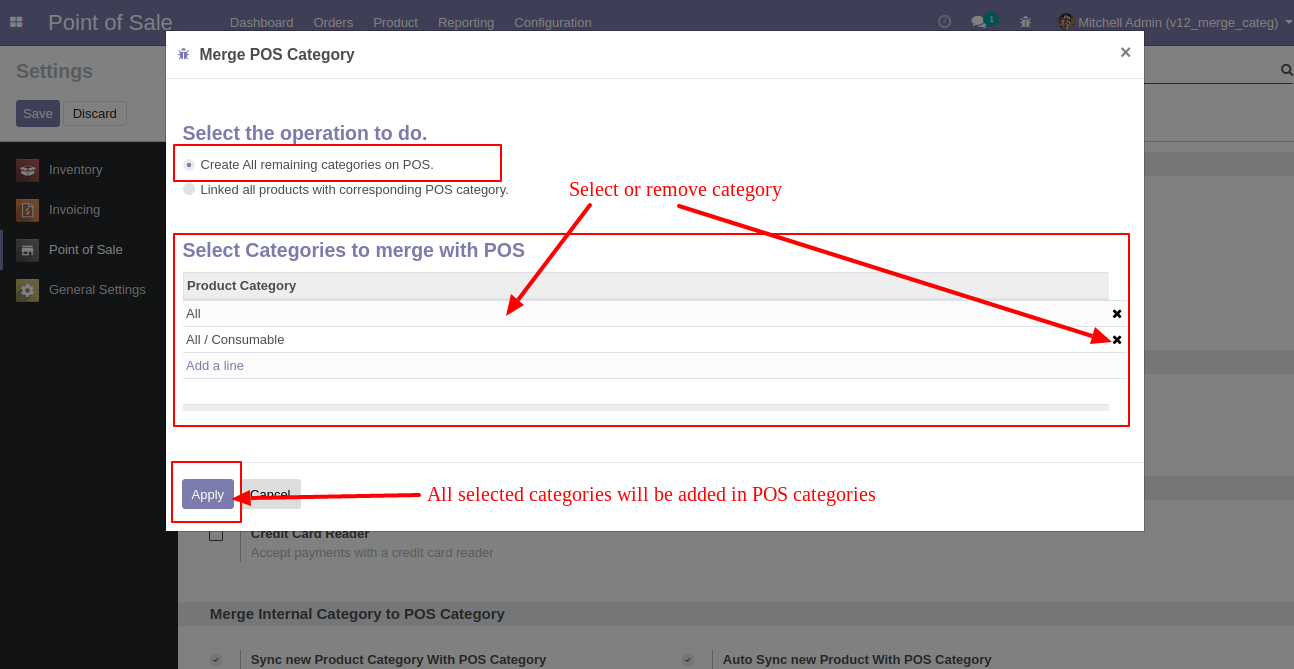
Goto pos config setting ---> Click on merge pos Categories.
After open 'Merge PoS Category' menu one popup will open and select 'Create all remaining categories on PoS' then you can see the remaining categories list in 'Select categories merge with PoS' and then you can add or remove categories from the list and click 'Apply' so all selected categories added in PoS Category.
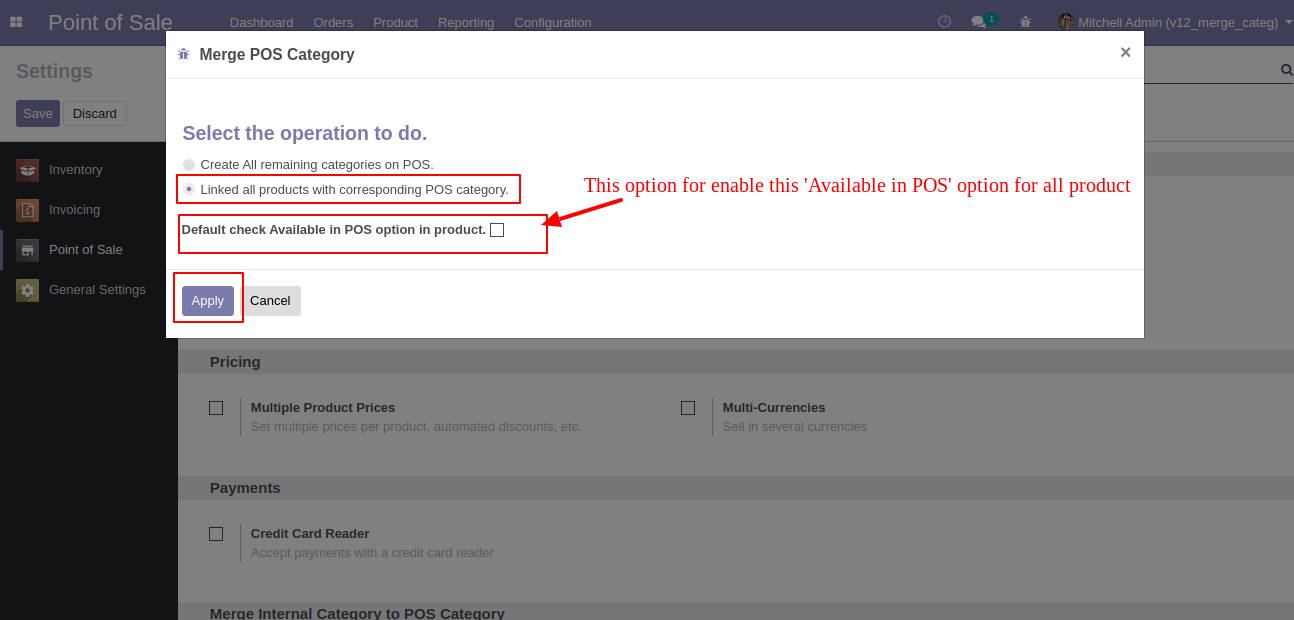
If you select 'Linked all products with corresponding PoS category' then one checkbox 'Default check Available in PoS option in product' will be visible, this checkbox used to check option 'Available in PoS' in product, and click 'Apply' then all products category and PoS category will be linked.
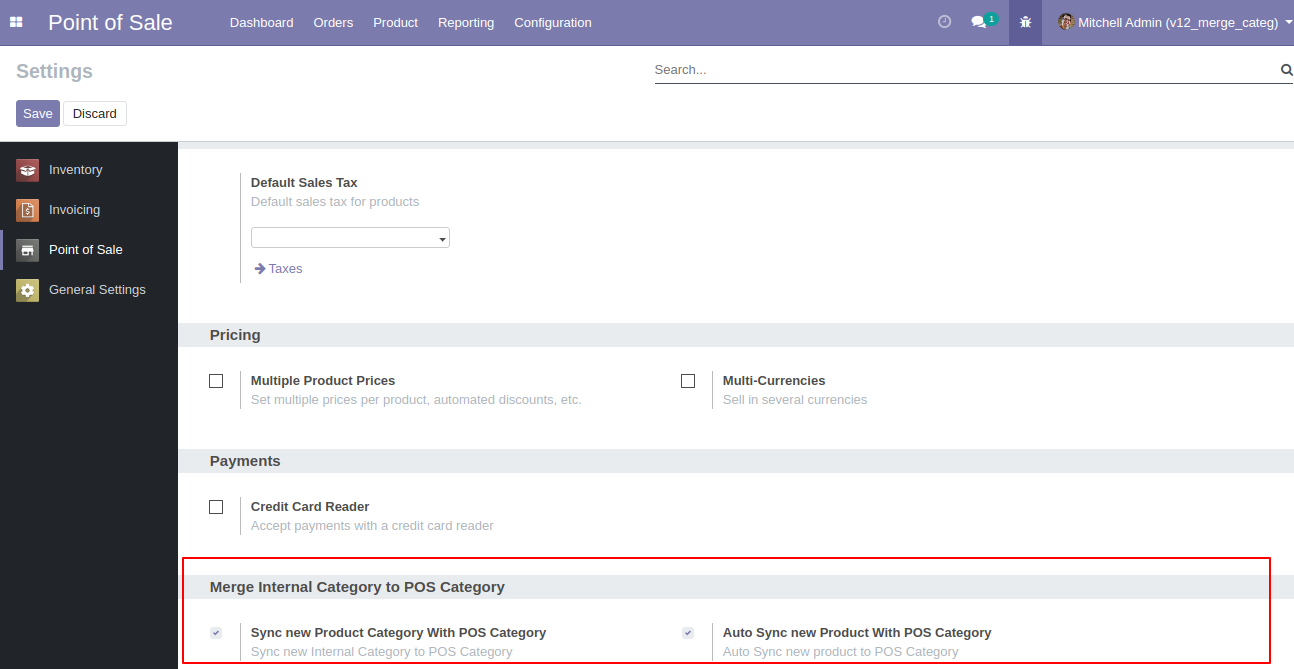
Goto POS config setting there is a two different option for merge internal category with POS category as like. 1)Sync new product category with POS Category 2)Auto Sync New Product With POS Category
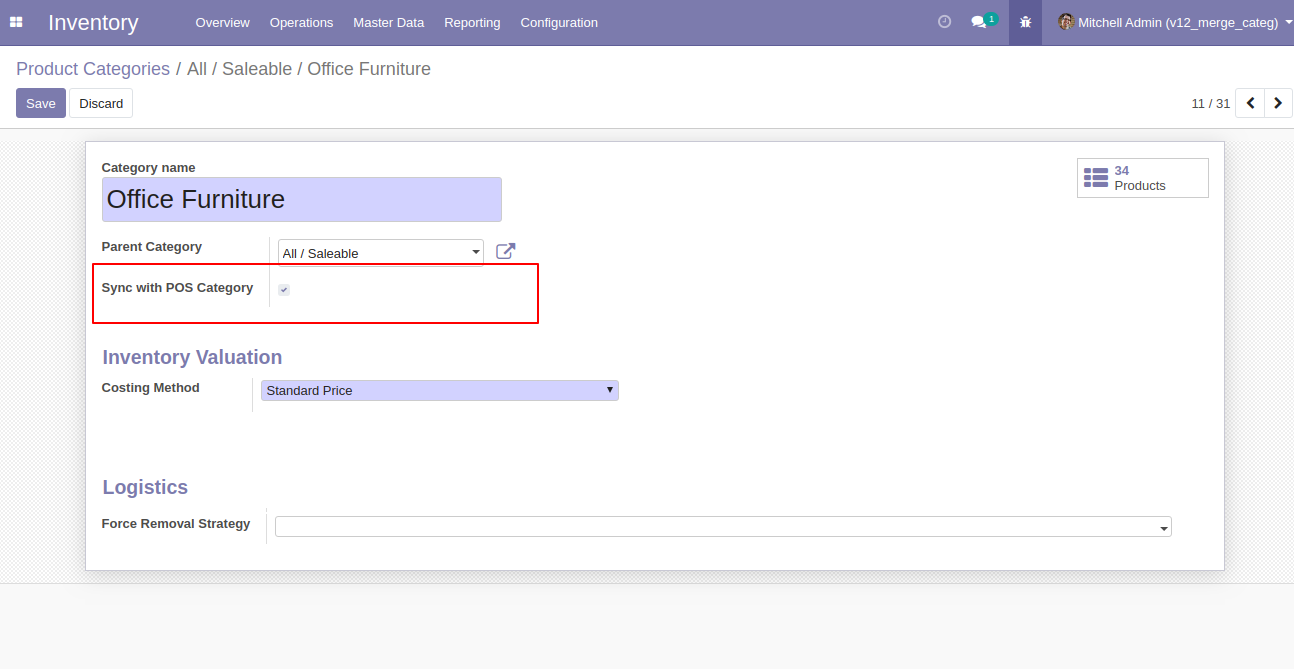
You can disable sync option for particular category after unchecking 'Sync with POS Category' option. 'Sync With POS Category' this option only visible after enabling this 'Sync new product category with POS Category' option in POS config Setting.
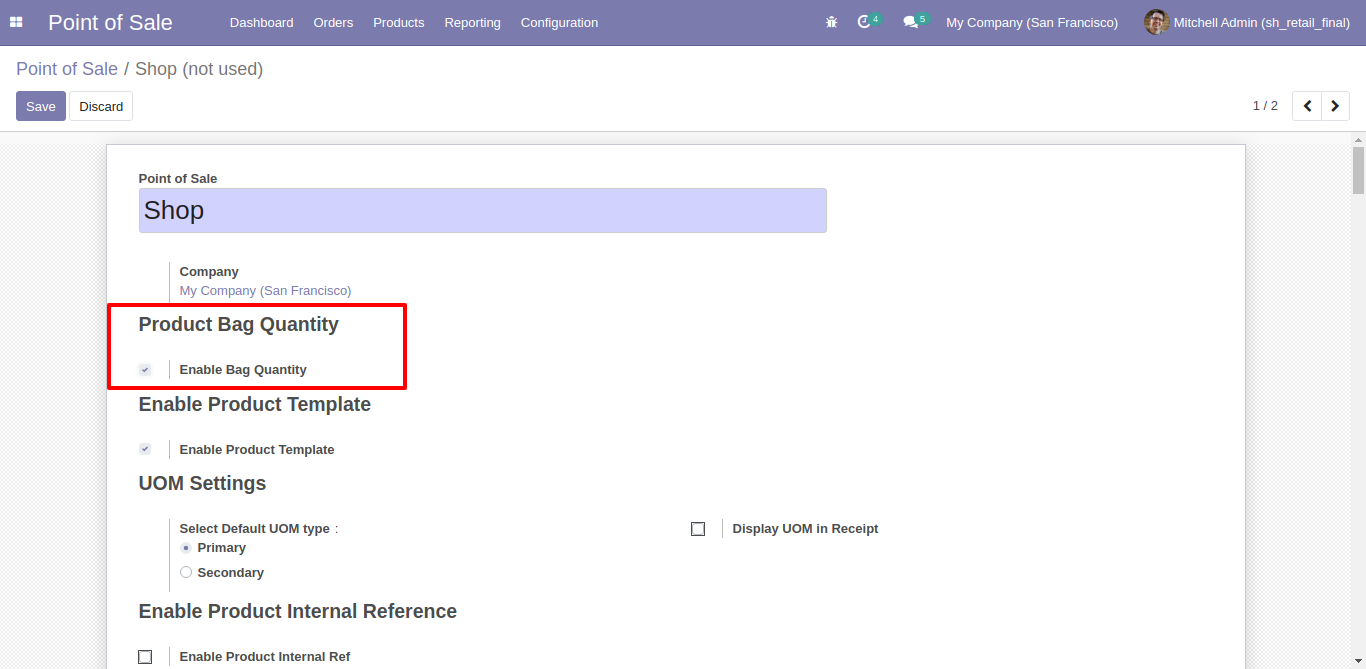
Goto pos setting and enable Bag Quantity features.
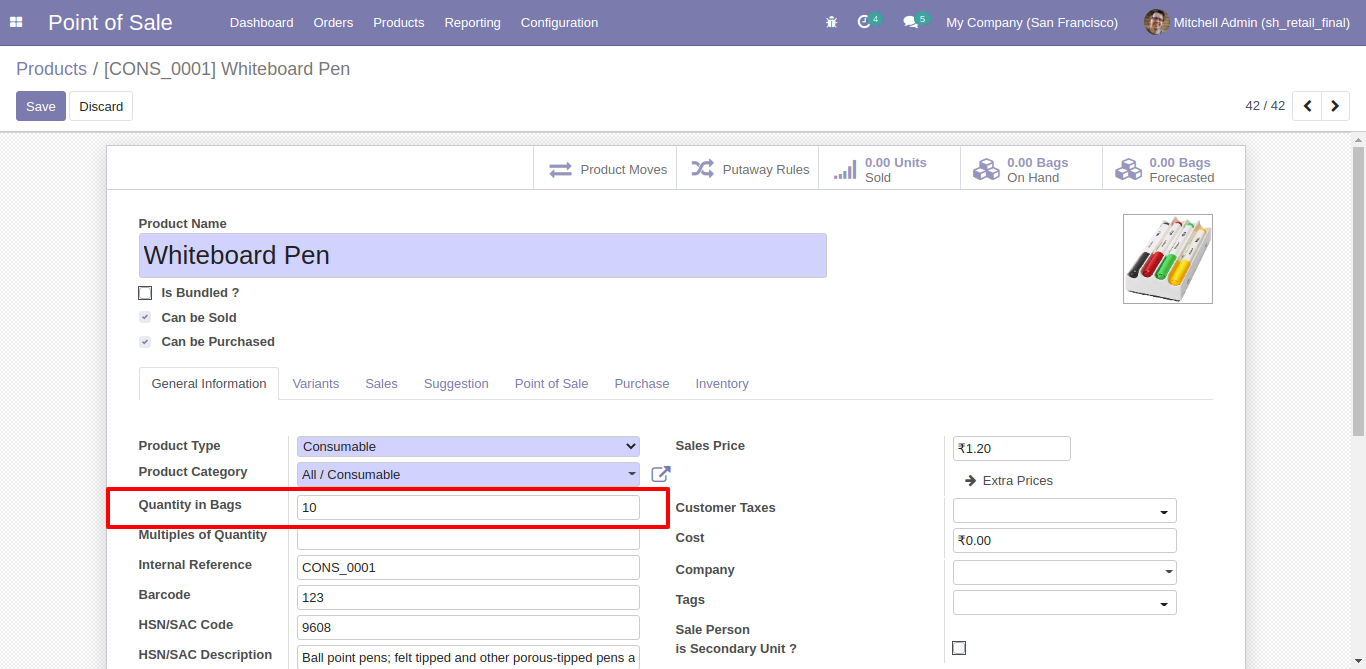
In product set bag quantity.
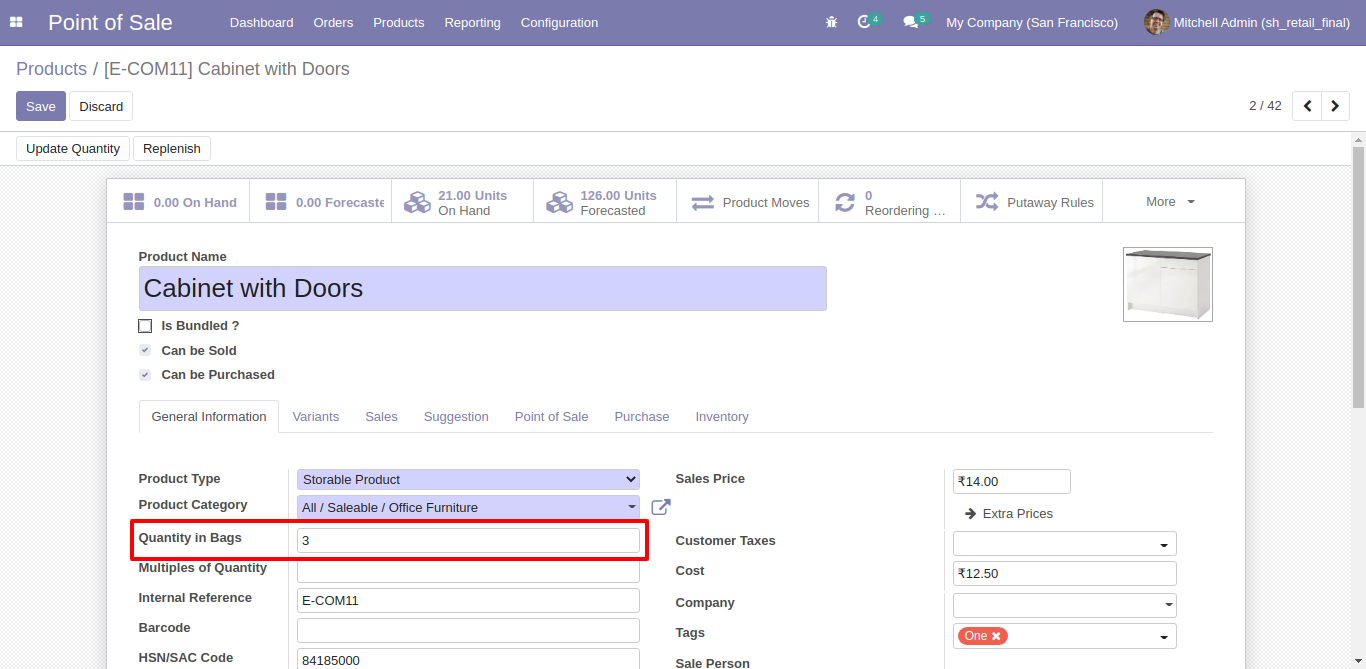
In product set bag quantity.
See below animated image for Bag Quantity works.
Goto pos setting and enable Order Line Label Configuration. Here you have several options like delete label wise products.
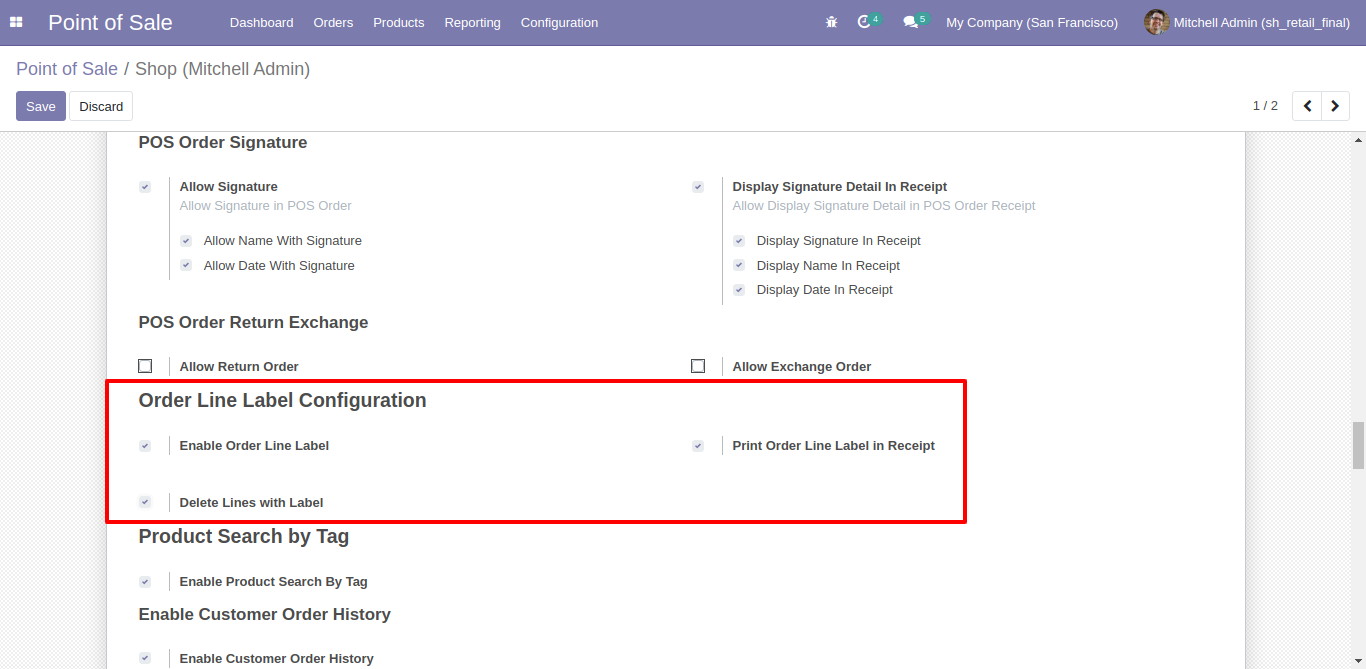
See animatated image for how label works.
Version 15.0.4 | Released on : 14 July 2022
- NEW Customer Maximum Discount
Version 15.0.3 | Released on : 25 April 2022
- FIX Small Bug Fix.
Version 15.0.2 | Released on : 7 March 2022
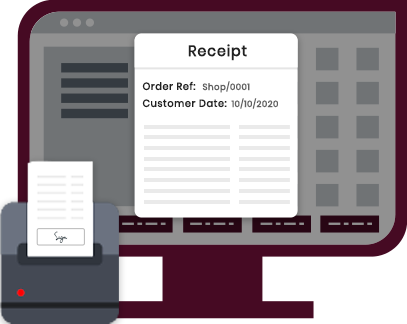
- NEW Add Customer VAT Number in Receipt.
Version 15.0.1 | Released on : 22 December 2021
- Initial Initial Release.
- Please Contact Us at sales@softhealer.comto request customization.
- Yes, we provide free support for 90 days.
You May Also Like